
6.
jenkins配置sonarqube-scanner并实现
jenkins代码的自动测试、自动部署
1)安装扫描器插件
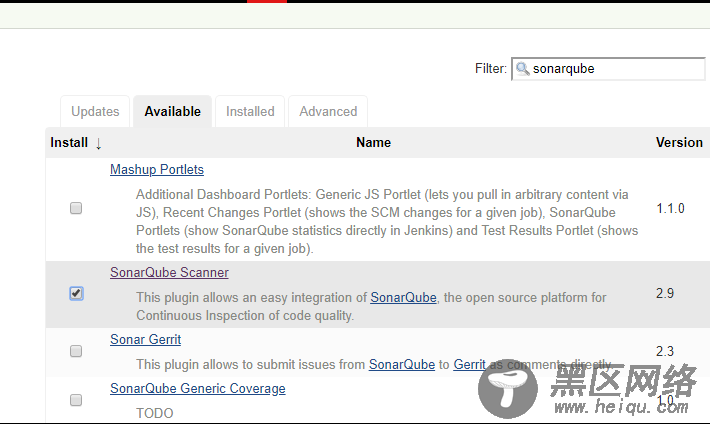
2)点击系统设置设置sonarqube服务
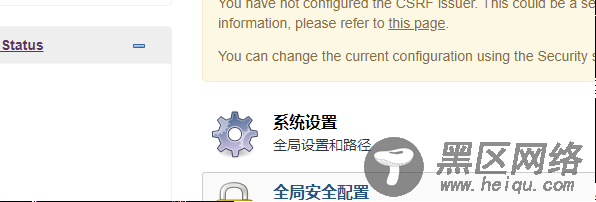
3)添加sonarqube服务并自定义服务名称以及url地址

4)自动安装scanner扫描器
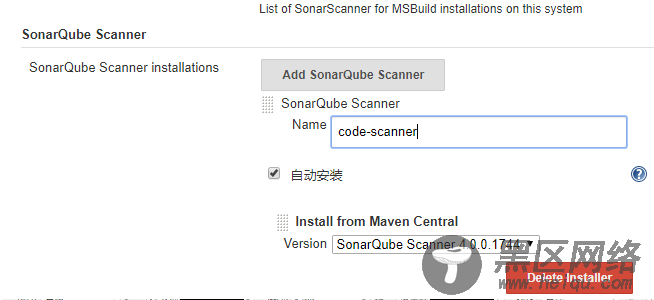
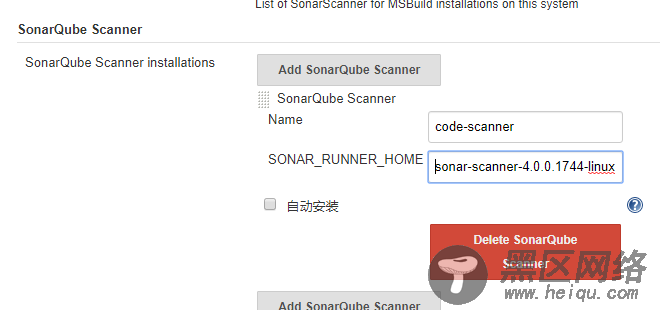
5)若已安装scanner扫描器则无需自动安装,直接添加扫描器的工作目录即可
6)在jenkins创建一个新项目code-test-job

7)配置此项目的configure
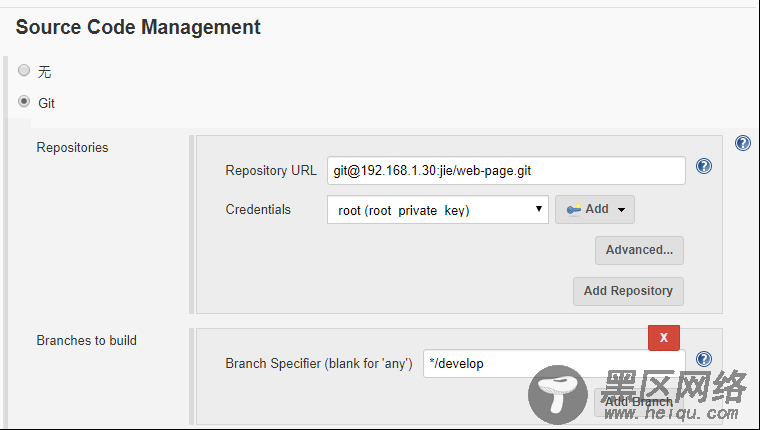
指定gitlab仓库源、认证方式
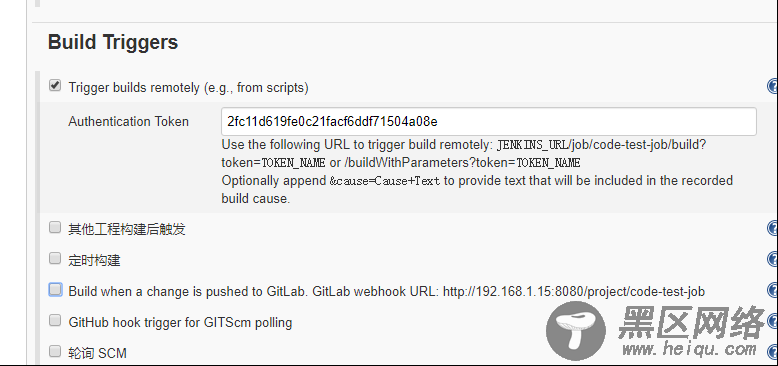
构建触发的口令秘钥
代码扫描的配置参数,其指定检测代码的类型、编码格式、路径等

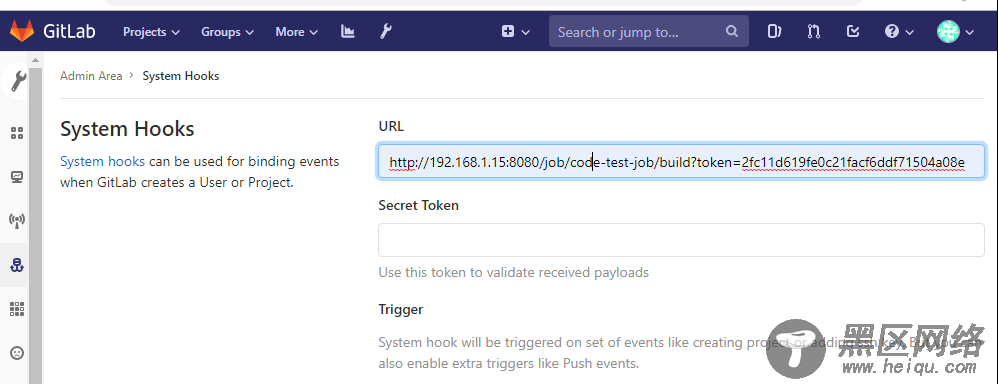
8)在gitlab服务器中对的系统钩子添加jenkins认证地址,以实现自动触发jenkins的项目构建
9)克隆gitlab仓库代码并修改代码,再上传至gitlab仓库触发jenkins项目构建
指定克隆develop分支代码
root@
Ubuntu1804:/data/src# git clone -b develop
Cloning into 'web-page'...
Username for 'http://192.168.1.30': jie
Password for 'http://jie@192.168.1.30':
remote: Enumerating objects: 30, done.
remote: Counting objects: 100% (30/30), done.
remote: Compressing objects: 100% (13/13), done.
remote: Total 30 (delta 4), reused 27 (delta 4)
Unpacking objects: 100% (30/30), done.
添加一个php源码文件到克隆的目录下
root@ubuntu1804:/data/src/web-page# mv /data/Math.php ./
root@ubuntu1804:/data/src/web-page# ls
index.html Math.php
代码添加至本地暂存区
root@ubuntu1804:/data/src/web-page# git add ./*
代码提交至工作区并指定提交版本号以便多次提交的区分
root@ubuntu1804:/data/src/web-page# git commit -m 'v11'
[develop 9e106d4] v11
1 file changed, 214 insertions(+)
create mode 100644 Math.php
代码上传至gitlab代码库
root@ubuntu1804:/data/src/web-page# git push
Username for 'http://192.168.1.30': jie
Password for 'http://jie@192.168.1.30':
Counting objects: 3, done.
Delta compression using up to 4 threads.
Compressing objects: 100% (3/3), done.
Writing objects: 100% (3/3), 1.75 KiB | 893.00 KiB/s, done.
Total 3 (delta 0), reused 0 (delta 0)
remote:
remote: To create a merge request for develop, visit:
remote: ?merge_request%5Bsource_branch%5D=develop
remote:
To
3fb434f..9e106d4 develop -> develop
10)在gitlab服务端查看代码已提交成功


