<body>
<formid="form1"runat="server">
<divid="panelcontent">
<asp:LabelID="Label1"runat="server"Text="Label"></asp:Label>
<asp:ButtonID="Button1"runat="server"Text="Button"onclick="Button1_Click" />
</div>
<div>Here is some fixed Content</div>
<divid="panel"></div>
</form>
</body>
head部分的脚本和上面的例子一致,只是把html和autoLoad属性都去掉,换成:
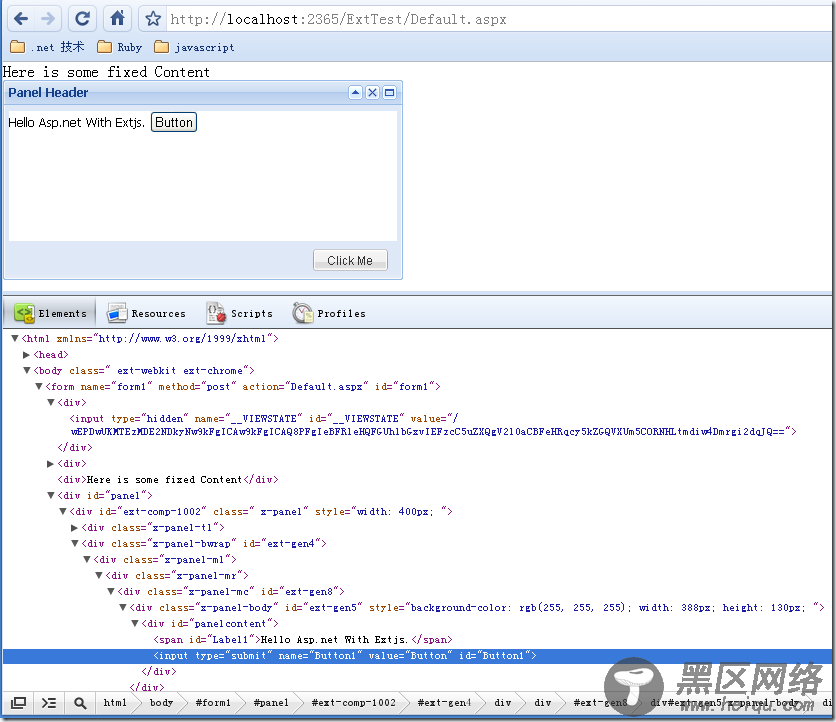
contentEl: 'panelcontent'表示这个panel要加载id为panelcontent的div中的内容,也就是一个Label和一个button。效果如下:

可以看到contentEl的效果,它是把原来在
<div>Here is some fixed Content</div>
之上的内容移动到Panel的内部 。这个时候点击button,能够正确响应服务器端的代码。这种方式仅仅是在页面上移动一些DOM节点的位置,一般来说对服务器端事件不会造成什么影响,但是这样Panel的作用和div也相差不大了。
最后介绍通过items配置项向Panel内添加其他Extjs组件的方法。Panel内除了直接添加html之外还可以添加其他的组件,Panel本身也是组件,所以Panel是可以嵌套的。嵌套的Panel结合下一节要介绍的布局可以方便的完成一些布局工作。
新建一个nestedPanel.htm,代码如下,通过items配置Panel内部的内容:
复制代码 代码如下:
<html xmlns="http://www.w3.org/1999/xhtml">
<head>
<title>Extjs Nest Panel</title>
<link type="text/css" href="https://www.jb51.net/ext-3.1.0/resources/css/ext-all.css" />
<script type="text/javascript" src="https://www.jb51.net/ext-3.1.0/adapter/ext/ext-base.js"></script>
<script type="text/javascript" src="https://www.jb51.net/ext-3.1.0/ext-all.js"></script>
<script type="text/javascript" src="https://www.jb51.net/ext-3.1.0/src/locale/ext-lang-zh_CN.js"></script>
<script type="text/javascript">
Ext.onReady(function() {
new Ext.Panel({
title: 'Panel Header',
renderTo: 'panel1',
frame: true,
bodyStyle: 'background-color:#FFFFFF',
collapsible: true,
items: new Ext.DatePicker(),
width: 189
});
new Ext.Panel({
title: 'Nested Panel',
renderTo: 'panel2',
width: 189,
frame: true,
items: [{ xtype: 'panel', title: 'nested 1',html:'<div>I am panel A</div>' },
{ xtype: 'panel', title: 'nested 2', autoLoad:'RemoteContent.htm'}]
});
});
</script>
</head>
<body>
<div></div>
<div></div>
</body>
</html>
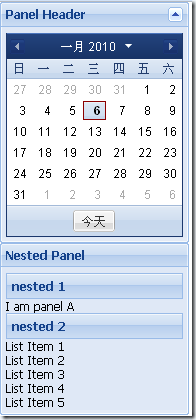
效果如下:

