代码如下:
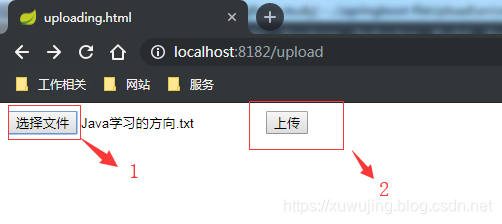
@SpringBootApplication public class FileUploadApplication { public static void main(String[] args) { SpringApplication.run(FileUploadApplication.class, args); System.out.println("FileUploadApplication 程序启动成功!"); } } 功能测试我们成功启动该程序之后,在浏览器上输入::8182/upload,然后选择一个文件进行上传,最后我们再到F:/test/路径下查看是否有该文件。
示例图如下:


使用Postman上传的示例图:

最后说明一下,如果文件重复上传,后面上传的文件会替换掉之前的那个文件。
SpringBoot 邮件发送说明:如果想直接获取工程那么可以直接跳到底部,通过链接下载工程代码。
开发准备环境要求
JDK:1.8
SpringBoot:1.5.9.RELEASE
首先还是Maven的相关依赖:
pom.xml文件如下:
<properties> <project.build.sourceEncoding>UTF-8</project.build.sourceEncoding> <java.version>1.8</java.version> <maven.compiler.source>1.8</maven.compiler.source> <maven.compiler.target>1.8</maven.compiler.target> </properties> <parent> <groupId>org.springframework.boot</groupId> <artifactId>spring-boot-starter-parent</artifactId> <version>1.5.9.RELEASE</version> <relativePath /> </parent> <dependencies> <!-- Spring Boot Web 依赖 核心 --> <dependency> <groupId>org.springframework.boot</groupId> <artifactId>spring-boot-starter-web</artifactId> </dependency> <!-- Spring Boot Test 依赖 --> <dependency> <groupId>org.springframework.boot</groupId> <artifactId>spring-boot-starter-test</artifactId> <scope>test</scope> </dependency> <!-- Spring Boot thymeleaf 模板 --> <dependency> <groupId>org.springframework.boot</groupId> <artifactId>spring-boot-starter-thymeleaf</artifactId> </dependency> <dependency> <groupId>org.springframework.boot</groupId> <artifactId>spring-boot-starter-mail</artifactId> </dependency> <dependency> <groupId>org.springframework</groupId> <artifactId>spring-context-support</artifactId> </dependency> </dependencies>然后就是application.properties的文件配置,这里我们需要根据自己的实际情况进行填写。如下述的配置文件示例中,个人使用的是qq邮箱,因此spring.mail.host配置的是smtp.qq.com。下述的示例中,只需填写个人邮箱的账号和密码即可。如果出现了535 错误,则需要该邮箱开启POP3/SMTP服务,并且使用授权码替换密码进行发送。
application.properties:
server.port = 8182 spring.mail.host=smtp.qq.com spring.mail.username=xxx@qq.com spring.mail.password=xxx spring.mail.default-encoding=UTF-8 spring.mail.properties.mail.smtp.auth=true spring.mail.properties.mail.smtp.starttls.enable=true spring.mail.properties.mail.smtp.starttls.required=true 代码编写SpringBoot这块已经集成了mail邮件发送的功能,我们引入相关架包之后,只需使用JavaMailSender这个类中的send方法即可完成邮件的发送。如果还想发送静态资源和附件的邮件,在JavaMailSender这个类中的方法也可以实现。如果想使用自定义的模板内容发送的话,则需要使用TemplateEngine 该类中的方法。
在我们使用邮件发送的时候,这四样最为重要,发件人、收件人、发送主题和发送的消息。因此我们可以根据这四样来创建一个简答的邮件实体类,方便进行相关的业务处理。
实体类代码
代码如下:
public class Mail { /** 发送者*/ private String sender; /** 接受者 */ private String receiver; /** 主题 */ private String subject; /** 发送 消息*/ private String text; //getter 和 setter 略 }
