config-server02 的 application.yml
server: port: 8889 # 端口 spring: application: name: config-server # 应用名称 cloud: config: server: git: uri: https://github.com/imrhelloworld/config-repo # 配置文件所在仓库地址 #username: # Github 等产品的登录账号 #password: # Github 等产品的登录密码 #default-label: master # 配置文件分支 #search-paths: # 配置文件所在根目录 # 配置 Eureka Server 注册中心 eureka: instance: prefer-ip-address: true # 是否使用 ip 地址注册 instance-id: ${spring.cloud.client.ip-address}:${server.port} # ip:port client: service-url: # 设置服务注册中心地址 defaultZone: :8761/eureka/,:8762/eureka/启动类
config-server 和 config-server02 启动类核心代码一致。
package com.example; import org.springframework.boot.SpringApplication; import org.springframework.boot.autoconfigure.SpringBootApplication; import org.springframework.cloud.config.server.EnableConfigServer; // 开启 EurekaClient 注解,当前版本如果配置了 Eureka 注册中心,默认会开启该注解 //@EnableEurekaClient // 配置中心服务端注解 @EnableConfigServer @SpringBootApplication public class ConfigServerApplication { public static void main(String[] args) { SpringApplication.run(ConfigServerApplication.class, args); } }Spring Cloud Config 客户端
客户端加入 Eureka 以后,就不用直接和配置中心服务端打交道了,而是通过 Eureka 来访问。
依赖
order-service 的 pom.xml。注意是 spring-cloud-starter-config 依赖。
<?xml version="1.0" encoding="UTF-8"?> <project xmlns="http://maven.apache.org/POM/4.0.0" xmlns:xsi="http://www.w3.org/2001/XMLSchema-instance" xsi:schemaLocation="http://maven.apache.org/POM/4.0.0 "> <modelVersion>4.0.0</modelVersion> <groupId>com.example</groupId> <artifactId>order-service</artifactId> <version>1.0-SNAPSHOT</version> <!-- 继承父依赖 --> <parent> <groupId>com.example</groupId> <artifactId>config-demo</artifactId> <version>1.0-SNAPSHOT</version> </parent> <!-- 项目依赖 --> <dependencies> <!-- spring boot web 依赖 --> <dependency> <groupId>org.springframework.boot</groupId> <artifactId>spring-boot-starter-web</artifactId> </dependency> <!-- netflix eureka client 依赖 --> <dependency> <groupId>org.springframework.cloud</groupId> <artifactId>spring-cloud-starter-netflix-eureka-client</artifactId> </dependency> <!-- spring cloud starter config 依赖 --> <dependency> <groupId>org.springframework.cloud</groupId> <artifactId>spring-cloud-starter-config</artifactId> </dependency> <!-- spring boot test 依赖 --> <dependency> <groupId>org.springframework.boot</groupId> <artifactId>spring-boot-starter-test</artifactId> <scope>test</scope> <exclusions> <exclusion> <groupId>org.junit.vintage</groupId> <artifactId>junit-vintage-engine</artifactId> </exclusion> </exclusions> </dependency> </dependencies> </project>配置文件
order-service 的 bootstrap.yml
spring: cloud: config: name: order-service # 配置文件名称,对应 git 仓库中配置文件前半部分 label: master # git 分支 profile: dev # 指定环境 discovery: enabled: true # 开启 service-id: config-server # 指定配置中心服务端的 service-id控制层
添加一个 RestController 用于测试获取配置文件信息。
package com.example.controller; import org.springframework.beans.factory.annotation.Value; import org.springframework.web.bind.annotation.GetMapping; import org.springframework.web.bind.annotation.RestController; @RestController public class ConfigController { @Value("${name}") private String name; @GetMapping("/name") public String getName() { return name; } }启动类
package com.example; import org.springframework.boot.SpringApplication; import org.springframework.boot.autoconfigure.SpringBootApplication; // 开启 EurekaClient 注解,当前版本如果配置了 Eureka 注册中心,默认会开启该注解 //@EnableEurekaClient @SpringBootApplication public class OrderServiceApplication { public static void main(String[] args) { SpringApplication.run(OrderServiceApplication.class, args); } }
测试
启动注册中心 eureka-server 和 eureka-server02。
启动配置中心服务端 config-server。
启动配置中心客户端 order-service。
当前环境在 Eureka UI 界面中如下:

访问::9090/name 结果如下:

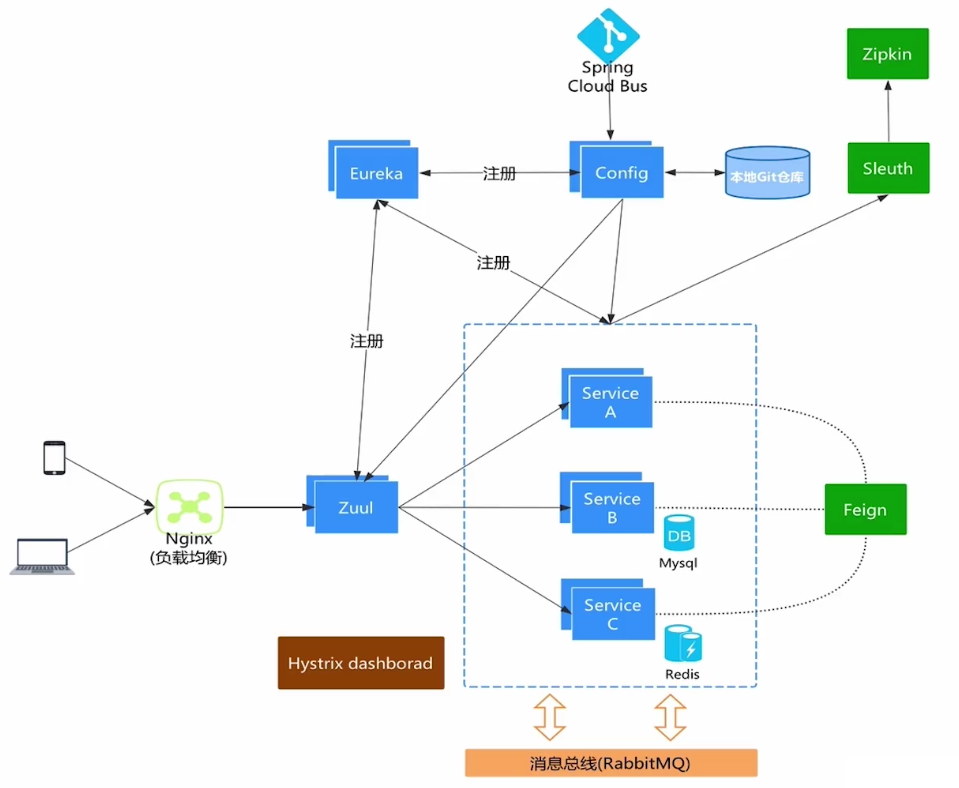
配置中心工作原理


