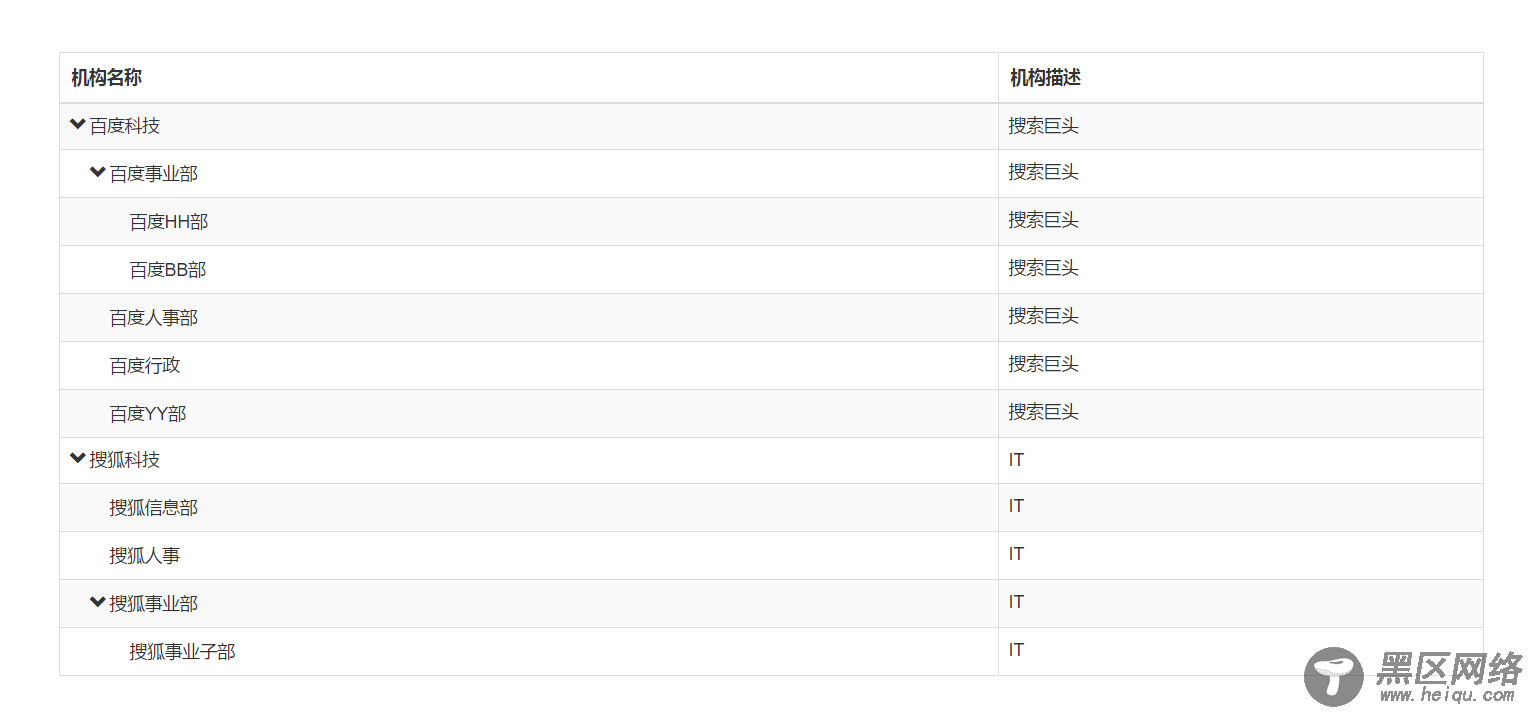
public class TestMVCController : Controller {public JsonResult GetData() { var result = new List<object>(); result.Add(new { Id = 1, Name = "百度科技", Desc = "搜索巨头"}); result.Add(new { Id = 2, Name = "百度事业部", Desc = "搜索巨头",ParentId=1 }); result.Add(new { Id = 3, Name = "百度人事部", Desc = "搜索巨头", ParentId = 1 }); result.Add(new { Id = 11, Name = "百度HH部", Desc = "搜索巨头", ParentId = 2 }); result.Add(new { Id = 4, Name = "百度行政", Desc = "搜索巨头", ParentId = 1 }); result.Add(new { Id = 5, Name = "百度YY部", Desc = "搜索巨头", ParentId = 1 }); result.Add(new { Id = 12, Name = "百度BB部", Desc = "搜索巨头", ParentId = 2 }); result.Add(new { Id = 6, Name = "搜狐科技", Desc = "IT" }); result.Add(new { Id = 7, Name = "搜狐信息部", Desc = "IT", ParentId = 6 }); result.Add(new { Id = 8, Name = "搜狐人事", Desc = "IT", ParentId = 6 }); result.Add(new { Id = 9, Name = "搜狐事业部", Desc = "IT", ParentId = 6 }); result.Add(new { Id = 10, Name = "搜狐事业子部", Desc = "IT", ParentId = 9 }); return Json(result, JsonRequestBehavior.AllowGet); } }
这里一看应该就能明白组件defaults里面的id和parentColumn的作用了吧。记得jqgrid里面使用treeview的时候用到了一个level用来判断是哪一级别的节点,博主觉得这样硬性要求返回数据里面加一个level属性有点不妥,所以我们约定如果当前记录的parentId为null或者空字符串的时候,这个节点就是根节点,然后根据根节点去递归找子节点。
使用后的各种效果示例如下。
初始化的时候配置expandAll: false得到的效果

增加隔行变色striped: true

增加表格边框bordered: true

综合效果

三、总结
至此本文就结束了,没有什么太高大上的技术,就是简单将一个第三方组件进行了一些封装,使得其使用起来更加方便而已。如果你项目中也正在为treegrid而纠结,何不试试呢。其实扩展bootstrapTable的treegrid功能的思路博主已经有了,等有时间在下篇给出说明。
以上所述是小编给大家介绍的JS 组件系统之 bootstrap treegrid 组件封装过程,希望对大家有所帮助,如果大家有任何疑问请给我留言,小编会及时回复大家的。在此也非常感谢大家对脚本之家网站的支持!
您可能感兴趣的文章:
