
在Latex中,有时需要对pdf文档里的图形进行注释,例如添加一个箭头,增加带指针的文本框等等,基本上有3种实现的方法:
直接对插入的图片进行注释,利用photoshop, GIMP等工具添加注释涂层。缺点:注释好后无法在pdf中进行修改,较死板。
利用pdf阅读器直接添加注释。缺点:每次对pdf进行修改后都必须重新添加注释,较繁琐。
利用Latex代码生成对图的注释。缺点:注释的语法比较复杂,上手不易。优点:代码调整好后图是图,注释是注释,后面.tex文档再做其它修改并不影响pdf注释,所谓一劳永逸之法。
这里重点介绍一下第三种方法,参考的一个例子来自国外的网站[1]:
\documentclass{article}
%\usepackage{showframe}
\usepackage{tikz}
\begin{document}
\noindent
\begin{tikzpicture}
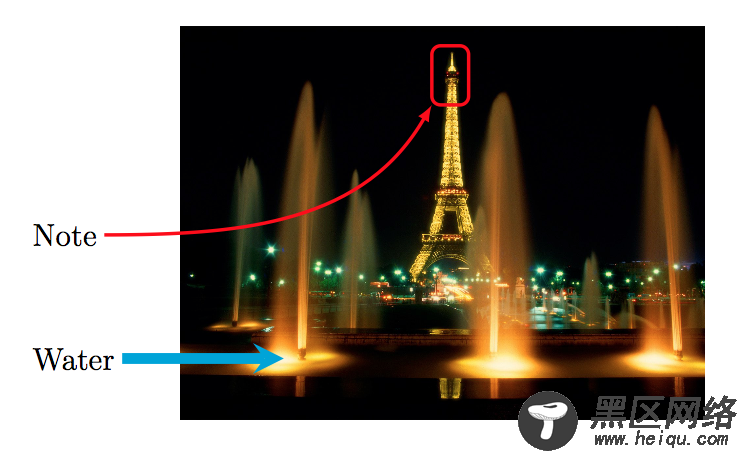
\node [anchor=west] (note) at (-1,3) {\Large Note};
\node [anchor=west] (water) at (-1,1) {\Large Water};
\begin{scope}[xshift=1.5cm]
\node[anchor=south west,inner sep=0] (image) at (0,0) {\includegraphics[width=0.7\textwidth]{test.jpg}};
\begin{scope}[x={(image.south east)},y={(image.north west)}]
\draw[red,ultra thick,rounded corners] (0.48,0.80) rectangle (0.55,0.95);
\draw [-latex, ultra thick, red] (note) to[out=0, in=-120] (0.48,0.80);
\draw [-stealth, line width=5pt, cyan] (water) -- ++(0.4,0.0);
\end{scope}
\end{scope}
\end{tikzpicture}%
\end{document}
上面添加了两种线形注释,具体参数的意义还需要另加揣摩。

参考:[1]stackexchange