注意:我只是一篇笔记,不是教程!不求甚解的可以一步步跟着做出来,想搞清楚原理的自己研究
温故而知新,虽然工作中用到的系统都是 CentOS 6.X,但我们不能一直沉浸在过去的经验中,要跟上时代的节奏
一、实验环境操作系统:CentOS Linux release 7.2.1511 (Core)
网卡地址:192.168.100.147/24
光盘镜像:CentOS-7-x86_64-Minimal-1511.iso
安装工具:kickstart + dhcp + tftp + ftp
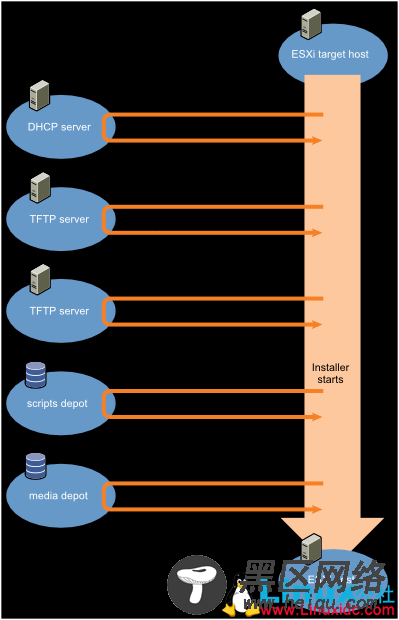
二、准备工作 2.1 关闭防火墙 [root@localhost ~]# systemctl stop iptables [root@localhost ~]# systemctl stop firewalld 2.2 关闭selinux [root@localhost ~]# setenforce 0 [root@localhost ~]# getenforce Permissive 三、原理和流程图
也可以启动新服务器,看看能否获取到IP地址
4.5 设置开机自启动(可选) [root@localhost ~]# systemctl enable dhcpd Created symlink from /etc/systemd/system/multi-user.target.wants/dhcpd.service to /usr/lib/systemd/system/dhcpd.service. 五、ftp服务安装及配置 5.1 安装vsftpd [root@localhost ~]# yum install -y vsftpd 5.2 配置vsftpd使用默认配置即可
5.3 挂载系统盘系统安装盘挂载到 /var/ftp/pub 目录下,不要挂载到其它地方,因为 /var/ftp 是 anonymous 匿名用户的家目录
如果是光驱,可以这样挂
[root@localhost ~]# mount /dev/cdrom /var/ftp/pub mount: /dev/sr0 is write-protected, mounting read-only如果是光盘镜像,可以这样挂
[root@localhost ~]# mount /opt/CentOS-7-x86_64-Minimal-1511.iso /var/ftp/pub -o loop mount: /dev/loop0 is write-protected, mounting read-only查看光盘内容
[root@localhost ~]# ls /var/ftp/pub CentOS_BuildTag EULA images LiveOS repodata RPM-GPG-KEY-CentOS-Testing-7 EFI GPL isolinux Packages RPM-GPG-KEY-CentOS-7 TRANS.TBL 5.4 启动vsftpd服务 [root@localhost ~]# systemctl start vsftpd 5.5 ftp服务器测试 [root@localhost ~]# ftp 192.168.100.147 Connected to 192.168.100.147 (192.168.100.147). 220 (vsFTPd 3.0.2) Name (192.168.100.147:root): anonymous 331 Please specify the password. Password: 230 Login successful. Remote system type is UNIX. Using binary mode to transfer files. ftp> ls 227 Entering Passive Mode (192,168,100,147,113,88). 150 Here comes the directory listing. -rw-r--r-- 1 0 0 1068 Aug 09 08:56 ks.cfg dr-xr-xr-x 8 0 0 2048 Dec 09 2015 pub 226 Directory send OK. ftp> get ks.cfg local: ks.cfg remote: ks.cfg 227 Entering Passive Mode (192,168,100,147,126,155). 150 Opening BINARY mode data connection for ks.cfg (1068 bytes). 226 Transfer complete. 1068 bytes received in 6.8e-05 secs (15705.88 Kbytes/sec) ftp> quit 221 Goodbye. [root@localhost ~]# ls anaconda-ks.cfg ks.cfg成功拿到 ks.cfg 则表示 ftp 服务正常
5.6 设置开机自启动(可选) [root@localhost ~]# systemctl enable vsftpd Created symlink from /etc/systemd/system/multi-user.target.wants/vsftpd.service to /usr/lib/systemd/system/vsftpd.service. 六、tftp服务安装及配置 6.1 安装tftp和xinetd服务 [root@localhost ~]# yum install -y xinetd [root@localhost ~]# yum install -y tftp-server tftp syslinux-tftpboot 6.2 配置xinetd [root@localhost ~]# vi /etc/xinetd.d/tftp service tftp { socket_type = dgram protocol = udp wait = yes user = root server = /usr/sbin/in.tftpd server_args = -s /var/lib/tftpboot #默认disable是yes的,把它改为no即可 disable = no per_source = 11 cps = 100 2 flags = IPv4 } 6.3 配置tftp-server [root@localhost ~]# cp /var/ftp/pub/images/pxeboot/initrd.img /var/lib/tftpboot/ [root@localhost ~]# cp /var/ftp/pub/images/pxeboot/vmlinuz /var/lib/tftpboot/ [root@localhost ~]# mkdir /var/lib/tftpboot/pxelinux.cfg [root@localhost ~]# vi /var/lib/tftpboot/pxelinux.cfg/default default linux prompt 1 timeout 60 display boot.msg label linux kernel vmlinuz append initrd=initrd.img text ks=ftp://192.168.100.147/ks.cfg 6.4 配置kickstart
