
前提是你已经配好了yum源。
yum -y install qemu-kvm virt-manager libvirt
。。。。。。。。。。。。。。。。。。。
安装完成后启动服务
service libvirtd start
启动 libvirtd 守护进程 : [确定]
。。。。。。。。。。。。。。。。。。。
输入命令brctl show 显示一下信息表示OK
建议:service NetworkManager stop
chkconfig NetworkManager off
这个时候启动服务
vir-manager 弹出下面界面
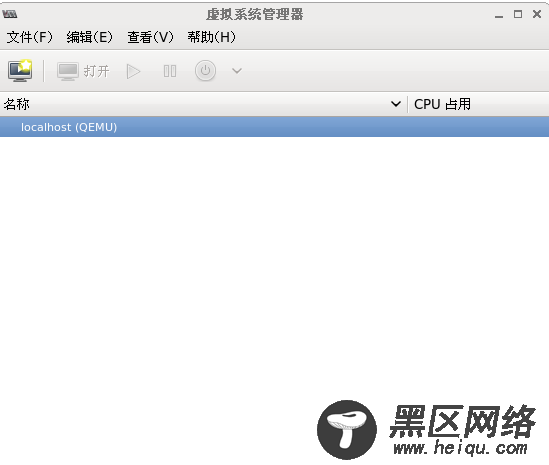
OK接下来点击“电脑”图标按照提示根据自己的需要安装就OK了。都是图形界面没什么好说的。
如果我们在生产环境中需要安装多台虚拟机怎么办呢?克隆?OK当然克隆的最简单方便的方法啦。但是如果直接克隆真实是很占用资源。小编今天跟大家分享一种更轻便、更简单的方法:
第一步:启动进程后 在目录/var/lib/libvirt/images/下生成一块80G的空间 具体操作如下
[root@localhost ~]# service libvirtd start
启动 libvirtd 守护进程: [确定]
[root@localhost images]# qemu-img create -f qcow2 rhel6base.img 80G
[root@localhost images]#virt-manager 启动服务
按照提示一步步安装
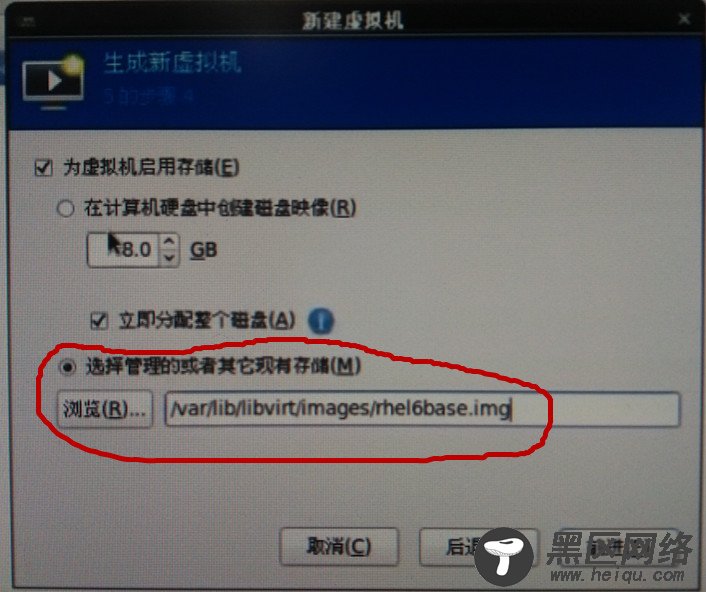
注意:下面这一步的时候路径为生成的rhel6base.img的路径
安装完成后重新引导进入系统后关掉虚拟机
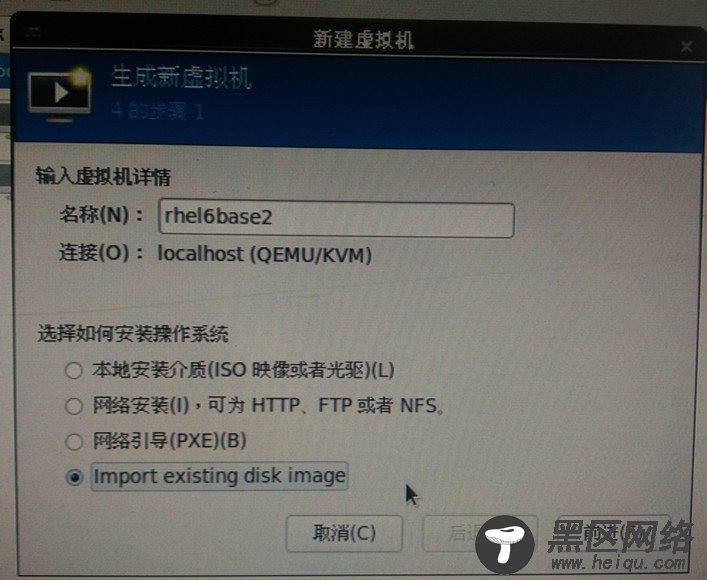
以刚开装的kvm虚拟机为模板 克隆第二太虚拟机 具体操作如下
[root@localhost images]# qemu-img create -b rhel6base.img -f qcow2 rhel6base2.img
Formatting 'rhel6base2.img', fmt=qcow2 size=85899345920 backing_file='rhel6base.img' encryption=off cluster_size=65536
启动图界面操作基本上没有太大差异,注意下面两步操作
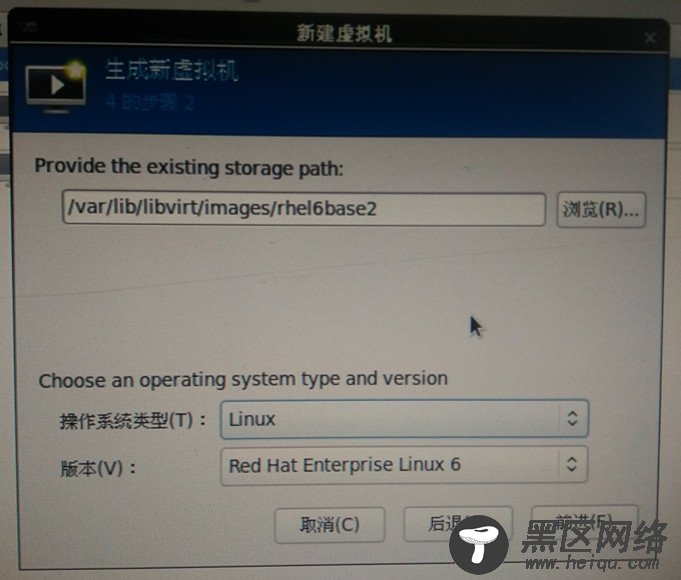
1:使用现有的磁盘镜像文件
2:路径为新生成的rhel6base2
安装完成后查看增大的文件大小 只有8.7M
[root@localhost images]# ll -lh
总用量 3.8G
-rw-r--r-- 1 root root 8.7M 6月 15 15:06 rhel6base1.img
-rw-r--r-- 1 qemu qemu 3.8G 6月 15 11:24 rhel6base.img
对于技术人员来说还可以通过直接命令行进行新建虚拟机
具体操作:
先创建增量镜像文件
[root@localhost images]#qemu-img create -b rhel6base,img -f qcow2 rhel6base2.img
[root@localhost images]# virsh list --all
Id 名称 状态
----------------------------------------------------
- rhel6base 关闭
- rhel6basenode1 关闭
[root@localhost images]# virsh dumpxml rhel6base
<domain type='kvm'>
<name>rhel6base</name>
<uuid>377ef988-42cf-5aad-771c-6e95979ea6a9</uuid>
<memory unit='KiB'>1003520</memory>
<currentMemory unit='KiB'>1003520</currentMemory>
<vcpu placement='static'>1</vcpu>
<os>
<type arch='x86_64' machine='rhel6.5.0'>hvm</type>
<boot dev='hd'/>
</os>
<features>
<acpi/>
<apic/>
<pae/>
</features>
<clock offset='utc'/>
<on_poweroff>destroy</on_poweroff>
<on_reboot>restart</on_reboot>
<on_crash>restart</on_crash>
<devices>
<emulator>/usr/libexec/qemu-kvm</emulator>
<disk type='file' device='disk'>
<driver type='qcow2' cache='none'/>
<source file='/var/lib/libvirt/images/rhel6base.img'/>
<target dev='vda' bus='virtio'/>
<address type='pci' domain='0x0000' bus='0x00' slot='0x05' function='0x0'/>
</disk>
<disk type='block' device='cdrom'>
<driver type='raw'/>
<target dev='hdc' bus='ide'/>
<readonly/>
<address type='drive' controller='0' bus='1' target='0' unit='0'/>
</disk>
<controller type='usb' index='0'>
<address type='pci' domain='0x0000' bus='0x00' slot='0x01' function='0x2'/>
</controller>
<controller type='ide' index='0'>
<address type='pci' domain='0x0000' bus='0x00' slot='0x01' function='0x1'/>
</controller>
<interface type='network'>
<mac address='52:54:00:c3:8c:d4'/>
<source network='default'/>
<model type='virtio'/>
<address type='pci' domain='0x0000' bus='0x00' slot='0x03' function='0x0'/>
</interface>
<serial type='pty'>
<target port='0'/>
</serial>
<console type='pty'>
<target type='serial' port='0'/>
</console>
<input type='tablet' bus='usb'/>
<input type='mouse' bus='ps2'/>
<graphics type='vnc' port='-1' autoport='yes'/>
<sound model='ich6'>
<address type='pci' domain='0x0000' bus='0x00' slot='0x04' function='0x0'/>
</sound>
<video>
<model type='cirrus' vram='9216' heads='1'/>
<address type='pci' domain='0x0000' bus='0x00' slot='0x02' function='0x0'/>
</video>
<memballoon model='virtio'>
<address type='pci' domain='0x0000' bus='0x00' slot='0x06' function='0x0'/>
</memballoon>
</devices>
</domain>
输出的内容就是虚拟机的配置文件
我们可以把输出文件重定向输出到/tmp下面重命名为mymv.xml
[root@localhost images]# virsh dumpxml rhel6base > /tmp/myvm.xml
然后对配置文件进行修改
[root@localhost images]# vim /tmp/myvm.xml
克隆出来的虚拟机需要更改 rhel的名字 mac地址 uuid号 文件名四个地方
修改名称:
<name>rhel6base</name> --》 <name>rhel6base2</name>
修改UUID:
[root@localhost images]# uuidgen 【生成新的uuid】
7bb06bc1-d610-4f51-a641-d1566b0a0c8b
<uuid>377ef988-42cf-5aad-771c-6e95979ea6a9</uuid> --》 <uuid>7bb06bc1-d610-4f51-a641-d1566b0a0c8b</uuid>