① 从指定的网络接口截获5个 ARP 数据包,并且不将网络地址转换成主机名
[root@Rocky ~]# tcpdump arp -i eth0 -c 5 -n
tcpdump: verbose output suppressed, use -v or -vv for full protocol decode
listening on eth0, link-type EN10MB (Ethernet), capture size 96 bytes
10:59:46.728425 arp who-has 192.168.1.1 tell 192.168.1.110
11:00:17.315719 arp who-has 192.168.1.1 tell 192.168.1.111
11:00:17.317911 arp who-has 192.168.1.1 tell 192.168.1.111
11:00:17.418271 arp who-has 192.168.1.1 tell 192.168.1.111
11:00:17.418980 arp who-has 192.168.1.1 tell 192.168.1.111
5 packets captured
5 packets received by filter
0 packets dropped by kernel
10:59:46:为截获数据包的时间
728425 :为毫秒数
arp:表明该数据包时 ARP 请求
who-has 192.168.1.1 tell 192.168.1.110:表示 110 请求 1 的 MAC 地址
② 截获主机“9.185.10.57”所有收到和发出的数据包
tcpdump host 9.185.10.57
③ 截获在主机“9.185.10.57”和主机“9.185.10.58”或“9.185.10.59”之间传递的数据包
tcpdump host 9.185.10.57 and \>\(9.185.10.58 or 9.185.10.59\)
④ 截获主机“9.185.10.57”和除主机“9.186.10.58”外所有其它主机之间通信的IP数据包
tcpdump ip host 9.185.10.57 and ! 9.185.10.58
⑤ 截获主机“9.185.10.57”接收或发出的FTP(端口号为21)数据包
tcpdump tcp port 21 host 9.185.10.57
⑥ 如果怀疑系统正受到(DoS)攻击,可通过截获发往本机的所有ICMP包,确定目前是否有大量的ping流向服务器
tcpdump icmp -n -i eth0
㈡ Ethereal
⑴ 下载并安装
***请确认 libpcap 包已经安装****
# cp ethereal-0.9.9.tar.bz2 /usr/local/src/
# cd /usr/local/src/
# bzip2 -d ethereal-0.9.9.tar.bz2
# tar xvf ethereal-0.9.9.tar
# cd ethereal-0.9.9
# ./configure
# make
# make install
⑵ 简单的捕获过程
大概可分 2 步:
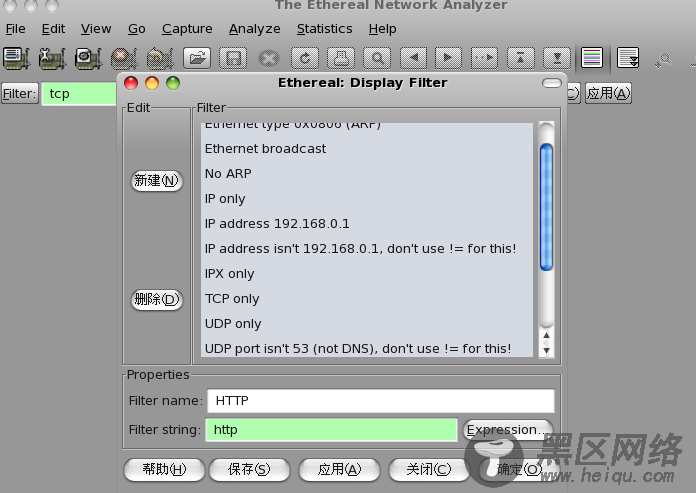
Ⅰ 点击 "filter":可直接在预置的条件里选择、也可自己新建、比如:
Filter name:Rocky
Filter string: host 124.127.185.106

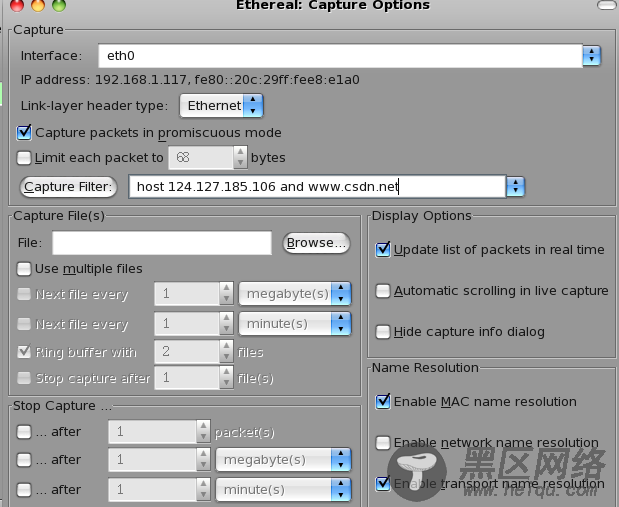
Ⅱ 点击 "capture "、在 "capture filter"选项框里面填上过滤条件


