相信大家都需要过,在Vue中使用Elementui的时候,遇到最多也最蛋疼的问题就是修改默认样式,接下来直奔主题;
// template <el-progress :text-inside="true" :stroke-width="26" :percentage="70" ></el-progress>
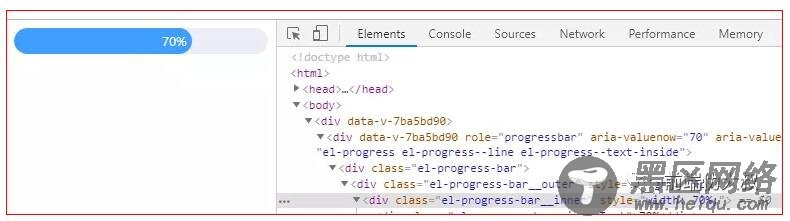
默认样式
方法1
1、找默认添加的类名
2、去掉scoped,scoped是Vue是限制独立组件中的CSS样式不被溢出到全局使用!
// style .el-progress-bar__inner{ background: #000 ; } // 这两种酌情使用。 .el-progress-bar__inner{ background: #000 !important; } // !important是css选择器中的属性,默认权重无线大!
总结:这种方法会生效,但是会影响到全局;
方法2,
使用Vue中的深度作用域选择器! 这个符号哦 >>>
<style scoped> >>> .el-progress-bar__inner{ background: #000 ; } </style>
总结:使用Vue的深度选择器,就可以完美的解决!

注意:有些像 Sass 之类的预处理器无法正确解析 >>>。
这种情况下你可以使用 /deep/ 或 ::v-deep 操作符取而代之——两者都是 >>> 的别名,同样可以正常工作。
给大家附上官网地址:https://vue-loader.vuejs.org/zh/guide/scoped-css.html#混用本地和全局样式
补充知识:Vue Element Upload组件自定义上传行为及值回填
问题
由于项目使用element-ui,然后upload默认上传方式不支持我们现有接口。参照了一下官方API及相关博客,解决了我现有问题。
解决方式
自定义上传:upload组件提供了一个http-request属性,官方给的描述是:覆盖默认的上传行为,可以自定义上传的实现
值的回填:upload组件提供了一个file-list属性,描述:上传的文件列表
#具体代码实现
自定义上传行为
这里使用图片上传作为实例
template部分
<el-upload action="https://up-z2.qbox.me" list-type="picture-card" :http-request="uploadImg" :on-success="uploadImgSuccess" :on-remove="handleRemove"> <i></i> </el-upload>
以上是template部分,我们实现了http-request, on-success, on-remove三个属性
script部分
methods: { uploadImg (f) { this.axios.get('./getToken').then((response) => {//获取token let param = new FormData(); //创建form对象 param.append('file',f.file);//通过append向form对象添加数据 param.append('token',response.data.token);//通过append向form对象添加数据 param.append('key',response.data.key);//添加form表单中其他数据 let config = { headers:{'Content-Type':'multipart/form-data'} }; //添加请求头 this.axios.post(f.action,param,config)//上传图片 .then(response=>{ f.onSuccess(response.data) }) .catch(({err}) => { f.onError() }) }) .catch(() => { f.onError() }) }, uploadImgSuccess(response, file, fileList) { // 缓存接口调用所需的文件路径 console.log('文件上传成功') }, handleRemove(file, fileList) { // 更新缓存文件 console.log('文件删除') } }
值回填
同样以图片上传为例
template部分
<el-upload action="https://up-z2.qbox.me" list-type="picture-card" :http-request="uploadImg" :on-remove="handleRemove" :on-change="handleImgChange" :file-list="imgList"> <i></i> </el-upload>
script部分
data() { return { imgList: [{url: '初始需回填的图片url', status: 'finished'}] } }, methods: { uploadImg (f) { this.axios.get('./getToken').then((response) => {//获取token let param = new FormData(); //创建form对象 param.append('file',f.file);//通过append向form对象添加数据 param.append('token',response.data.token);//通过append向form对象添加数据 param.append('key',response.data.key);//添加form表单中其他数据 let config = { headers:{'Content-Type':'multipart/form-data'} }; //添加请求头 this.axios.post(f.action,param,config)//上传图片 .then(response=>{ f.onSuccess(response.data) }) .catch(({err}) => { f.onError() }) }) .catch(() => { f.onError() }) }, handleImgChange (file, fileList) {// 这里可以打印file查看数据结构 if (file.response) {//判断是否上传成功 this.imgList.push({url: this.tools.cdn(file.response.key), status: 'finished'})//上传成功之后把值添加到imglist中 } }, handleRemove (file, fileList) {// 这里可以打印filelist查看数据结构 this.imgList = fileList//删除某张图片时重新对imglist赋值 } }
写在最后
一直想把这个记下来,比较懒惰一看好久没有写博客了。由于是在我们工程里改的,暂时还没有写demo。如有问题,请大家指教
以上这篇浅谈Vue使用Elementui修改默认的最快方法就是小编分享给大家的全部内容了,希望能给大家一个参考,也希望大家多多支持脚本之家。
您可能感兴趣的文章: