最后一步!!!
1,安装好了以后,我们配置一下eclipse!!
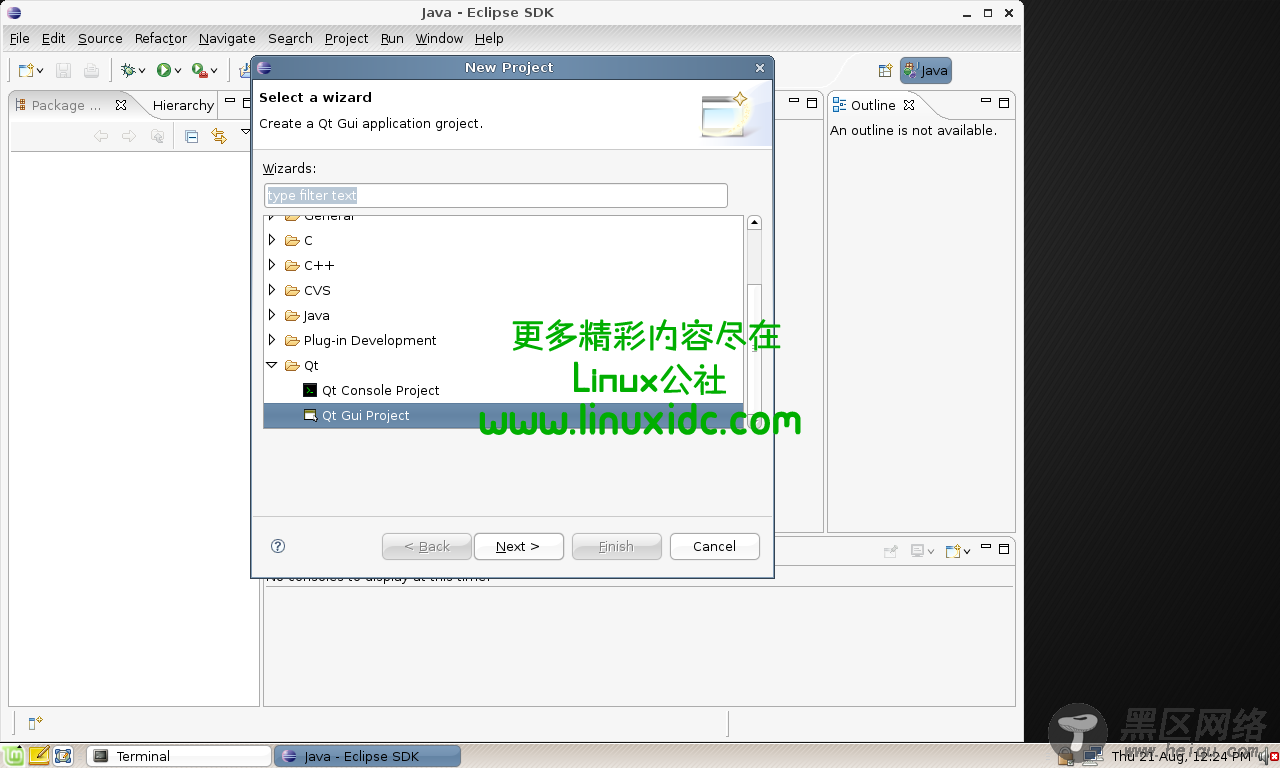
There may be some messages in the terminal when opening eclipse, don’t worry that’s normal. There will probably be an initial welcome screen. You can choose just to go to the bench/workspace. You may be prompted for a default workspace location. Change it or leave it, the choice is yours. Now go to File > New > Project… and then a wizard pops up. Scroll down and choose Qt folder then QT Gui Project. Click next.

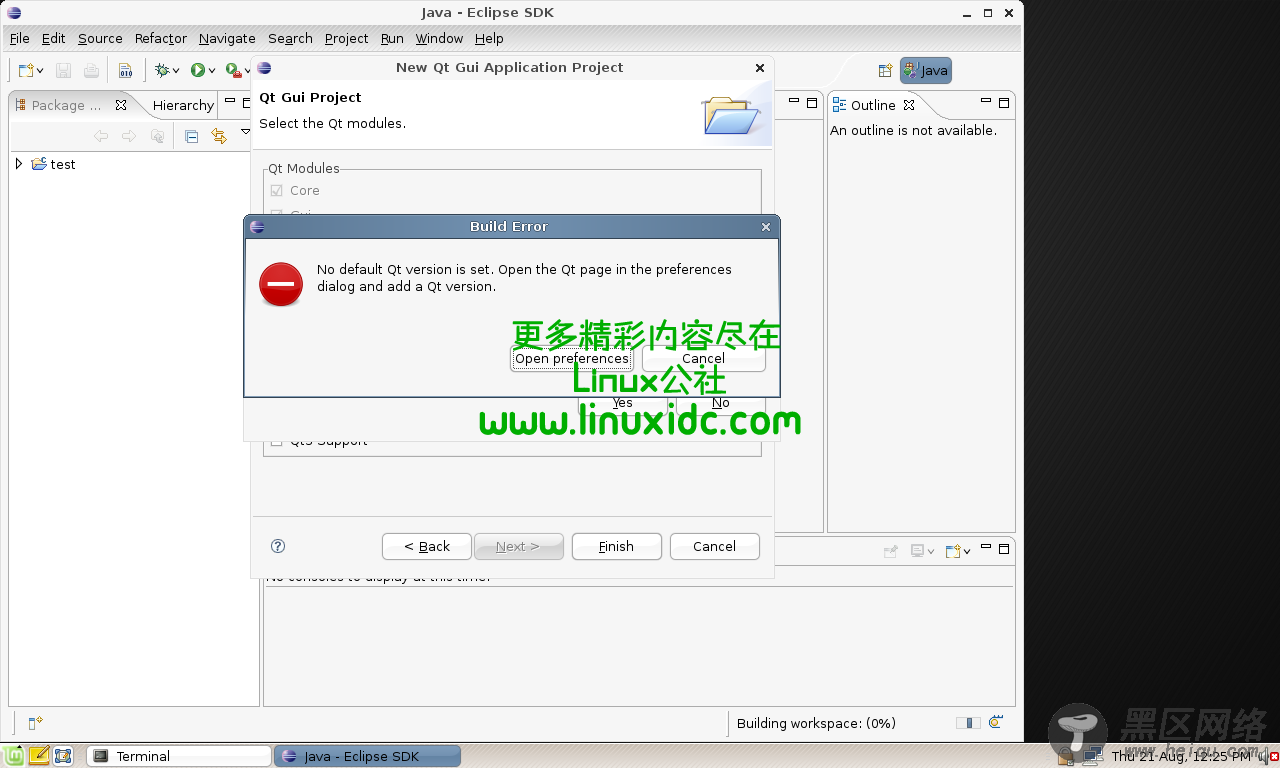
Then input any “Project Name”, I choose test. Click Next. Then in the next window leave defaults and click Next. Finally the Last window leave defaults and click Finish. You will then get an Error window popup which says no default QT version is set. So click the “Open preferences button”.

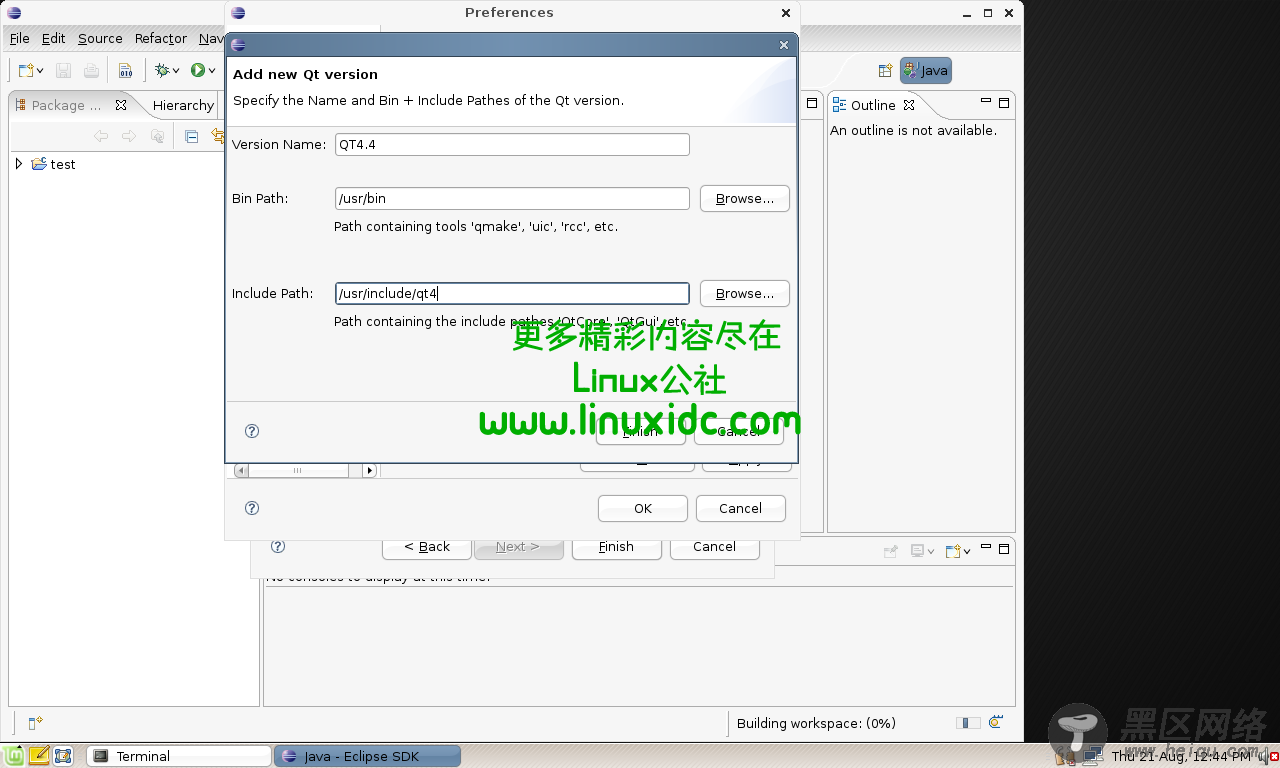
Now click add and then enter the settings as per the picture below.
Then click Finish and then Ok. You will be prompted that the QT version has changed and a rebuild of the project is necessary. Click Yes. It may also prompt you that this kind of project is associated with the C/C++ view, you can also accept this as it just changes the workspace layout within eclipse.

There the project should rebuild in the background but you are done!
Now you can create QT gui or console projects, and you can even edit the qt4.ui files within eclipse using the qt4-designer (part of the qt eclipse-cdt plugin). And to compile/run a project you just go to the Project > Run.

