搭建模拟环境:
操作系统:CentOS7
内存:1G
jdk:1.8.0_131
tomcat:8.0.48
环境准备我们这里就不直接演示了,直接配置tomcat的jmx
1、进入到tomcat的bin目录下# cd /opt/tomcat/apache-tomcat-8.0.48/bin/
2、编辑配置文件# vim catalina.sh
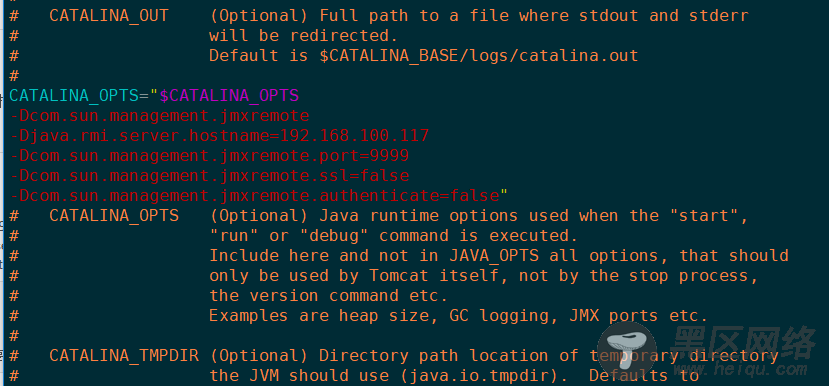
3、在下图中上面添加参数

参数添加后的样子
3.1、此配置连接jmx不需要账号密码:CATALINA_OPTS="$CATALINA_OPTS -Dcom.sun.management.jmxremote -DJava.rmi.server.hostname=192.168.100.117 -Dcom.sun.management.jmxremote.port=9999 -Dcom.sun.management.jmxremote.ssl=false -Dcom.sun.management.jmxremote.authenticate=false"
配置后的截图:

参数说明:
hostname:是监控tomcat所在服务器的ip地址
jmxremote.port:端口号,是要开启的监控端口号
jmxremote.ssl:是否要开启ssl连接
authenticate: false表示监控不需要用户和密码
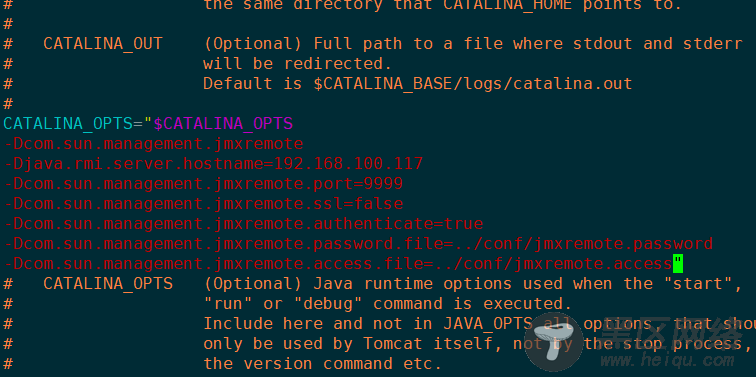
3.2、需要配置用户名、密码:CATALINA_OPTS="$CATALINA_OPTS -Dcom.sun.management.jmxremote -Djava.rmi.server.hostname=192.168.100.117 -Dcom.sun.management.jmxremote.port=9999 -Dcom.sun.management.jmxremote.ssl=false -Dcom.sun.management.jmxremote.authenticate=true -Dcom.sun.management.jmxremote.password.file=../conf/jmxremote.password -Dcom.sun.management.jmxremote.access.file=../conf/jmxremote.access"
配置后的截图:

参数说明:
authenticate:为true开启账号验证
access.file:权限文件路径
password.file:密码文件路径
3.3、当没有配置密码验证的时候,不需要此步操作,当启用用户、密码验证后需要操作此步骤3.3.1、找到jdk安装目录
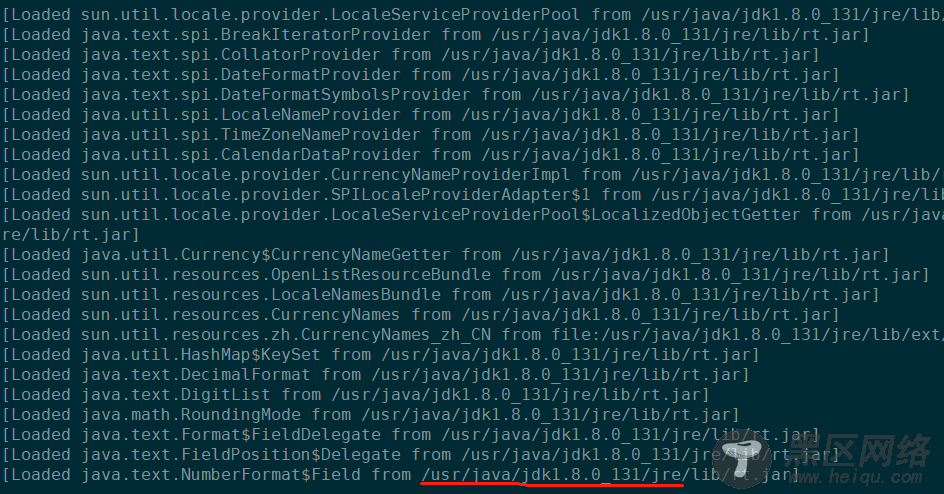
如果不知道安装到目录那个地方可以通过命令查找:
# java -verbose

3.3.2、切换到jdk目录中
进入# cd jre/lib/management/
在文件目录下会有jmxremote.access jmxremote.password.template文件,拷贝到tomcat的conf目录下
# cp jmxremote.* /opt/tomcat/apache-tomcat-8.0.48/conf/
3.3.3、修改jmxremote.access文件

3.3.4、重命名密码文件:
# mv jmxremote.password.template jmxremote.password
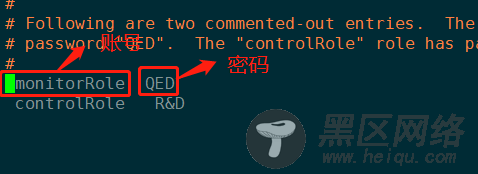
3.3.5、编辑密码文件
# vim jmxremote.password

3.3.6、编辑完文件后,要修改access文件和password文件权限,不然tomcat启动不起来
# chmod 600 jmxremote.*
4、启动tomcat[root@ha bin]# ./startup.sh Using CATALINA_BASE: /opt/tomcat/apache-tomcat-8.0.48 Using CATALINA_HOME: /opt/tomcat/apache-tomcat-8.0.48 Using CATALINA_TMPDIR: /opt/tomcat/apache-tomcat-8.0.48/temp Using JRE_HOME: /usr Using CLASSPATH: /opt/tomcat/apache-tomcat-8.0.48/bin/bootstrap.jar:/opt/tomcat/apache-tomcat-8.0.48/bin/tomcat-juli.jar Tomcat started.

