在这之后你会在/usr/src/目录发现一个linux-image和一个linux-headers的 .deb包:
cd /usr/src/
ls -l
root@falko-desktop:/usr/src# ls -l
total 461180
drwxr-xr-x 23 root root 4096 2009-10-27 19:16 linux-headers-2.6.31-14
drwxr-xr-x 7 root root 4096 2009-10-27 19:16 linux-headers-2.6.31-14-generic
drwxr-xr-x 23 root root 4096 2009-12-11 16:57 linux-headers-2.6.31-16
drwxr-xr-x 7 root root 4096 2009-12-11 16:57 linux-headers-2.6.31-16-generic
-rw-r--r-- 1 root src 6319116 2009-12-11 19:51 linux-headers-2.6.31.4-custom_2.6.31.4-custom-10.00.Custom_amd64.deb
-rw-r--r-- 1 root src 403726102 2009-12-11 19:48 linux-image-2.6.31.4-custom_2.6.31.4-custom-10.00.Custom_amd64.deb
drwxr-xr-x 26 root root 4096 2009-12-11 19:48 linux-source-2.6.31
-rw-r--r-- 1 root root 62176632 2009-12-08 09:02 linux-source-2.6.31.tar.bz2
root@falko-desktop:/usr/src#
向下面这样安装这两个包...
dpkg -i linux-image-2.6.31.4-custom_2.6.31.4-custom-10.00.Custom_amd64.deb linux-headers-2.6.31.4-custom_2.6.31.4-custom-10.00.Custom_amd64.deb
... 再重启系统:
reboot
然后, 作为一个普通用户运行
uname -a
... , 你就可以看到你的新内核了:
falko@falko-desktop:~$ uname -a
Linux falko-desktop 2.6.31.4-custom #1 SMP Fri Dec 11 17:36:56 CET 2009 x86_64 GNU/Linux
falko@falko-desktop:~$
现在我们可以继续 VMware Server 的安装:
cd /home/falko/Downloads/vmware-update*/
sudo ./runme.pl
这一回下面这个问题可以回答yes:
Before running VMware for the first time after update, you need to configure it
for your running kernel by invoking the following command:
"/usr/bin/vmware-config.pl". Do you want this script to invoke the command for
you now? [no]
以后的问题你可以简单敲击 来接受默认值.
当安装程序询问这个时:
In which directory do you want to keep your virtual machine files?
[/var/lib/vmware/Virtual Machines]
你既可以接受默认值,也可以指定一个有充足空间来存放你的虚拟机的地方.
在安装即将结束的时候会要求你输入序列号:
Please enter your 20-character serial number.
Type XXXXX-XXXXX-XXXXX-XXXXX or 'Enter' to cancel:
填入你的VMware Server序列号.
成功安装以后,你可以删除VMware Server的下载文件和安装目录:
cd /home/falko/Downloads
rm -f VMware-server*
rm -fr vmware-server-distrib/
rm -fr vmware-update*
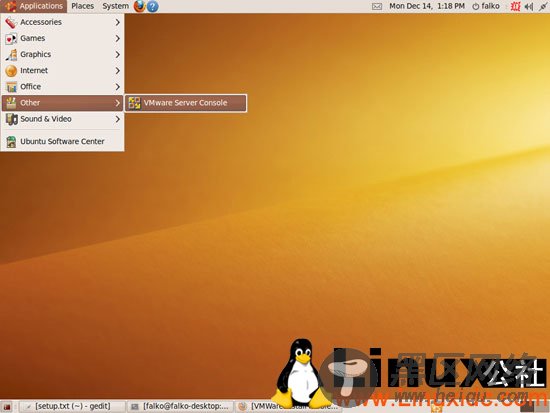
你可以在这个地方找到VMware Server: Applications > Other > VMware Server Console:


