一台最小化安装的CentOS 7.3虚拟机
安装软件包
yum install -y epel-*
yum install -y nginx mariadb-server php php-
MySQL \
php-fpm php-pdo php-pdo_dblib php-gd php-pear \
php-xml php-pecl-zip php-json php-devel wget vim
配置nginx支持PHP
1.建立nginx的web主目录
mkdir /var/wwwroot
cd /var/wwwroot
echo -e hello_world >> index.html
echo -e
"<?php phpinfo(); ?>" >> info.php

2.编辑nginx的配置文件
vim /etc/nginx/nginx.conf
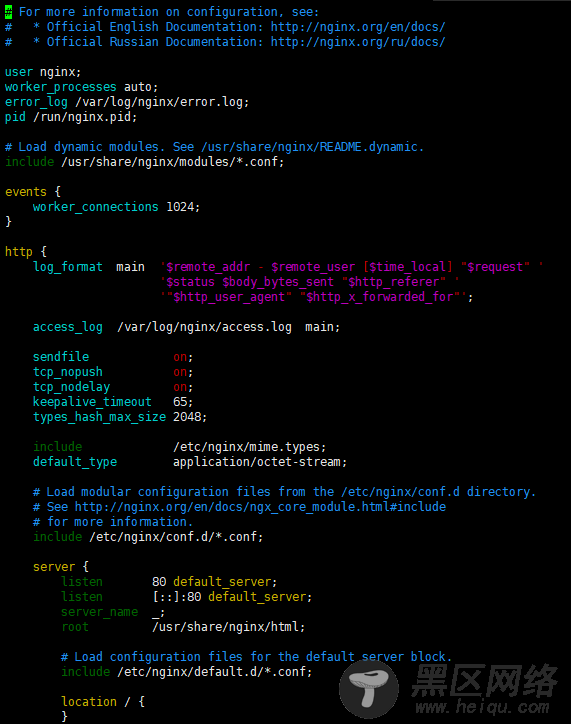
3.修改nginx主目录和索引
将http下的server下的root的值修改为/var/wwwroot
在http下的server下添加index index.php index.html index.htm

4.在http下的server区块加入以下内容
location ~ \.php$ {
fastcgi_pass 127.0.0.1:9000;
fastcgi_index index.php;
fastcgi_param SCRIPT_FILENAME
$document_root$fastcgi_script_name;
include
fastcgi_params;
}

5.启动nginx和php-fpm
systemctl start nginx php-fpm
systemctl
enable nginx php-fpm
6.关闭防火墙
setenforce 0
systemctl stop firewalld
systemctl
disable firewalld
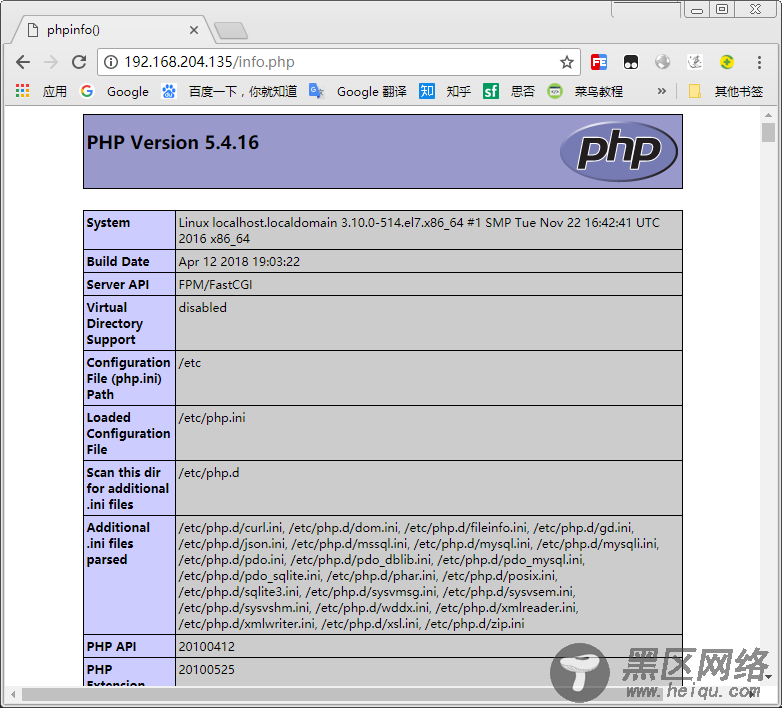
7.在宿主机访问nginx
访问[centos_ip]/info.php
配置MySQL
1.启动MySQL
systemctl start mariadb
systemctl
enable mariadb
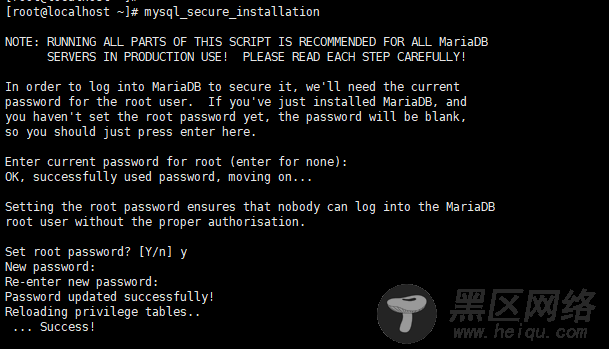
2.输入以下命令,配置MySQL
mysql_secure_installation
3.提示Enter current password for root (enter for none):
敲击回车
4.提示Set root password? [Y/n]
按Y,随后设置密码
5.提示Remove anonymous users?
意思为是否删除匿名用户
6.提示Disallow root login remotely?
意思为远程禁止root登录吗?
7.提示Remove test database and access to it?
意思为删除测试数据库吗?
8.提示Reload privilege tables now?
意思为现在重新加载特权表吗?
9.登录mysql数据库
mysql -uroot -p

下载WordPress测试
LNMP环境
1.下载WordPress
cd /var/wwwroot
rm -rf index.html
rm -rf info.php
wget https://cn.wordpress.org/wordpress-4.9.4-zh_CN.tar.gz
tar -zxvf wordpress-4.9.4-zh_CN.tar.gz
cp -rf /var/wwwroot/wordpress/* /var/wwwroot
cd /var/wwwroot
rm -rf wordpress
chmod -R 777 *
2.登录mysql创建数据库
mysql -uroot -p
CREATE DATABASE wordpress;
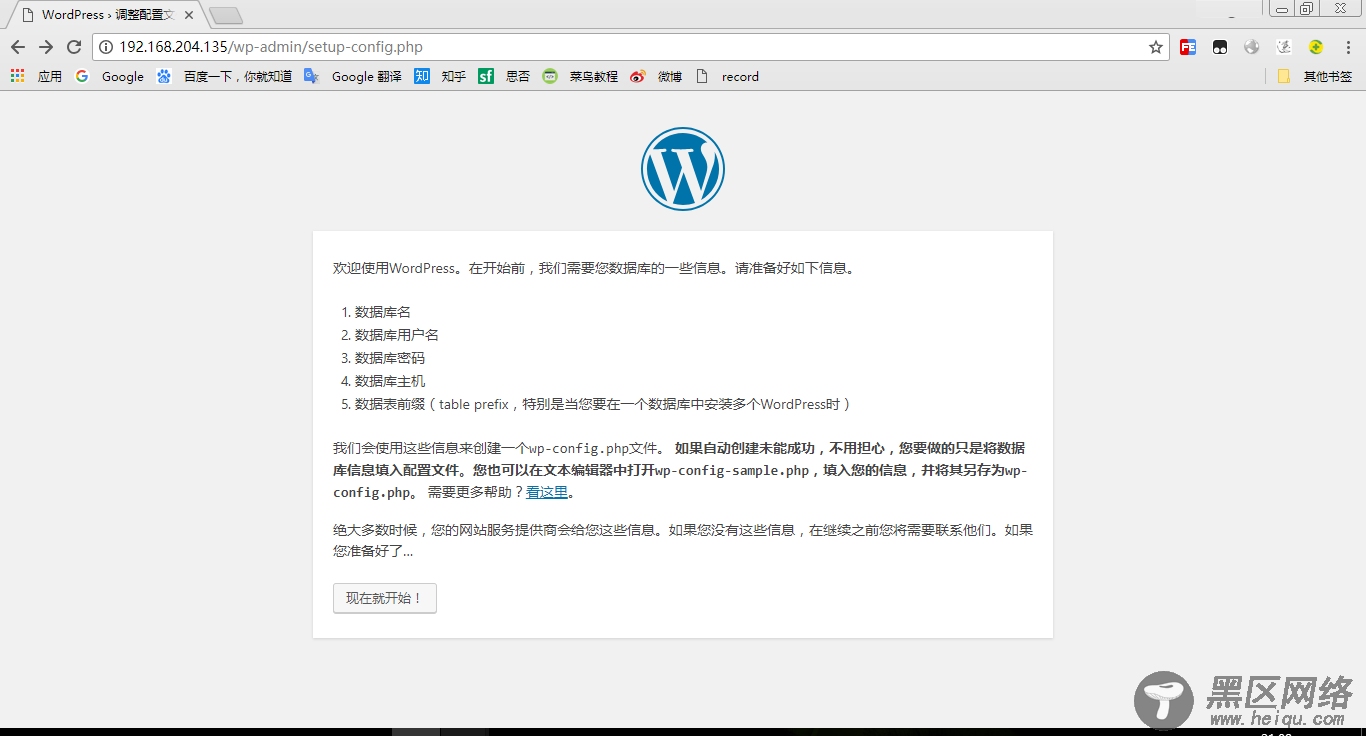
3.在宿主机访问nginx服务器
访问[centos_ip]/
按提示安装即可