
上篇博客中已经介绍了Fragment产生原因,以及一些基本的用法和各种API。
本篇将介绍上篇博客提到的:如何管理Fragment回退栈,Fragment如何与Activity交互,Fragment与Activity交互的最佳实践,没有视图的Fragment的用处,使用Fragment创建对话框,如何与ActionBar,MenuItem集成等~~
1、管理Fragment回退栈类似与Android系统为Activity维护一个任务栈,我们也可以通过Activity维护一个回退栈来保存每次Fragment事务发生的变化。如果你将Fragment任务添加到回退栈,当用户点击后退按钮时,将看到上一次的保存的Fragment。一旦Fragment完全从后退栈中弹出,用户再次点击后退键,则退出当前Activity。
看这样一个效果图:
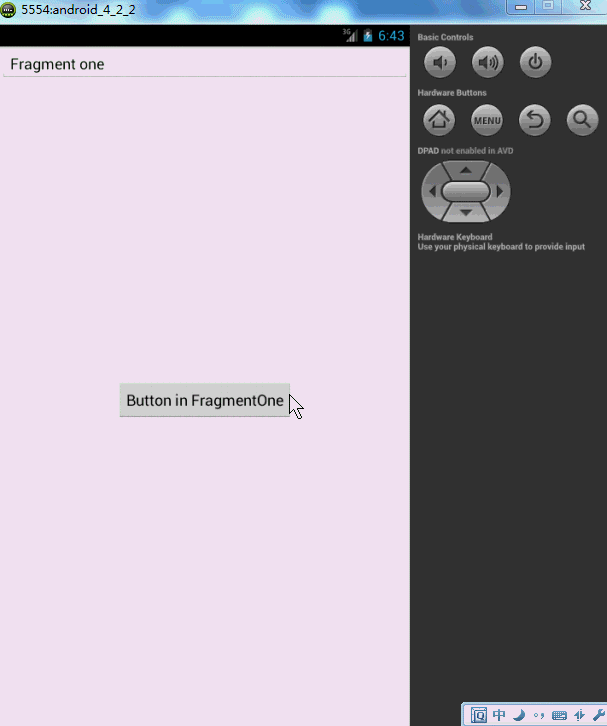
点击第一个按钮,切换到第二个界面,点击第二个按钮,切换到第三个界面,然后点击Back键依次回退。这像不像初学Android时的Activity跳转,当然了,这里肯定不是,不然我就跪了。这里是Fragment实现的,用户点击Back,实际是Fragment回退栈不断的弹栈。
如何添加一个Fragment事务到回退栈:
FragmentTransaction.addToBackStack(String)
下面讲解代码:很明显一共是3个Fragment和一个Activity.
先看Activity的布局文件:
<RelativeLayout xmlns:android="http://schemas.android.com/apk/res/android"
xmlns:tools="http://schemas.android.com/tools"
android:layout_width="match_parent"
android:layout_height="match_parent" >
<FrameLayout
android:id="@+id/id_content"
android:layout_width="fill_parent"
android:layout_height="fill_parent" >
</FrameLayout>
</RelativeLayout>
不同的Fragment就在这个FrameLayout中显示。
MainActivity.java
package com.zhy.zhy_fragments;
import android.app.Activity;
import android.app.FragmentManager;
import android.app.FragmentTransaction;
import android.os.Bundle;
import android.view.Window;
public class MainActivity extends Activity
{
@Override
protected void onCreate(Bundle savedInstanceState)
{
super.onCreate(savedInstanceState);
requestWindowFeature(Window.FEATURE_NO_TITLE);
setContentView(R.layout.activity_main);
FragmentManager fm = getFragmentManager();
FragmentTransaction tx = fm.beginTransaction();
tx.add(R.id.id_content, new FragmentOne(),"ONE");
tx.commit();
}
}
很简单,直接将FragmentOne添加到布局文件中的FrameLayout中,注意这里并没有调用FragmentTransaction.addToBackStack(String),因为我不喜欢在当前显示时,点击Back键出现白板。而是正确的相应Back键,即退出我们的Activity.
下面是FragmentOne
package com.zhy.zhy_fragments;
import android.app.Fragment;
import android.app.FragmentManager;
import android.app.FragmentTransaction;
import android.os.Bundle;
import android.view.LayoutInflater;
import android.view.View;
import android.view.View.OnClickListener;
import android.view.ViewGroup;
import android.widget.Button;
public class FragmentOne extends Fragment implements OnClickListener
{
private Button mBtn;
@Override
public View onCreateView(LayoutInflater inflater, ViewGroup container,
Bundle savedInstanceState)
{
View view = inflater.inflate(R.layout.fragment_one, container, false);
mBtn = (Button) view.findViewById(R.id.id_fragment_one_btn);
mBtn.setOnClickListener(this);
return view;
}
@Override
public void onClick(View v)
{
FragmentTwo fTwo = new FragmentTwo();
FragmentManager fm = getFragmentManager();
FragmentTransaction tx = fm.beginTransaction();
tx.replace(R.id.id_content, fTwo, "TWO");
tx.addToBackStack(null);
tx.commit();
}
}
我们在点击FragmentOne中的按钮时,使用了replace方法,如果你看了前一篇博客,一定记得replace是remove和add的合体,并且如果不添加事务到回退栈,前一个Fragment实例会被销毁。这里很明显,我们调用tx.addToBackStack(null);将当前的事务添加到了回退栈,所以FragmentOne实例不会被销毁,但是视图层次依然会被销毁,即会调用onDestoryView和onCreateView,证据就是:仔细看上面的效果图,我们在跳转前在文本框输入的内容,在用户Back得到第一个界面的时候不见了。
接下来FragmentTwo
package com.zhy.zhy_fragments;