对于没有共享存储的环境下,可以使用基于NFS的ASM来配置RAC。这里简单描述如何在Oracle 18c RAC环境下配置基于NFS的ASM服务。
1、环境介绍所用到的主机信息如图中所示:
RAC节点分别编辑/etc/fstab文件,加入以下内容:
[root@odb01 ~]# vi /etc/fstab onas:/u02 /u02 nfs rw,bg,hard,nointr,tcp,vers=3,timeo=600,rsize=32768,wsize=32768,actimeo=0 0 0 [root@odb01 ~]# mount -a [root@odb02 ~]# vi /etc/fstab onas:/u02 /u02 nfs rw,bg,hard,nointr,tcp,vers=3,timeo=600,rsize=32768,wsize=32768,actimeo=0 0 0 [root@odb02 ~]# mount -a 4、安装Grid组件 4.1 初始安装具体的安装过程不做过多描述,只截取几张ASM部分的截图。
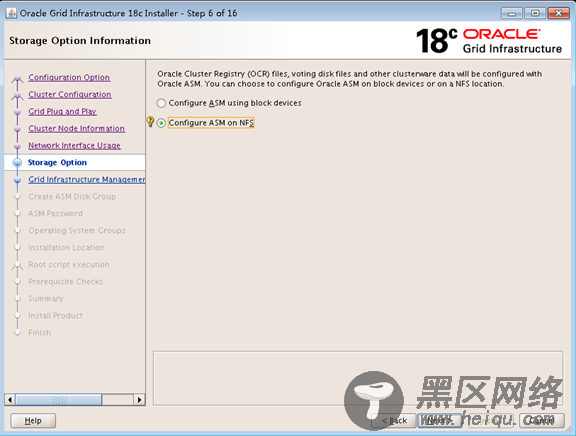
这里使用第二个选项“Configure ASM on NFS”,使用了此选项后,系统会自动创建共享磁盘。
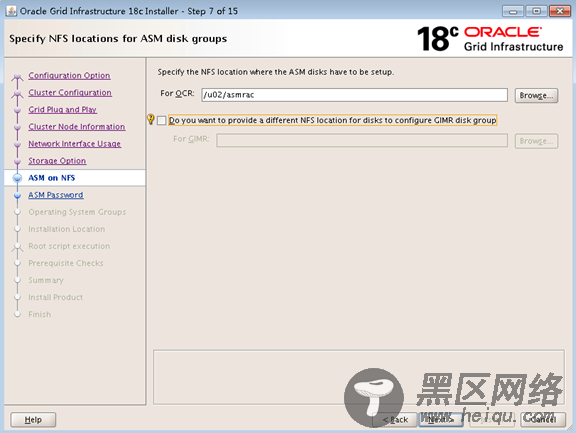
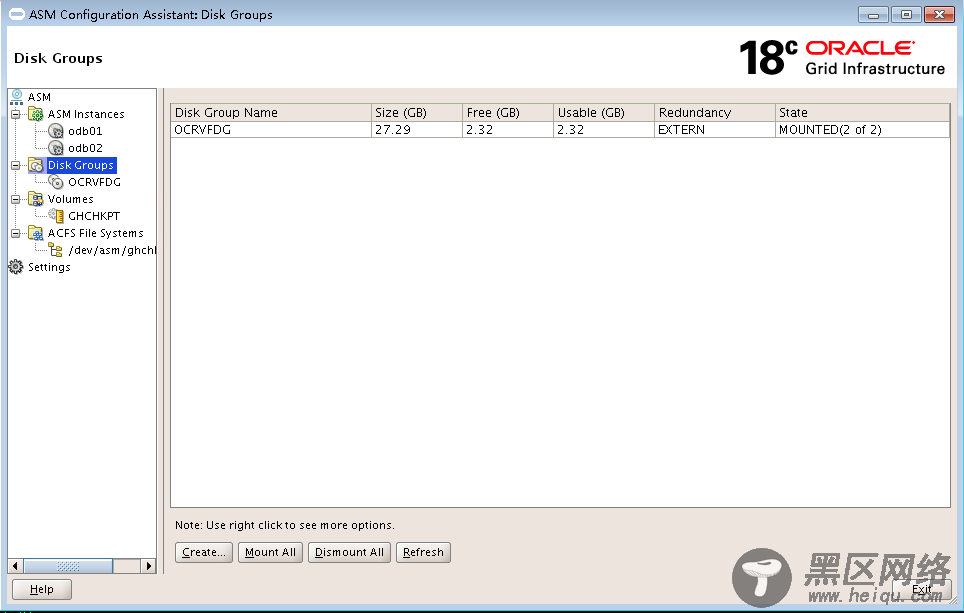
指定OCR的位置,下一步。待Grid组件安装并配置完成后,默认会创建一块30G大小的磁盘ocrvfdgdisk0,用于OCRVFDG磁盘组,如下: [root@odb01 ~]# la /u02/asmrac/ total 33G drwxr-xr-x 2 grid oinstall 40 Sep 4 17:05 . drwxr-xr-x 8 root root 4.0K Sep 4 15:09 .. -rw-rw---- 1 grid asmadmin 28G Sep 5 09:52 ocrvfdgdisk0
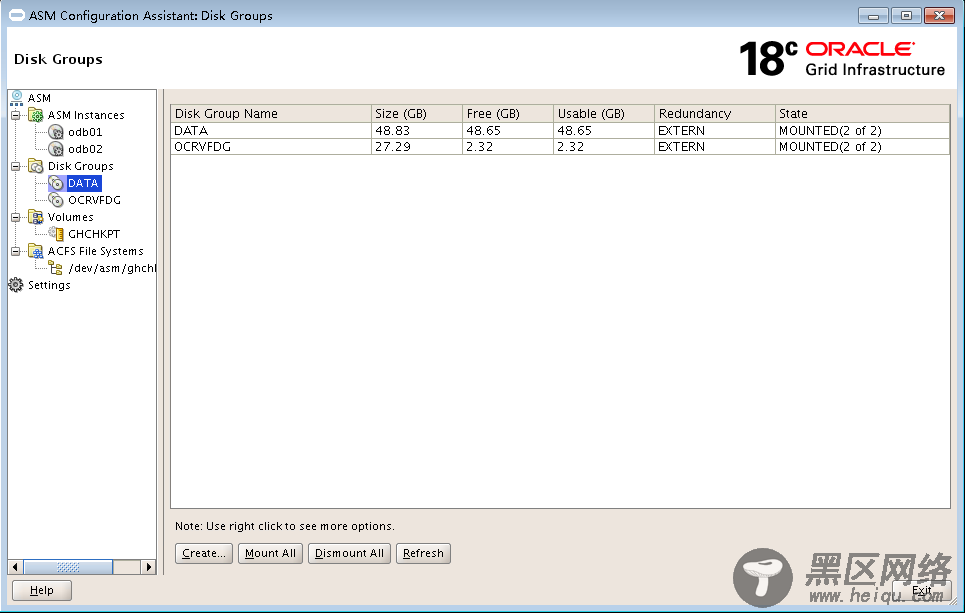
通过asmca图形界面查看,如下图所示:
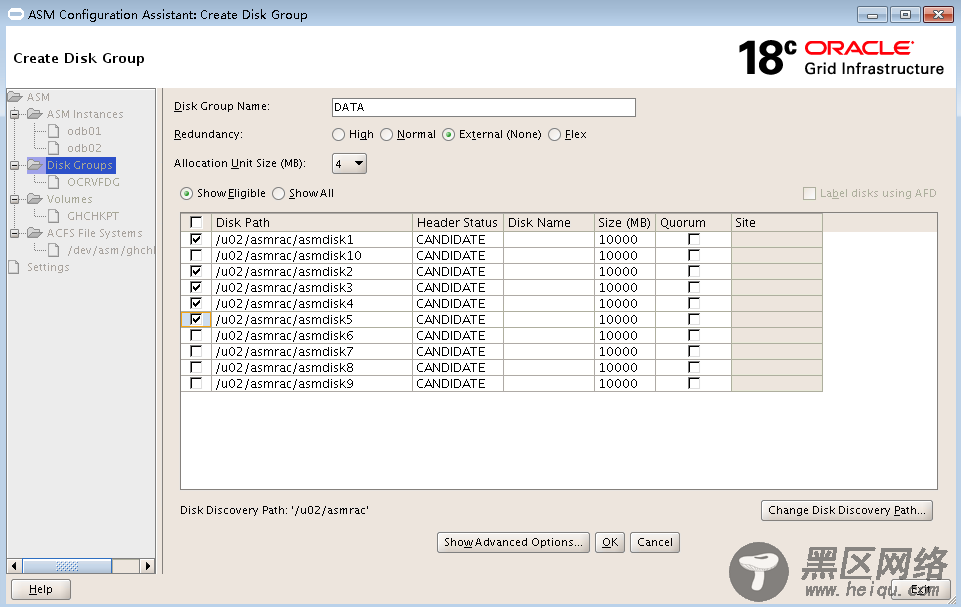
在共享目录下,创建了10块虚拟磁盘:asmdisk1~asmdisk10,分别演示使用asmca和命令行创建磁盘组。通过asmca图形界面创建data磁盘组,通过asmca命令创建fra磁盘组。
在RAC各个节点分别配置asmlib服务,如下:
root@odb01 ~]# oracleasm configure -i Configuring the Oracle ASM library driver. This will configure the on-boot properties of the Oracle ASM library driver. The following questions will determine whether the driver is loaded on boot and what permissions it will have. The current values will be shown in brackets ('[]'). Hitting <ENTER> without typing an answer will keep that current value. Ctrl-C will abort. Default user to own the driver interface []: grid Default group to own the driver interface []: dba Start Oracle ASM library driver on boot (y/n) [n]: y Scan for Oracle ASM disks on boot (y/n) [y]: Writing Oracle ASM library driver configuration: done [root@odb01 ~]# oracleasm init Creating /dev/oracleasm mount point: /dev/oracleasm Loading module "oracleasm": oracleasm Configuring "oracleasm" to use device physical block size Mounting ASMlib driver filesystem: /dev/oracleasm 5.3 创建块设备
