九.我们在此基础上安装Drupal网站
实现创建drupal网站:
DNS服务器需要添加域名解析:
1 2 3 4 5 6 7 8 9 10 11 12 13 14 15 16 17
[root@web1 ~]# vim/var/named/stu31.com.zone $TTL 600 $ORIGIN stu31.com. @ IN SOA ns.stu31.com. root.stu31.com. ( 2014122302 1H 3M 5D 6H ) @ IN NS ns IN MX 5 mail ns IN A 172.16.31.30 www IN A 172.16.31.30 www IN A 172.16.31.31 web IN A 172.16.31.30 web IN A 172.16.31.31 mail IN A 172.16.31.30
重启named服务:
1 2 3
[root@web1 ~]# service named restart Stopping named: [ OK ] Starting named: [ OK ]
测试解析:
1 2 3 4 5 6 7 8 9 10 11 12 13 14 15 16 17 18 19 20 21 22 23 24 25
[root@web2 ~]# dig -t A web.stu31.com@172.16.31.30 ; <<>> DiG9.8.2rc1-RedHat-9.8.2-0.30.rc1.el6 <<>> -t A web.stu31.com@172.16.31.30 ;; global options: +cmd ;; Got answer: ;; ->>HEADER<<- opcode: QUERY,status: NOERROR, id: 60232 ;; flags: qr aa rd ra; QUERY: 1, ANSWER: 2,AUTHORITY: 1, ADDITIONAL: 1 ;; QUESTION SECTION: ;web.stu31.com. IN A ;; ANSWER SECTION: web.stu31.com. 600 IN A 172.16.31.30 web.stu31.com. 600 IN A 172.16.31.31 ;; AUTHORITY SECTION: stu31.com. 600 IN NS ns.stu31.com. ;; ADDITIONAL SECTION: ns.stu31.com. 600 IN A 172.16.31.30 ;; Query time: 4 msec ;; SERVER: 172.16.31.30#53(172.16.31.30) ;; WHEN: Wed Dec 24 08:16:36 2014 ;; MSG SIZE rcvd: 96
在php服务器上创建NFS文件目录共享,以存放drupal网站的静态资源:
1 2 3 4 5 6 7
[root@php ~]# mkdir /web/drupal [root@php ~]# showmount -e 172.16.31.32 Export list for 172.16.31.32: /web/blog 172.16.31.31,172.16.31.30 [root@php ~]# vim /etc/exports /web/blog 172.16.31.30(rw,async,no_root_squash)172.16.31.31(rw,async,no_root_squash) /web/drupal 172.16.31.30(rw,async,no_root_squash) 172.16.31.31(rw,async,no_root_squash)
重启NFS共享文件系统:
1 2 3 4 5 6 7 8 9 10 11
[root@php drupal]# service nfs restart Shutting down NFS daemon: [ OK ] Shutting down NFS mountd: [ OK ] Shutting down NFS quotas: [ OK ] Shutting down NFS services: [ OK ] Shutting down RPC idmapd: [ OK ] Starting NFS services: [ OK ] Starting NFS quotas: [ OK ] Starting NFS mountd: [ OK ] Starting NFS daemon: [ OK ] Starting RPC idmapd: [ OK ]
在NFS共享服务器端查看共享的文件目录:
1 2 3 4
[root@php drupal]# showmount -e172.16.31.32 Export list for 172.16.31.32: /web/drupal 172.16.31.31,172.16.31.30 /web/blog 172.16.31.31,172.16.31.30
准备好drupal程序包:包含中文语言包
1 2 3
[root@php ~]# ll -rw-r--r-- 1 root root 3229858 Dec 22 08:21drupal-7.34.tar.gz -rw-r--r-- 1 root root 582727 Dec 21 21:48drupal-7.34.zh-hans.po
解压程序包:
1 2 3 4 5
[root@php ~]# tar xf drupal-7.34.tar.gz [root@php ~]# mv drupal-7.34/* /web/drupal/ [root@php ~]# cd /web/drupal/ [root@php drupal]# cp sites/default/default.settings.phpsites/default/settings.php [root@php drupal]# chmod a+w sites/default/
将中文语言包放置到指定目录:
1
[root@php drupal]# cp/root/drupal-7.34.zh-hans.po profiles/standard/translations/
创建drupal动态资源存放目录,并且将drupal网站目录复制一份到动态资源存放目录:
1 2
[root@php drupal]# mkdir /www/drupal [root@php drupal]# cp -a * /www/drupal/
下面配置NFS客户端,将NFS服务器共享的drupal网站目录映射到web服务器:
切换到web服务器:
我们需要创建网站目录:
[root@web1 ~]# mkdir /web/drupal
实现自动挂载:
[root@web1 ~]# vim /etc/fstab
172.16.31.32:/web/drupal /web/drupal nfs defaults,_netdev 0 0
[root@web1 ~]# mount -a
[root@web1 ~]# mount
/dev/mapper/vg0-root on / type ext4 (rw)
proc on /proc type proc (rw)
sysfs on /sys type sysfs (rw)
devpts on /dev/pts type devpts(rw,gid=5,mode=620)
tmpfs on /dev/shm type tmpfs (rw)
/dev/sda1 on /boot type ext4 (rw)
/dev/mapper/vg0-usr on /usr type ext4 (rw)
/dev/mapper/vg0-var on /var type ext4 (rw)
none on /proc/sys/fs/binfmt_misc typebinfmt_misc (rw)
sunrpc on /var/lib/nfs/rpc_pipefs typerpc_pipefs (rw)
172.16.31.32:/web/blog on /web/blog typenfs (rw,vers=4,addr=172.16.31.32,clientaddr=172.16.31.30)
172.16.31.32:/web/drupal on /web/drupaltype nfs (rw,vers=4,addr=172.16.31.32,clientaddr=172.16.31.30)
web2服务器做同样的操作即可。
[root@web2 ~]# ls /web/drupal/
authorize.php index.php INSTALL.txt profiles themes
CHANGELOG.txt INSTALL.MySQL.txt LICENSE.txt README.txt update.php
COPYRIGHT.txt INSTALL.pgsql.txt MAINTAINERS.txt robots.txt UPGRADE.txt
cron.php install.php misc scripts web.config
includes INSTALL.sqlite.txt modules sites xmlrpc.php
PHP服务器上NFS共享文件内的网站的内容就挂载到本地了!!!
web1服务器的虚拟主机配置:
1 2 3 4 5 6 7 8 9 10 11 12 13 14
[root@web1 ~]# vim/etc/httpd24/extra/httpd-vhosts.conf <VirtualHost 172.16.31.30:80> DocumentRoot "/web/drupal" ServerName web.stu31.com ProxyRequests Off ProxyPassMatch ^/(.*\.php)$ fcgi://172.16.31.32:9000/www/drupal/$1 ErrorLog "/web/drupal/logs/drupal-error_log" CustomLog "/web/drupal/logs/drupal-access_log" common <Directory "/web/drupal"> Options none AllowOverride none Require all granted </Directory> </VirtualHost>
测试配置文件语法:
1 2 3 4
[root@web1 ~]# httpd -t (2)No such file or directory: AH02291:Cannot access directory '/web/drupal/logs/' for error log of vhost defined at/etc/httpd24/extra/httpd-vhosts.conf:38 (2)No such file or directory: AH02291:Cannot access directory '/web/blog/logs/' for error log of vhost defined at/etc/httpd24/extra/httpd-vhosts.conf:24 AH00014: Configuration check failed
提示的错误是日志文件目录未创建!创建日志目录:
1 2 3
[root@web1 ~]# mkdir /web/drupal/logs [root@web1 ~]# httpd -t Syntax OK
web2的虚拟主机配置:注意只需要改变一下虚拟主机的地址即可了!
1 2 3 4 5 6 7 8 9 10 11 12 13 14
[root@web2 ~]# mkdir /web/drupal <VirtualHost 172.16.31.31:80> DocumentRoot "/web/drupal" ServerName web.stu31.com ProxyRequests Off ProxyPassMatch ^/(.*\.php)$ fcgi://172.16.31.32:9000/www/drupal/$1 ErrorLog "/web/drupal/logs/drupal-error_log" CustomLog "/web/drupal/logs/drupal-access_log" common <Directory "/web/drupal"> Options none AllowOverride none Require all granted </Directory> </VirtualHost>
虚拟主机配置完成!
切换到数据库服务器为drupal网站创建数据库及数据库管理用户及密码:
1 2 3 4 5 6 7 8 9 10 11 12 13 14 15 16 17 18 19 20 21 22 23 24 25 26 27 28 29 30 31 32 33 34
[root@mysql ~]# mysql -uroot -p Enter password: Welcome to the MariaDB monitor. Commands end with ; or \g. Your MariaDB connection id is 32 Server version: 10.0.10-MariaDB-log MariaDBServer Copyright (c) 2000, 2014, Oracle, SkySQL Aband others. Type 'help;' or '\h' for help. Type '\c' toclear the current input statement. MariaDB [(none)]> create databasedrupal; Query OK, 1 row affected (0.00 sec) MariaDB [(none)]> show databases; +--------------------+ | Database | +--------------------+ | drupal | | information_schema | | mysql | | performance_schema | | test | | wpdb | +--------------------+ 6 rows in set (0.02 sec) MariaDB [(none)]> grant all on drupal.*to 'drupal'@'172.16.%.%' identified by 'oracle'; Query OK, 0 rows affected (0.03 sec) MariaDB [(none)]> flush privileges; Query OK, 0 rows affected (0.01 sec) MariaDB [(none)]> \q Bye
重启httpd服务:
1 2 3 4 5 6 7
[root@web1 ~]# service httpd24 restart Stopping httpd: [ OK ] Starting httpd: [ OK ] [root@web2 ~]# service httpd24 restart Stopping httpd: [ OK ] Starting httpd: [ OK ]
开始去客户端安装drupal:
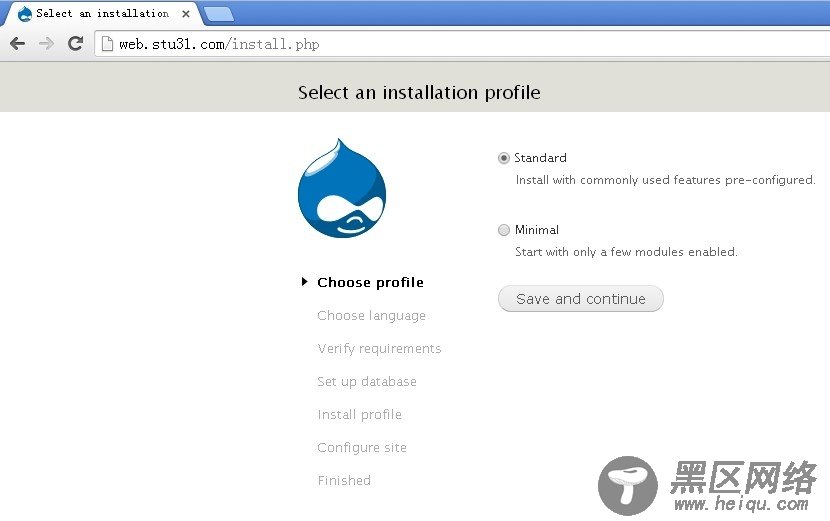
输入web.stu31.com访问drupal网站:
选择标准安装:
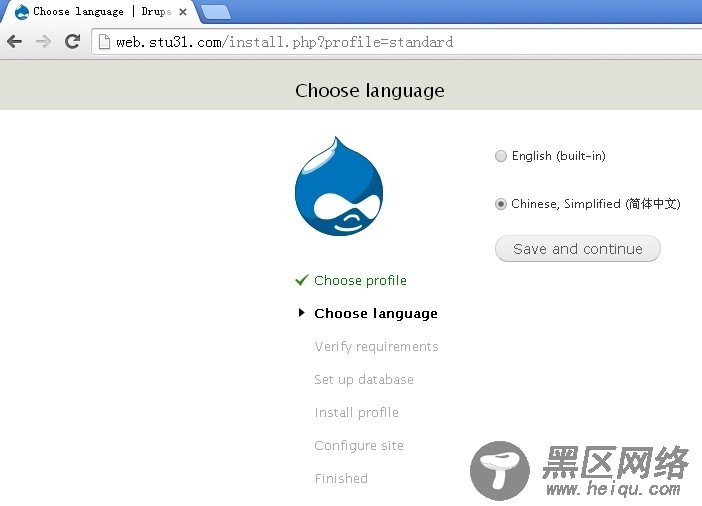
选择简体中文:
检查安装条件是否通过:
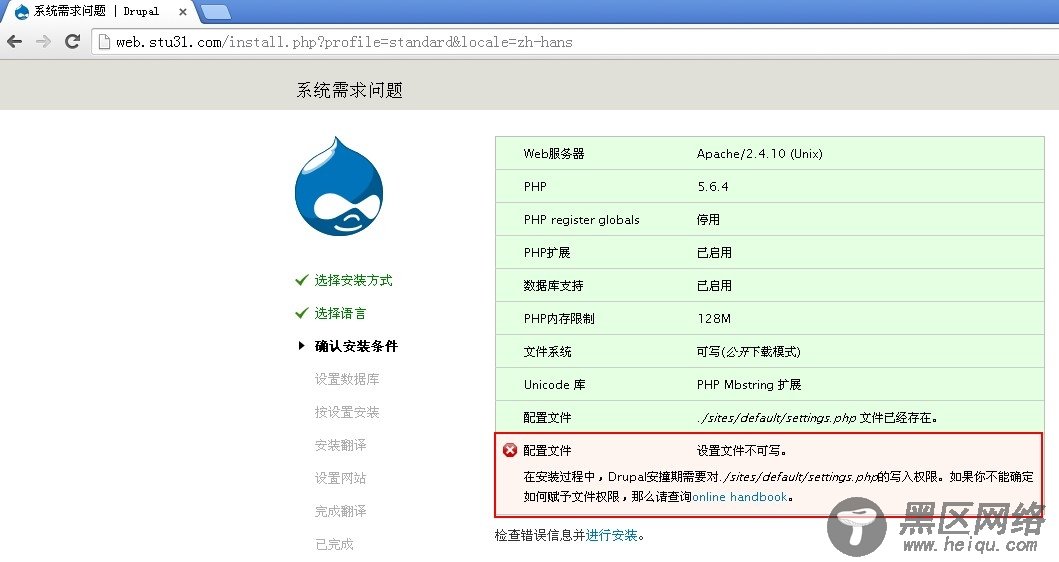
出现不可写,需要对sites目录赋予写权限:
需要同时更改NFS共享目录和php服务器本地的/www/drupal目录:
1 2
[root@php ~]# chmod -R a+w/web/drupal/sites/ [root@php ~]# chmod -R a+w /www/drupal/sites/
再次刷新安装成功进入下一步:
设置数据库,填入我们在上面设置的数据库名称和用户名及密码
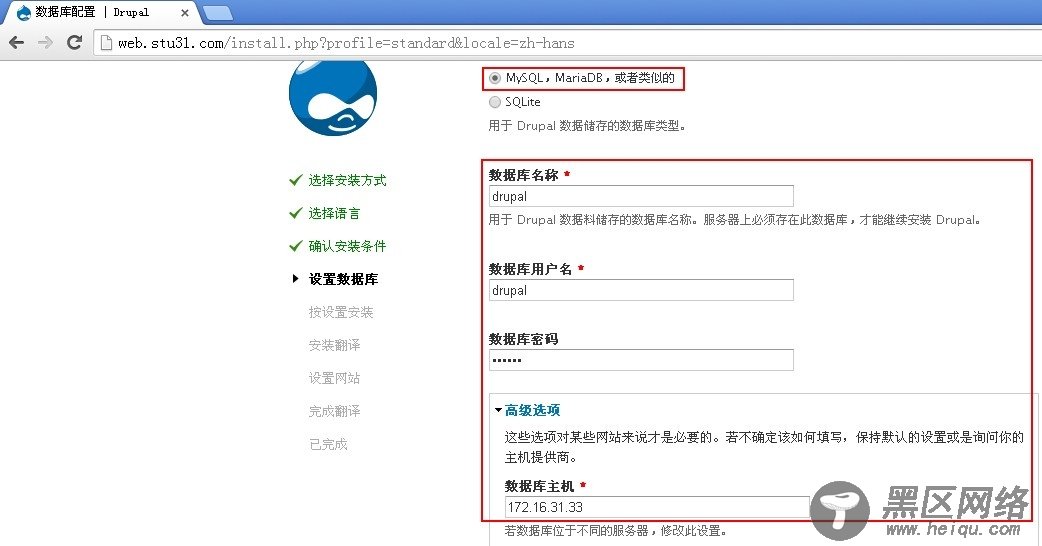
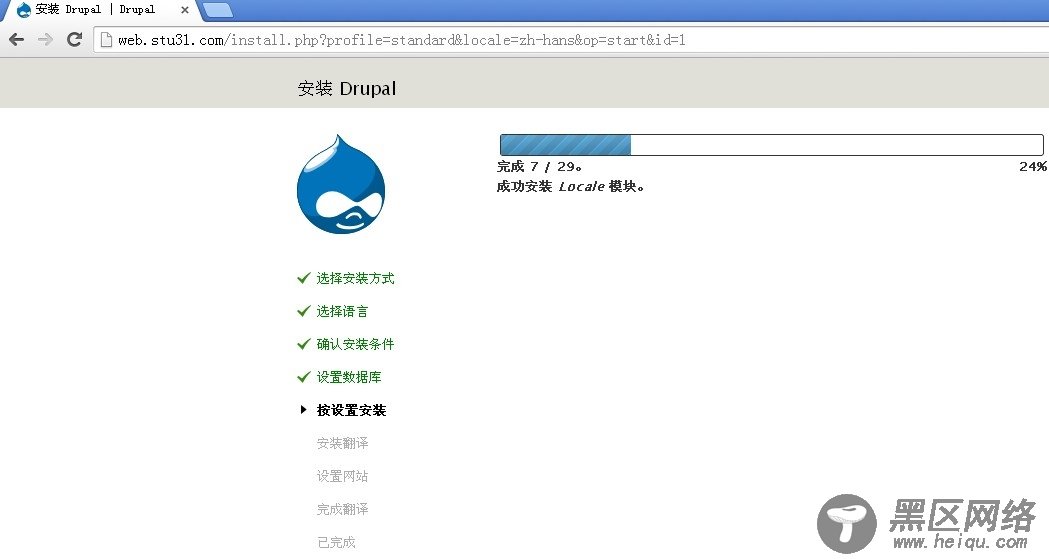
安装模块:
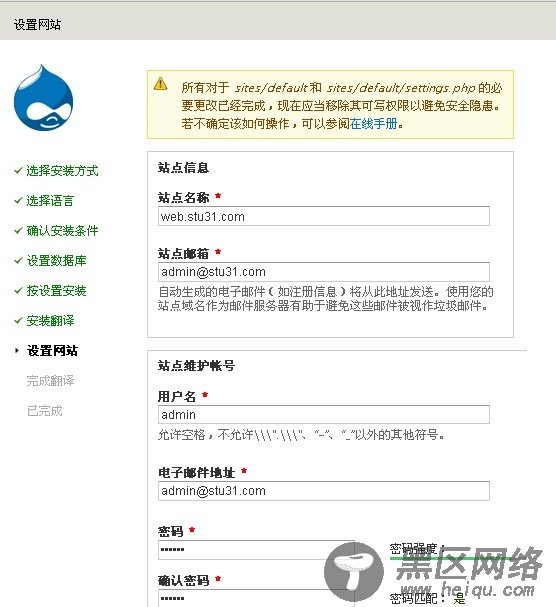
设置网站:
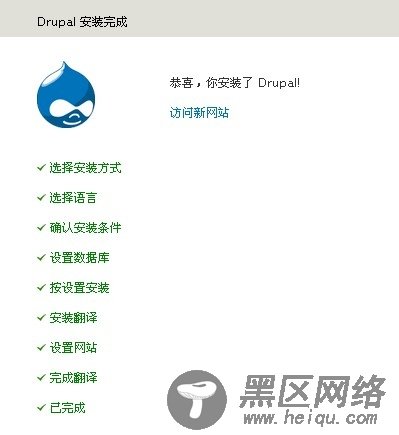
完成安装:
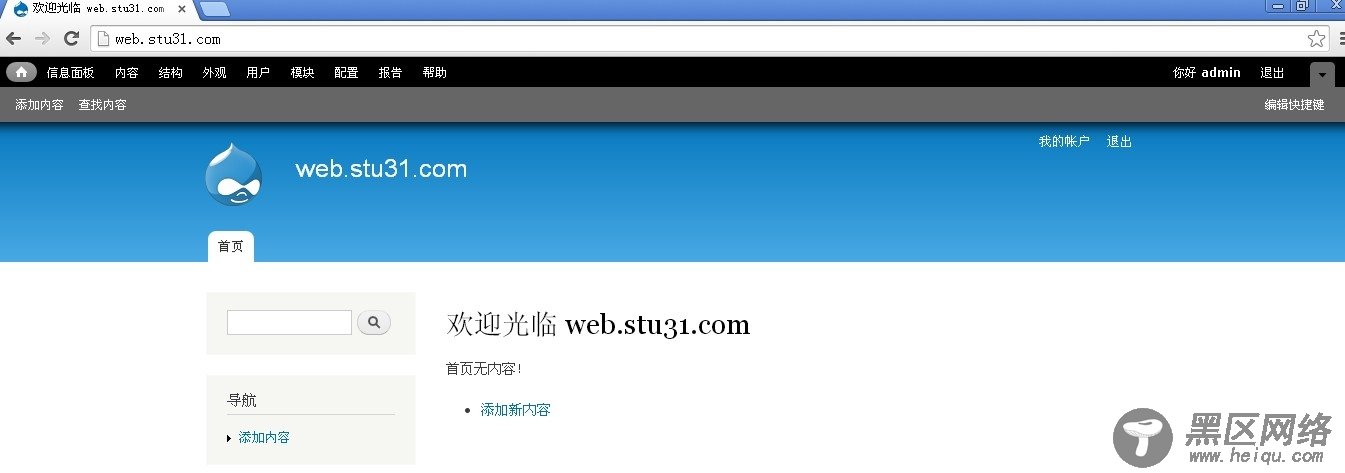
进入网站首页:
安装完成后将sites/default/settings.php的权限更改为只读权限,考虑到安全:
1 2
[root@php ~]# chmod 444/web/drupal/sites/default/settings.php [root@php ~]# chmod 444/www/drupal/sites/default/settings.php
到这里drupal网站安装就完成了!!!

