<!DOCTYPE html> <html lang="en"> <head> <meta charset="UTF-8"> <title>Title</title> <script src="https://www.jb51.net/statics/vue.min.js"></script> </head> <body> <div> </div> <script> let Model = { template: ` <div> <input v-bind:value="value" v-on:input="$emit('input', $event.target.value)" /> <h1>{{ value }}</h1> `, props: ['value'] }; let App = { template: ` <div> <custom-input v-model="searchText"></custom-input> `, components: { 'custom-input': Model, }, data(){ return { searchText: "", } } }; new Vue({ el: "#app", template: `<App></App>`, components: { App, } }) </script> </body> </html>
使用组件的注意事项
注意事项一:单个根元素
当构建一个内容页面的组件时,我们的组件可能包含多个HTML标签。
<h1>Hello World</h1> <h2>Hello Vue</h2>
然而如果你在模板中尝试这样写,Vue 会显示一个错误,并解释道 every component must have a single root element (每个组件必须只有一个根元素) 。你可以将模板的内容包裹在一个父元素内,来修复这个问题,例如:
<div> <h1>Hello World</h1> <h2>Hello Vue</h2> </div>
注意事项二:解析特殊HTML元素
有些 HTML 元素,诸如 <ul> 、 <ol> 、 <table> 和 <select> ,对于哪些元素可以出现在其内部是有严格限制的。而有些元素,诸如 <li> 、 <tr> 和 <option> ,只能出现在其它某些特定的元素内部。
这会导致我们使用这些有约束条件的元素时遇到一些问题。例如:
<table> <blog-post-row></blog-post-row> </table>
这个自定义组件 <blog-post-row> 会被作为无效的内容提升到外部,并导致最终渲染结果出错。幸好这个特殊的 is 特性给了我们一个变通的办法:
<table> <tr is="blog-post-row"></tr> </table>
需要注意的是如果我们从以下来源使用模板的话,这条限制是不存在的:
字符串 (例如:template: '...')
单文件组件 (.vue) <script type="text/x-template">
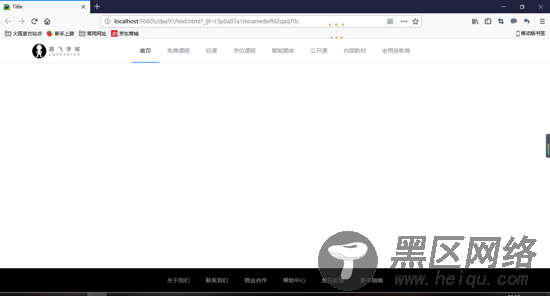
使用组件实现路飞导航栏
<!DOCTYPE html> <html lang="en"> <head> <meta charset="UTF-8"> <title>Title</title> <script src="https://www.jb51.net/statics/vue.min.js"></script> <!-- 引入样式 --> <link href="https://unpkg.com/element-ui/lib/theme-chalk/index.css"> <!-- 引入组件库 --> <script src="https://unpkg.com/element-ui/lib/index.js"></script> <style> body { margin: 0; padding: 0; } .header { position: fixed; top: 0; left: 0; width: 100%; } .el-menu { display: flex; align-items: center; justify-content: center; } .footer { position: fixed; bottom: 0; left: 0; width: 100%; } .header img { position: absolute; left: 80px; top: -4px; width: 118px; height: 70px; z-index: 999; } </style> </head> <body> <div> </div> <template> <div> <img src="https://www.luffycity.com/static/img/head-logo.a7cedf3.svg"/> <el-menu :default-active="activeIndex" mode="horizontal"> <el-menu-item index="1">首页</el-menu-item> <el-menu-item index="2">免费课程</el-menu-item> <el-menu-item index="3">轻课</el-menu-item> <el-menu-item index="4">学位课程</el-menu-item> <el-menu-item index="5">智能题库</el-menu-item> <el-menu-item index="6">公开课</el-menu-item> <el-menu-item index="7">内部教材</el-menu-item> <el-menu-item index="8">老男孩教育</el-menu-item> </el-menu> </div> </template> <template> <div> <el-menu mode="horizontal" background-color="black"> <el-menu-item index="1">关于我们</el-menu-item> <el-menu-item index="2">联系我们</el-menu-item> <el-menu-item index="3">商业合作</el-menu-item> <el-menu-item index="4">帮助中心</el-menu-item> <el-menu-item index="5">意见反馈</el-menu-item> <el-menu-item index="6">新手指南</el-menu-item> </el-menu> </div> </template> <script> let pageHeader = { template: "#header", data() { return { activeIndex: "1", } } }; let pageFooter = { template: "#footer", }; let App = { template: ` <div> <div> <page-header></page-header> </div> <div> <page-footer></page-footer> </div> </div> `, components: { 'page-header': pageHeader, 'page-footer': pageFooter, } }; new Vue({ el: "#app", template: `<app></app>`, components: { 'app': App, } }) </script> </body> </html>
效果图:

总结
