upstream fdfs_group1 { server 192.168.5.72 weight=1 max_fails=2 fail_timeout=30s; server 192.168.5.73 weight=1 max_fails=2 fail_timeout=30s; } server { listen 80; server_name 192.168.5.71; location /group1/M00 { proxy_pass ; } }
###---------------------------- PHP客户端配置 ------------------------------###
#首先客户端要安装LNMP环境或者LANMP环境
#因为php的客户端安装也会依赖fastdfs本身的一些库文件,所以要安装fastdfs
cd /opt/fastdfs/php_client /usr/local/php/bin/phpize ./configure --with-php-config=/usr/local/php/bin/php-config make;make install
cat fastdfs_client.ini >> /usr/local/php/etc/php.ini
#配置fastDFS的client.conf
mkdir -p /data/fastdfs cp /etc/fdfs/client.conf.sample /etc/fdfs/client.conf vi /etc/fdfs/client.conf base_path=/data/fastfds tracker_server=192.168.5.71:22122 http.tracker_server_port=80
#重新加载php
service php-fpm reload
#验证模块是否被正常加载
/usr/local/php/bin/php -m | grep fastdfs_client
#通过http上传测试
cat test.php
<html> <body> <form action="upload.php" method="post" enctype="multipart/form-data"> <label for="file">Filename:</label> <input type="file" /> <br /> <input type="submit" value="Submit" /> </form> </body> </html>
cat upload.php
<?php header('Content-type:text/html;charset=utf-8'); //上传附件 function uploadAttach() {/*{{{*/ $ret = array(); $ret['errorcode'] = 0; $ret['errormsg'] = ''; if(!$_FILES || false == isset($_FILES["upFile"])) { $ret['errorcode'] = 1; $ret['errormsg'] = "ERROR:upFile is not set"; return $ret; } $file = $_FILES["upFile"]; if (false == isset($file['tmp_name']) || false == is_file($file['tmp_name'])) { $ret['errorcode'] = 2; $ret['errormsg'] = "tmp_name is not file"; return $ret; } if (0 == filesize($file['tmp_name'])) { $ret['errorcode'] = 3; $ret['errormsg'] = "tmp_name filesize is 0"; return $ret; } $curlFile = new CurlFile($file['tmp_name'], $file['type'], $file['name']); $fileSuffix = getSuffix($curlFile->getPostFilename()); $ret['file'] = $file; $ret['fileId'] = uploadToFastdfs($curlFile, $fileSuffix); return $ret; }/*}}}*/ //获取后缀 function getSuffix($fileName) {/*{{{*/ preg_match('/\.(\w+)?$/', $fileName, $matchs); return isset($matchs[1])?$matchs[1]:''; }/*}}}*/ //上传文件到fastdfs function uploadToFastdfs(CurlFile $file, $fileSuffix) {/*{{{*/ $fdfs = new FastDFS(); $tracker = $fdfs->tracker_get_connection(); $fileId = $fdfs->storage_upload_by_filebuff1(file_get_contents($file->getFilename()), $fileSuffix); $fdfs->tracker_close_all_connections(); return $fileId; }/*}}}*/ function start() { $ret = uploadAttach(); print_r($ret); } start(); ?>


#通过php脚本上传测试
echo "php client is here." > /opt/upload.txt
cat test.php
<?php var_dump(function_exists('fastdfs_storage_upload_by_filename')); $ret = fastdfs_storage_upload_by_filename('/opt/upload.txt'); var_dump($ret); ?>
#执行php脚本
/usr/local/php/bin/php test.php
###------------------------- storage server宕机测试 ------------------------###
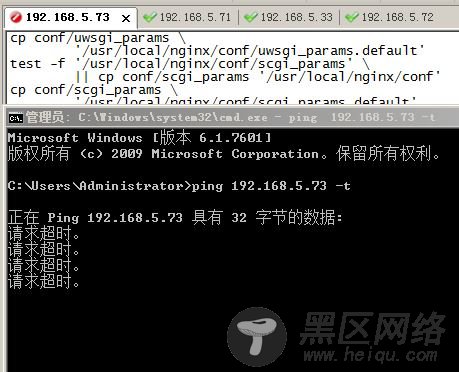
#先关闭storage73

#通过tracker可以看到storage73已经不在线了
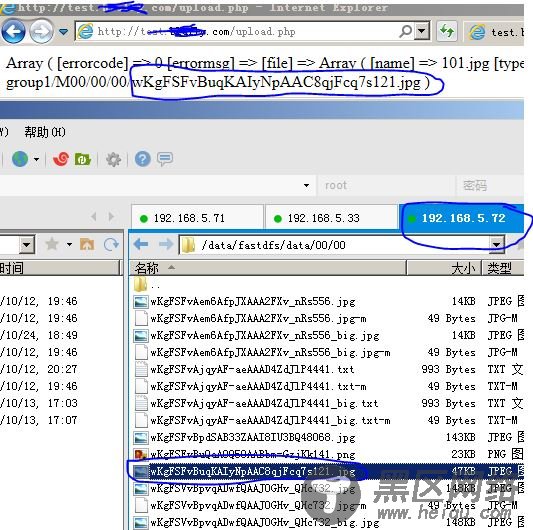
#然后通过客户端上传一张图片

#上传的图片可以正常访问

#重启storage73看上传的图片有没有同步过来


###--------------------------- 横向扩容,增加group2 ------------------------###
#添加一组storage server: 192.168.5.74 192.168.5.75(group2)
#分别安装fastdfs、nginx、fastdfs-nginx-module
#修改group2成员的storage.conf(192.168.5.74 192.168.5.75)
cp /etc/fdfs/storage.conf.sample /etc/fdfs/storage.conf
#修改storage server的配置文件:
vi /etc/fdfs/storage.conf group_name=group2 bind_addr=192.168.5.74 base_path=/data/fastdfs store_path0=/data/fastdfs tracker_server=192.168.5.71:22122 http.server_port=80
#创建数据目录,并启动storage server
mkdir -p /data/fastdfs /etc/init.d/fdfs_storaged start
#开机启动
/sbin/chkconfig --add fdfs_storaged /sbin/chkconfig --level 2345 fdfs_storaged on
#修改所有storage server的mod_fastdfs.conf配置文件

