
[root@slave1 kibana]# cd bin
[root@slave1 bin]# ls
kibana kibana-plugin nohup.out
[root@slave1 bin]# ./kibana
log [01:23:27.650] [info][status][plugin:kibana@5.2.0] Status changed from uninitialized to green - Ready
log [01:23:27.748] [info][status][plugin:elasticsearch@5.2.0] Status changed from uninitialized to yellow - Waiting for Elasticsearch
log [01:23:27.786] [info][status][plugin:console@5.2.0] Status changed from uninitialized to green - Ready
log [01:23:27.794] [warning] You're running Kibana 5.2.0 with some different versions of Elasticsearch. Update Kibana or Elasticsearch to the same version to prevent compatibility issues: v5.6.4 @ 192.168.23.151:9200 (192.168.23.151)
log [01:23:27.811] [info][status][plugin:elasticsearch@5.2.0] Status changed from yellow to green - Kibana index ready
log [01:23:28.250] [info][status][plugin:timelion@5.2.0] Status changed from uninitialized to green - Ready
log [01:23:28.255] [info][listening] Server running at :5601
log [01:23:28.259] [info][status][ui settings] Status changed from uninitialized to green - Ready
5. 浏览器中输入::5601/ 你就可以打开kibana页面了,,默认让我指定一个查看的Index。

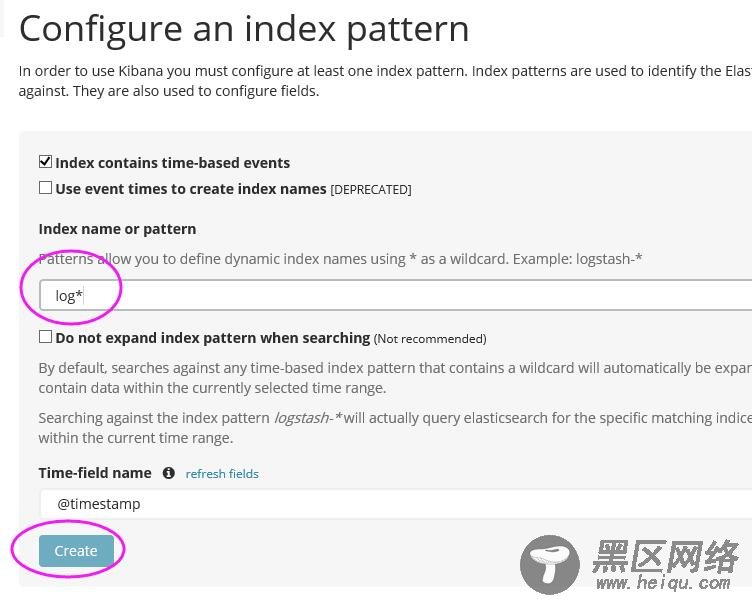
接下来我们在本机的/logs文件夹下创建一个简单的1.log文件,内容为“hello world”,然后在kibana上将logstash-* 改成 log* ,Create按钮就会自动出来。
[root@slave1 logs]# echo 'hello world' > 1.log
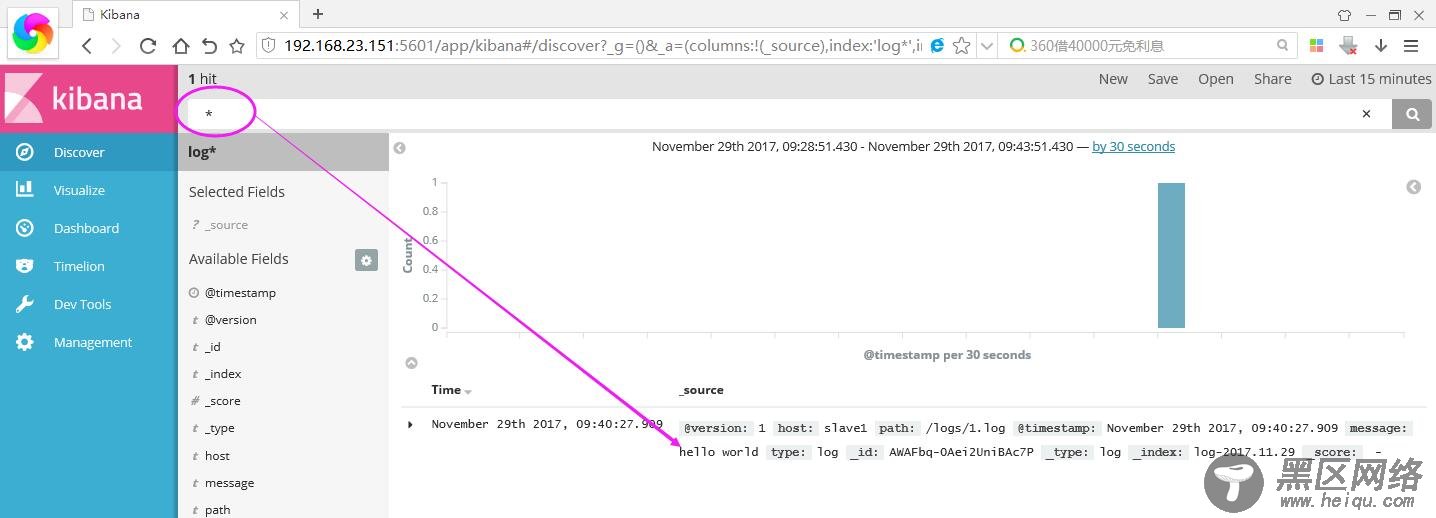
进入之后,点击Discover,你就可以找到你输入的内容啦~~~~ 是不是很帅气。。。
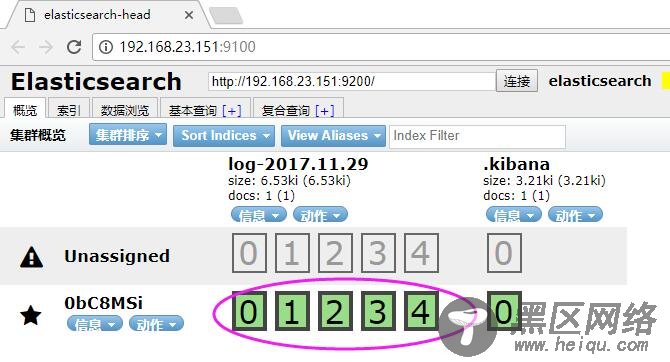
如果你装了head安装包,你还可以看到它确实带了日期模式的Index索引,还自带5个默认分片数。
好了,本篇就说这么多吧,希望对你有帮助。
更多ELK相关教程见以下内容: