传进来的state对象,通过new Vue({data: {state}})的方式,让数据变成响应式的。当访问state对象时候,就直接返回响应式的数据,这样子在App.vue中就可以通过this.$store.state.count拿到state的数据啦,并且是响应式的呢。
编写mutations、actions、getters
上面我们已经设置好state为响应式的数据,这里我们在store.js里面写上mutations、actions、getters,如下
import Vue from 'vue' import Vuex from './vuex' // 引入我们的自己编写的文件 Vue.use(Vuex) // 安装store // 实例化store,参数数对象 export default new Vuex.Store({ state: { count : 1000 }, getters : { newCount (state) { return state.count + 100 } }, mutations: { change (state) { console.log(state.count) state.count += 10 } }, actions: { change ({commit}) { // 模拟异步 setTimeout(() => { commit('change') }, 1000) } } })
配置选项都写好之后,就看到getters对象里面有个newCount函数,mutations和actions对象里面都有个change函数,配置好store之后我们在App.vue就可以写上,dispatch和commit,分别可以触发actions和mutations,代码如下
<template> <div> 这里是store的state------->{{this.$store.state.count}} <br/> 这里是store的getter------->{{this.$store.getters.newCount}} <br/> <button @click="change">点击触发dispach--> actions</button> <button @click="change1">点击触发commit---> mutations</button> </div> </template> <script> export default { name: 'app', methods: { change () { this.$store.dispatch('change') // 触发actions对应的change }, change1 () { this.$store.commit('change') // 触发mutations对应的change } }, mounted () { console.log(this.$store) } } </script>
数据都配置好之后,我们开始编写store类,在此之前我们先编写一个循环对象工具函数。
const myforEach = (obj, callback) => Object.keys(obj).forEach(key => callback(key, obj[key])) // 作用: // 例如{a: '123'}, 把对象的key和value作为参数 // 然后就是函数运行callback(a, '123')
工具函数都准备好了,之后,下面直接县编写getters、mutations和actions的实现
class Store { constructor (options) { let { state = {}, getters = {}, actions = {}, mutations = {} } = options this.getters = {} this.mutations = {} this.actions = {} // vuex的核心就是借用vue的实例,因为vuex的数据更改回更新视图 this._vm = new Vue({ data: { state } }) // 循环getters的对象 myforEach(getters, (getterName, getterFn) => { // 对this.getters对象进行包装,和vue的computed是差不多的 // 例如 this.getters['newCount'] = fn(state) // 执行 this.getters['newCount']()就会返回计算的数据啦 Object.defineProperty(this.getters, getterName, { get: () => getterFn(state) }) }) // 这里是mutations各个key和值都写到,this.mutations对象上面 // 执行的时候就是例如:this.mutations['change']() myforEach(mutations, (mutationName, mutationsFn) => { // this.mutations.change = () => { change(state) } this.mutations[mutationName] = () => { mutationsFn.call(this, state) } }) // 原理同上 myforEach(actions, (actionName, actionFn) => { // this.mutations.change = () => { change(state) } this.actions[actionName] = () => { actionFn.call(this, this) } }) const {commit , dispatch} = this // 先存一份,避免this.commit会覆盖原型上的this.commit // 解构 把this绑定好 // 通过结构的方式也要先调用这类,然后在下面在调用原型的对应函数 this.commit = type => { commit.call(this, type) } this.dispatch = type => { dispatch.call(this, type) } } get state() { // Object.defineProperty 同理 return this._vm.state } // commi调用 commit (type) { this.mutations[type]() } // dispatch调用 dispatch (type) { this.actions[type]() } }
通过上面的,我们可以看出,其实mutations和actions都是把传入的参数,赋值到store实例上的this.mutations和this.actions对象里面。
当组件中this.$store.commit('change')的时候 其实是调用this.mutations.change(state),就达到了改变数据的效果,actions同理。
getters是通过对Object.defineProperty(this.getters, getterName, {})
对this.getters进行包装当组件中this.$store.getters.newCount其实是调用getters对象里面的newCount(state),然后返回计算结果。就可以显示到界面上了。
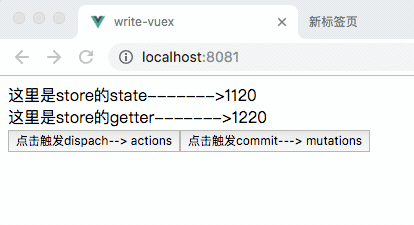
大家看看完成后的效果图。
到这里大家应该懂了vuex的内部代码的工作流程了,vuex的一半核心应该在这里了。为什么说一半,因为还有一个核心概念module,也就是vuex的数据的模块化。
vuex数据模块化
由于使用单一状态树,应用的所有状态会集中到一个比较大的对象。当应用变得非常复杂时,store 对象就有可能变得相当臃肿。