还是那句话,网上找个完整的博客真的难,实现效果全靠摸索啊
第一步:安装axios 、vuex npm i -s axios npm i -s vuex 执行这两句 ,vue等环境搭建就不废话了
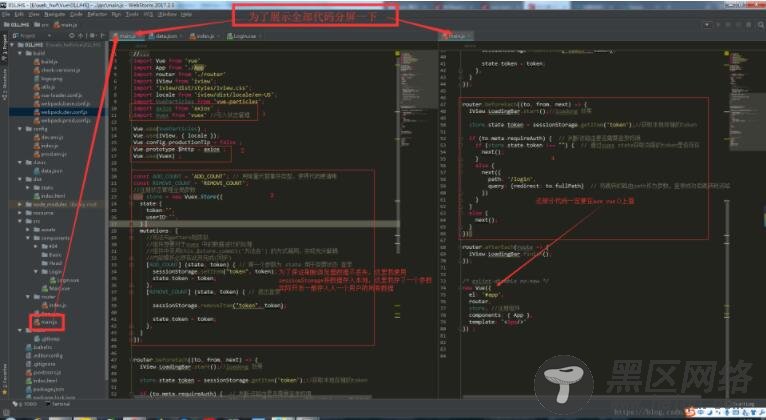
第二步:配置main.js文件

上图不上码,菊花万人捅,附上代码
// The Vue build version to load with the `import` command // (runtime-only or standalone) has been set in webpack.base.conf with an alias. import Vue from 'vue' import App from './App' import router from './router' import iView from 'iview'; import 'iview/dist/styles/iview.css'; import locale from 'iview/dist/locale/en-US'; import VueParticles from 'vue-particles'; import axios from 'axios' ; import Vuex from 'vuex' //引入状态管理 Vue.use(VueParticles) ; Vue.use(iView, { locale }); Vue.config.productionTip = false ; Vue.prototype.$http = axios ; Vue.use(Vuex) ; const ADD_COUNT = 'ADD_COUNT'; // 用常量代替事件类型,使得代码更清晰 const REMOVE_COUNT = 'REMOVE_COUNT'; //注册状态管理全局参数 var store = new Vuex.Store({ state:{ token:'', userID:'', }, mutations: { //写法与getters相类似 //组件想要对于vuex 中的数据进行的处理 //组件中采用this.$store.commit('方法名') 的方式调用,实现充分解耦 //内部操作必须在此刻完成(同步) [ADD_COUNT] (state, token) { // 第一个参数为 state 用于变更状态 登录 sessionStorage.setItem("token", token); state.token = token; }, [REMOVE_COUNT] (state, token) { // 退出登录 sessionStorage.removeItem("token", token); state.token = token; }, } }); router.beforeEach((to, from, next) => { iView.LoadingBar.start();//loadong 效果 store.state.token = sessionStorage.getItem('token');//获取本地存储的token if (to.meta.requireAuth) { // 判断该路由是否需要登录权限 if (store.state.token !== "") { // 通过vuex state获取当前的token是否存 next(); } else { next({ path: '/login', query: {redirect: to.fullPath} // 将跳转的路由path作为参数,登录成功后跳转到该路由 }) } } else { next(); } }) router.afterEach(route => { iView.LoadingBar.finish(); }); /* eslint-disable no-new */ new Vue({ el: '#app', router, store, //注册组件 components: { App }, template: '<App/>' }) ;
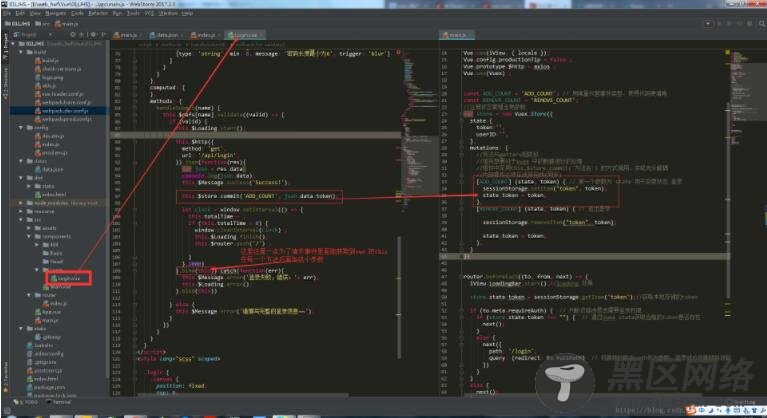
第三步:进行登录 操作,调用main.js 中定义好的修改token的方法[ADD_COUNT]

附上请求部分代码
this.$http({ method: 'get', url: '/api/login', }).then(function(res){ var json = res.data console.log(json.data); this.$Message.success('Success!'); this.$store.commit('ADD_COUNT', json.data.token); let clock = window.setInterval(() => { this.totalTime-- ; if (this.totalTime < 0) { window.clearInterval(clock) ; this.$Loading.finish(); this.$router.push('https://www.jb51.net/') ; } },1000) }.bind(this)).catch(function(err){ this.$Message.error('登录失败,错误:'+ err); this.$Loading.error(); }.bind(this))
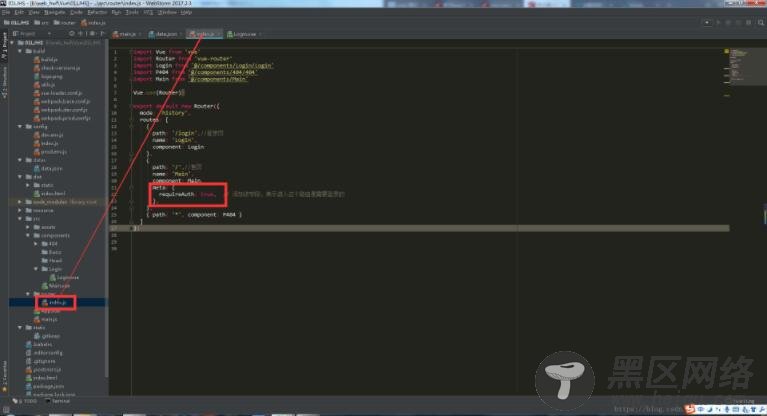
差点忘记了一点,在router中要配置需要验证是否登录的请求

附上router/index.js 代码
import Vue from 'vue' import Router from 'vue-router' import Login from '@/components/Login/Login' import P404 from '@/components/404/404' import Main from '@/components/Main' Vue.use(Router) export default new Router({ mode: 'history', routes: [ { path: '/login',//登录页 name: 'Login', component: Login }, { path: 'https://www.jb51.net/',//首页 name: 'Main', component: Main, meta: { requireAuth: true, // 添加该字段,表示进入这个路由是需要登录的 }, }, { path: '*', component: P404 } //这里是保证错误地址会跳转到404界面进行提示 ] })
这些方法的编写顺序可能没有体现出来,不过最终效果就是这个了,如果有疑问欢迎留言。
以上这篇vuex + axios 做登录验证 并且保存登录状态的实例就是小编分享给大家的全部内容了,希望能给大家一个参考,也希望大家多多支持脚本之家。
您可能感兴趣的文章:
