<!DOCTYPE html PUBLIC "-//W3C//DTD XHTML 1.0 Transitional//EN"
"http://www.w3.org/TR/xhtml1/DTD/xhtml1-transitional.dtd">
<html>
<head>
<meta http-equiv="Content-Type" content="text/html; charset=utf-8"/>
<title></title>
<style type="text/css">
*{ margin: 0; padding: 0;}
ul{ list-style: none;}
#view{ position: relative; width: 320px; height: 120px; margin-left:320px; border: 10px solid #bc8f8f; }
#view:after{ content: '.'; display: block; clear: both; height: 0; visibility:hidden;}
#img_list{ position: absolute; width: 960px;}
#img_list li{ float: left; width: 320px; height: 120px; }
#a{ background: #87ceeb;}
#b{ background: #ff69b4;}
#c{ background: #98fb98;}
</style>
</head>
<body>
<div>
<ul>
<li></li>
<li></li>
<li></li>
</ul>
</div>
<script type="text/javascript">
var img_list = document.getElementById('img_list');
setInterval(function(){
var current = img_list.children[0];
for(var i = 0 ; i < 100 ; i++){
(function(pos){
setTimeout(function(){
current.style.width = 320 - (pos/100)*320 + 'px';
},(pos + 1)*10)
})(i)
}
setTimeout(function(){
img_list.appendChild(current);
current.style.width = '320px';
},1010);
},1500)
</script>
</body>
</html>
上面几种,方式原理都差不多,另外还可以设置透明渐变,让一张图片透明度从1国度到0 ,于是也可以产生切换效果,代码改动也很小。
demo_5:
复制代码 代码如下:
<!DOCTYPE html PUBLIC "-//W3C//DTD XHTML 1.0 Transitional//EN"
"http://www.w3.org/TR/xhtml1/DTD/xhtml1-transitional.dtd">
<html>
<head>
<meta http-equiv="Content-Type" content="text/html; charset=utf-8"/>
<title></title>
<style type="text/css">
*{ margin: 0; padding: 0;}
ul{ list-style: none;}
#view{ position: relative; width: 320px; height: 120px; margin-left:320px; border: 10px solid #bc8f8f; }
#view:after{ content: '.'; display: block; clear: both; height: 0; visibility:hidden;}
#img_list{ position: absolute; width: 960px;}
#img_list li{position: absolute; top:0; left: 0; width: 320px; height: 120px; }
#a{ background: #87ceeb;}
#b{ background: #ff69b4;}
#c{ background: #98fb98;}
</style>
</head>
<body>
<div>
<ul>
<li></li>
<li></li>
<li></li>
</ul>
</div>
<script type="text/javascript">
var img_list = document.getElementById('img_list');
setInterval(function(){
var current = img_list.children[0];
for(var i = 0 ; i < 100 ; i++){
(function(pos){
setTimeout(function(){
current.style.opacity = 1 - (pos/100)*1;
},(pos + 1)*10)
})(i)
}
setTimeout(function(){
img_list.appendChild(current);
current.style.opacity = 1;
},1010);
},1500)
</script>
</body>
</html>
至于其他各种绚丽的效果,经过一些其他的组合处理就可以了。
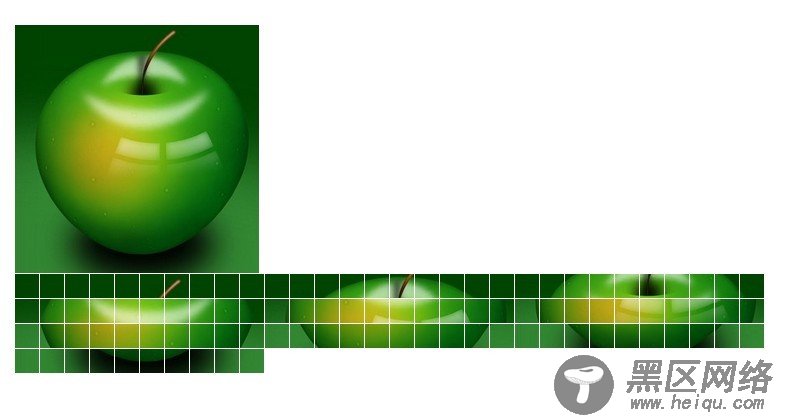
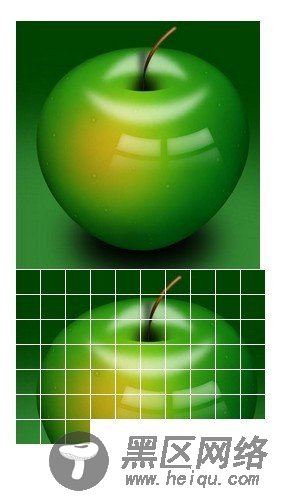
一种处理方法就是把图片分割成n个区域,将背景都设置为需要显示的图片,然后在不同的区域显示对应的背景。这样一来,一张100*100的图片,可以被分割成100个10*10的小方块,再对这些方块来进行处理,得到的效果就会更多。理论上还可以分成10000个1*1的小点,但是浏览器会爆掉··
demo_6:
复制代码 代码如下:
<!DOCTYPE html PUBLIC "-//W3C//DTD XHTML 1.0 Transitional//EN"
"http://www.w3.org/TR/xhtml1/DTD/xhtml1-transitional.dtd">
<html>
<head>
<meta http-equiv="Content-Type" content="text/html; charset=utf-8"/>
<title></title>
<style type="text/css">
*{ margin: 0; padding: 0; border: 0;}
body{ padding: 50px;}
.sep{ float: left; margin:1px 1px 0 0;}
</style>
</head>
<body>
<img src="https://www.jb51.net/动画/apple.jpg" alt="" />
<div></div>
<script type="text/javascript">
var img = document.getElementById('img');
var wrap = document.getElementById('wrap');
img.onload = function(){
console.dir(img);
var h = img.naturalHeight;
var w = img.naturalWidth;
newPanel(w,h);
}
function newPanel(w,h){
var cols = 10;
var rows = 10;
var colWidth = Math.floor(w/cols);
var rowHeight = Math.floor(w/rows);
for(var row = 0; row < rows; row++){
for(var col =0; col < cols; col++){
var div = document.createElement('div');
div.style.width = colWidth + 'px';
div.style.height= rowHeight + 'px';
div.className= 'sep';
div.style.backgroundImage = 'url(' + img.src + ')';
div.style.backgroundPosition = -colWidth*col +'px ' + -rowHeight*row +'px' ;
wrap.appendChild(div);
}
}
}
setTimeout(function(){
setInterval(function(){
wrap.lastChild && wrap.removeChild(wrap.lastChild);
},50)
},1000)
</script>
</body>
</html>


