NetCore1.1+Linux部署初体验
1.环境准备
Centaos7+Win10 虚拟机
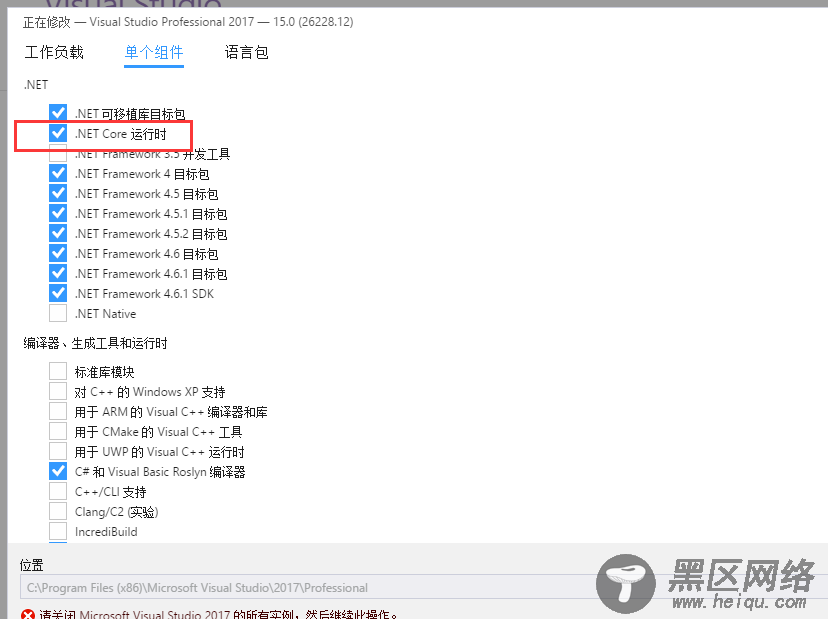
Win10安装VS2017 注意勾选下.Net Core
3.Centaos安装netcore 1.1参见https://www.microsoft.com/net/core
sudo yum install libunwind libicu curl -sSL -o dotnet.tar.gz https://go.microsoft.com/fwlink/?linkid=848821 sudo mkdir -p /opt/dotnet && sudo tar zxf dotnet.tar.gz -C /opt/dotnet sudo ln -s /opt/dotnet/dotnet /usr/local/bin

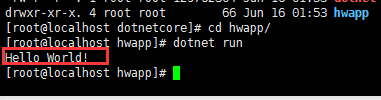
dotnet new console -o hwapp cd hwapp
dotnet restore
主要是寻找当前目录下的项目文件,然后利用NuGet库还原整个项目的依赖库,然后遍历每个目录,生成项目文件,继续还原该项目文件中的依赖项;
dotnet run
如果是交互的就直接运行,否则编译然后执行
2.项目准备
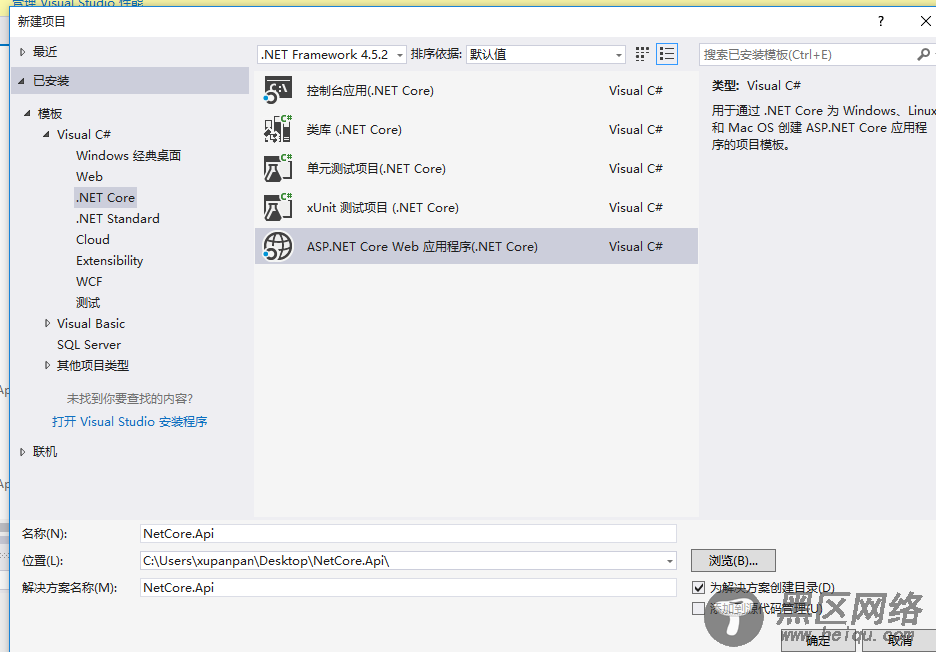
1.我这边项目名称为: NetCore.Api

2.修改发布相关支持;
.NET Core彻底放弃project.json,全面改回.csproj
Asp.NetCore1.1版本去掉project.json后如何打包生成跨平台包
打开:NetCore.Api.csproj 添加发布支持RuntimeIdentifiers配置
<PropertyGroup> <RuntimeIdentifiers>win10-x64;centos.7-x64</RuntimeIdentifiers> </PropertyGroup>
3.打开Program.cs修改端口支持
public static void Main(string[] args) { var host = new WebHostBuilder() .UseKestrel() .UseUrls("http://*:8088") .UseContentRoot(Directory.GetCurrentDirectory()) .UseIISIntegration() .UseStartup<Startup>() .UseApplicationInsights() .Build(); host.Run(); }
4.编译运行没有问题,通过WinSCP上传到Centaos7服务器上

3.Linux部署
进入上传的项目目录

dotnet restore 命令进行还原依赖项
还原完成后,发布项目文件
dotnet publish

复制发布后的文件到运行文件夹
cp -rf /home/xupp/website/bin/Debug/netcoreapp1.1/publish/ /home/xupp/web.test/
运行项目
nohup dotnet NetCore.Api.dll
只是做测试用,正式环境下可以使用Supervisor守护进程[/code]
外网测试看能否访问,不能访问的话先用dotnet NetCore.Api.dll运行,并检查防火墙配置
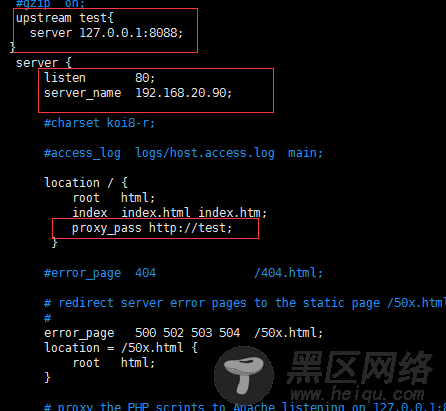
Ngiux配置(负载均衡下用)
Ngiux简单配置
Asp.NetCore1.1版本去掉project.json后如何打包生成跨平台包
NetCore2.0体验参见: