新闻网站建立,后台登录界面的搭建
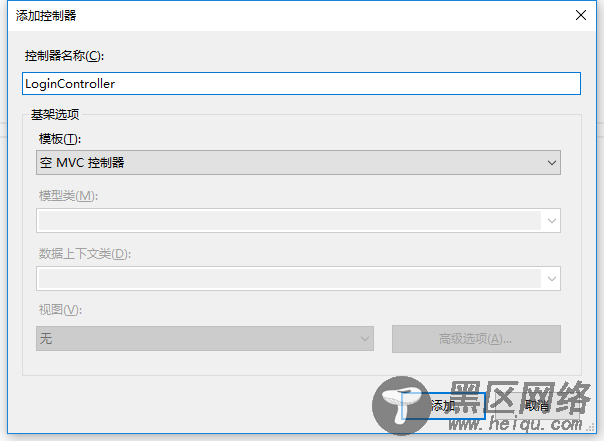
首先我们在Controllers里面新添加一个控制器就叫LoginController,右键点击Controllers添加控制器就可以了(注意后面一定是Controller结尾,这是一种约定)

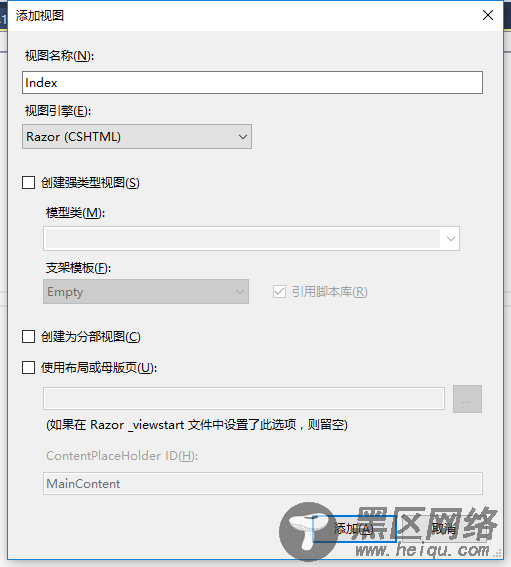
其次:右键点击index建立Index视图。(不选择使用母版页)

现在我们就可以在Index视图中设计我们的登录页面了。
这里需要我们引入几个Css样式和JS文件

简单的进行登录界面的布局
<html> <head> <meta content="width=device-width" /> <title>登录</title> <script src="https://www.jb51.net/~/Scripts/jquery-1.8.2.js"></script> <script src="https://www.jb51.net/~/Content/EasyUI/jquery.easyui.min.js"></script> <script src="https://www.jb51.net/~/Content/EasyUI/easyui-lang-zh_CN.js"></script> <link href="https://www.jb51.net/~/Content/EasyUI/themes/default/easyui.css" /> <link href="https://www.jb51.net/~/Content/EasyUI/themes/icon.css" /> <script type="text/javascript"> $(function () { initWin(); //初始化登录窗体 }); function initWin() { $("#win").window({ title: "登录", width: 400, height: 270, collapsible: false, minimizable: false, maximizable: false, closable: false, modal: true, resizable: false, }); } </script> </head> <body> <divclass="easyui-window"> <div> <div></div> <table> <tr> <td></td> <td>用户名:</td> <td><input type="text"class="easyui-textbox"/></td> <td><span></span></td> </tr> <tr></tr> <tr> <td></td> <td>密 码:</td> <td><input type="password/"class="easyui-textbox"id="txtPwd"></td> <td><span></span></td> </tr> <tr></tr> <tr> <td></td> <td>验证码:</td> <td><input type="text"class="easyui-textbox"/></td> <td><spanstyle="color:red"></span></td> </tr> <tr></tr> <tr> <td></td> <td><img src="" /></td> <td><a href="javascript:void(0)">看不清,换一张</a></td> </tr> </table> </div> <div></div> <div data-options="region:'south',border:false"> <a data-options="iconCls:'icon-ok'" href="javascript:void(0)">登录</a> </div> </div> </body> </html>
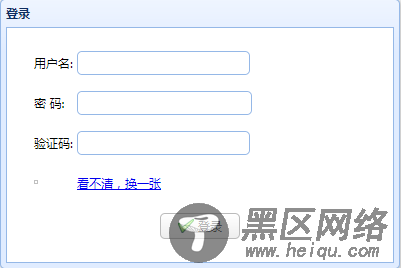
运行的结果图:

这里验证码的图片没有显示出来,这是没有关系的,在下一节中就讲怎么把验证码显示出来。
