.NET Core发布很久了,因为近几年主要使用java,所以还没使用过.NET Core,今天正好有一个c#写的demo,需要做成服务,不想再转成java来实现,考虑使用.NET CORE来尝下鲜,目标是开发一个微服务,然后部署到Docker swarm集群,供其他应用调用。
环境准备
下载.NET core的最新版本2.1.3, 安装后打开命令行验证:
出现下面的输出,就代表安装成功了
dotnet Usage: dotnet [options] Usage: dotnet [path-to-application] Options: -h|--help Display help. --info Display .NET Core information. --list-sdks Display the installed SDKs. --list-runtimes Display the installed runtimes. path-to-application: The path to an application .dll file to execute.
然后是VS CODE安装c#插件,
以及安装nuget插件,方便管理扩展。
创建工程
使用dotnet new name创建项目,其中name是项目类型,具体如下:
C:\Users\jqpeng>dotnet new --help 使用情况: new [选项] 选项: -h, --help 显示有关此命令的帮助。 -l, --list 列出包含指定名称的模板。如果未指定名称,请列出所有模板。 -n, --name 正在创建输出的名称。如果未指定任何名称,将使用当前目录的名称。 -o, --output 要放置生成的输出的位置。 -i, --install 安装源或模板包。 -u, --uninstall 卸载一个源或模板包。 --nuget-source 指定在安装期间要使用的 NuGet 源。 --type 基于可用的类型筛选模板。预定义的值为 "project"、"item" 或 "other"。 --force 强制生成内容,即使该内容会更改现有文件。 -lang, --language 根据语言筛选模板,并指定要创建的模板的语言。 模板 短名称 语言 标记 ---------------------------------------------------------------------------------------------------------------------------- Console Application console [C#], F#, VB Common/Console Class library classlib [C#], F#, VB Common/Library Unit Test Project mstest [C#], F#, VB Test/MSTest NUnit 3 Test Project nunit [C#], F#, VB Test/NUnit NUnit 3 Test Item nunit-test [C#], F#, VB Test/NUnit xUnit Test Project xunit [C#], F#, VB Test/xUnit Razor Page page [C#] Web/ASP.NET MVC ViewImports viewimports [C#] Web/ASP.NET MVC ViewStart viewstart [C#] Web/ASP.NET ASP.NET Core Empty web [C#], F# Web/Empty ASP.NET Core Web App (Model-View-Controller) mvc [C#], F# Web/MVC ASP.NET Core Web App razor [C#] Web/MVC/Razor Pages ASP.NET Core with Angular angular [C#] Web/MVC/SPA ASP.NET Core with React.js react [C#] Web/MVC/SPA ASP.NET Core with React.js and Redux reactredux [C#] Web/MVC/SPA Razor Class Library razorclasslib [C#] Web/Razor/Library/Razor Class Library ASP.NET Core Web API webapi [C#], F# Web/WebAPI global.json file globaljson Config NuGet Config nugetconfig Config Web Config webconfig Config Solution File sln Solution Examples: dotnet new mvc --auth Individual dotnet new classlib --framework netcoreapp2.1 dotnet new --help
开发微服务,可以dotnet new mvc,创建一个mvc项目,然后VS CODE打开即可。
工程实现
实现就简单了,按部就班coding就可以,和几年前的.NET MVC没有本质区别:
新建一个APIController,添加一个方法:
public JsonResult Search(string tfsid) { try { return Json(new { success = true, data = PailitaoApi.SearchByTFSId(tfsid) }); } catch (Exception ex) { Console.WriteLine(ex.Message); return Json(new { success = false, data = "Search failed!" }); ; } }
然后删掉默认的模板文件,将HomeControler里的代码清理掉,保留Index,减小包体积
public string Index() { return "api"; }
主要代码OK!
Docker 镜像编译
按照官方指南,我们编写Dockefile,主要是通过microsoft/dotnet:2.1-sdk AS build实现编译,通过microsoft/dotnet:2.1-aspnetcore-runtime来运行,具体见下面,注意pailitao.dll需要修改成你项目的名称:
FROM microsoft/dotnet:2.1-sdk AS build WORKDIR /app # copy csproj and restore as distinct layers COPY *.csproj ./ RUN dotnet restore # copy everything else and build app COPY . ./ RUN dotnet publish -c Release -o out FROM microsoft/dotnet:2.1-aspnetcore-runtime AS runtime WORKDIR /app COPY --from=build /app/out ./ EXPOSE 80 ENTRYPOINT ["dotnet", "appname.dll"]
简单分析:
build时,先dotnet restore
通过dotnet publish -c Release -o out 编译release版本dll
然后构建runtime,从build环境将out 目录拷贝出来
然后EXPOSE 80端口,设置ENTRYPOINT 为‘dotnet appname.dll'
微服务CICD
首先是构建,先将代码放入SVN, 在Jenkins里新建自由模式项目,Build里使用Build/publish Docker Image:

然后部署,构建好image后,通过shell执行部署:
docker service rm pailitaoservice docker service create --name pailitaoservice --replicas 1 --publish 15001:80 192.168.86.8:5000/pailitaoservice
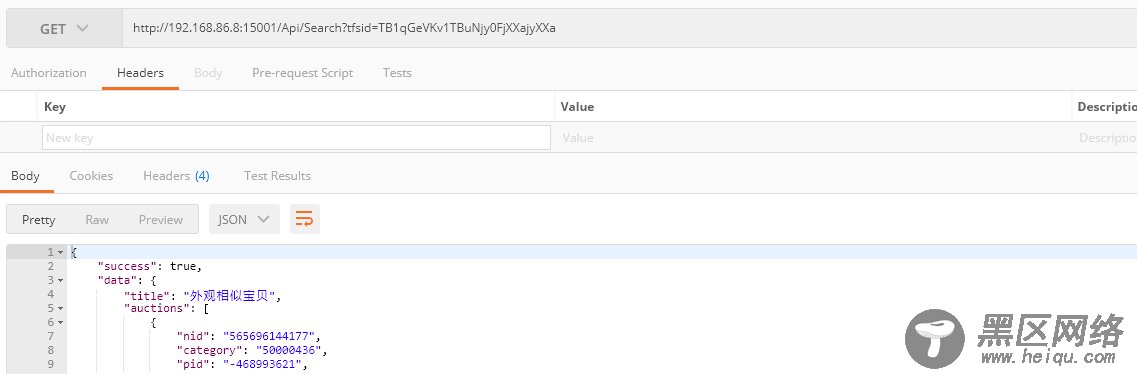
最后,测试下服务:
您可能感兴趣的文章: