//配置Swagger //注册Swagger生成器,定义一个Swagger 文档 services.AddSwaggerGen(c => { c.SwaggerDoc("v1", new Info { Version = "v1", Title = "接口文档", Description = "RESTful API" }); // 为 Swagger 设置xml文档注释路径 var xmlFile = $"{Assembly.GetExecutingAssembly().GetName().Name}.xml"; var xmlPath = Path.Combine(AppContext.BaseDirectory, xmlFile); c.IncludeXmlComments(xmlPath); });
在Configure方法里加入下面的代码,启用中间件服务使用生成Swagger和SwaggerUI,将SwaggerUI中的RoutePrefix设为空字符串,这样就能在根节点(:port)直接显示SwaggerUI界面。
//启用中间件服务生成Swagger app.UseSwagger(); //启用中间件服务生成SwaggerUI,指定Swagger JSON终结点 app.UseSwaggerUI(c => { c.SwaggerEndpoint("/swagger/v1/swagger.json", "Web App V1"); c.RoutePrefix = string.Empty;//设置根节点访问 });
编辑后Startup.cs完整代码如下。
using System; using System.Collections.Generic; using System.IO; using System.Linq; using System.Reflection; using System.Threading.Tasks; using Microsoft.AspNetCore.Builder; using Microsoft.AspNetCore.Hosting; using Microsoft.AspNetCore.Mvc; using Microsoft.Extensions.Configuration; using Microsoft.Extensions.DependencyInjection; using Microsoft.Extensions.Logging; using Microsoft.Extensions.Options; using Swashbuckle.AspNetCore.Swagger; namespace FirstApi { public class Startup { public Startup(IConfiguration configuration) { Configuration = configuration; } public IConfiguration Configuration { get; } // This method gets called by the runtime. Use this method to add services to the container. public void ConfigureServices(IServiceCollection services) { services.AddMvc().SetCompatibilityVersion(CompatibilityVersion.Version_2_2); //配置Swagger //注册Swagger生成器,定义一个Swagger 文档 services.AddSwaggerGen(c => { c.SwaggerDoc("v1", new Info { Version = "v1", Title = "接口文档", Description = "RESTful API" }); // 为 Swagger 设置xml文档注释路径 var xmlFile = $"{Assembly.GetExecutingAssembly().GetName().Name}.xml"; var xmlPath = Path.Combine(AppContext.BaseDirectory, xmlFile); c.IncludeXmlComments(xmlPath); }); } // This method gets called by the runtime. Use this method to configure the HTTP request pipeline. public void Configure(IApplicationBuilder app, IHostingEnvironment env) { if (env.IsDevelopment()) { app.UseDeveloperExceptionPage(); } //启用中间件服务生成Swagger app.UseSwagger(); //启用中间件服务生成Swagger,指定Swagger JSON终结点 app.UseSwaggerUI(c => { c.SwaggerEndpoint("/swagger/v1/swagger.json", "Web App V1"); c.RoutePrefix = string.Empty;//设置根节点访问 }); app.UseMvc(); } } }
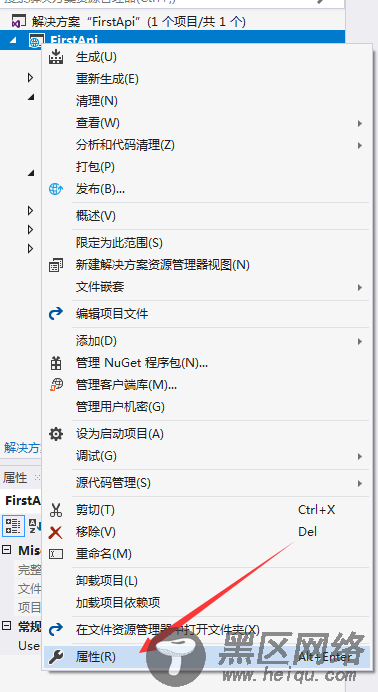
然后,右键项目,点击属性。
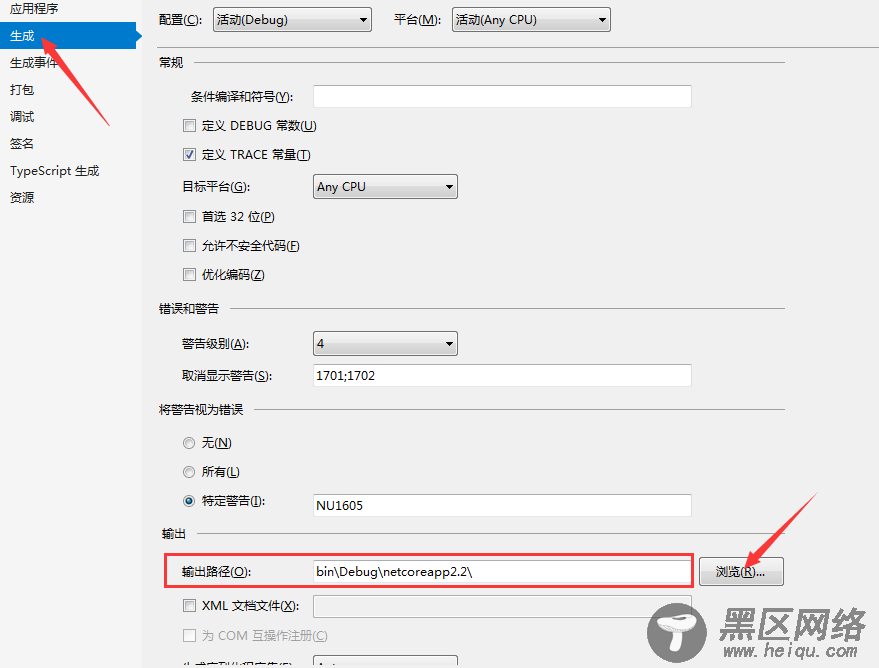
选择生成,选择我们的Debug路径。
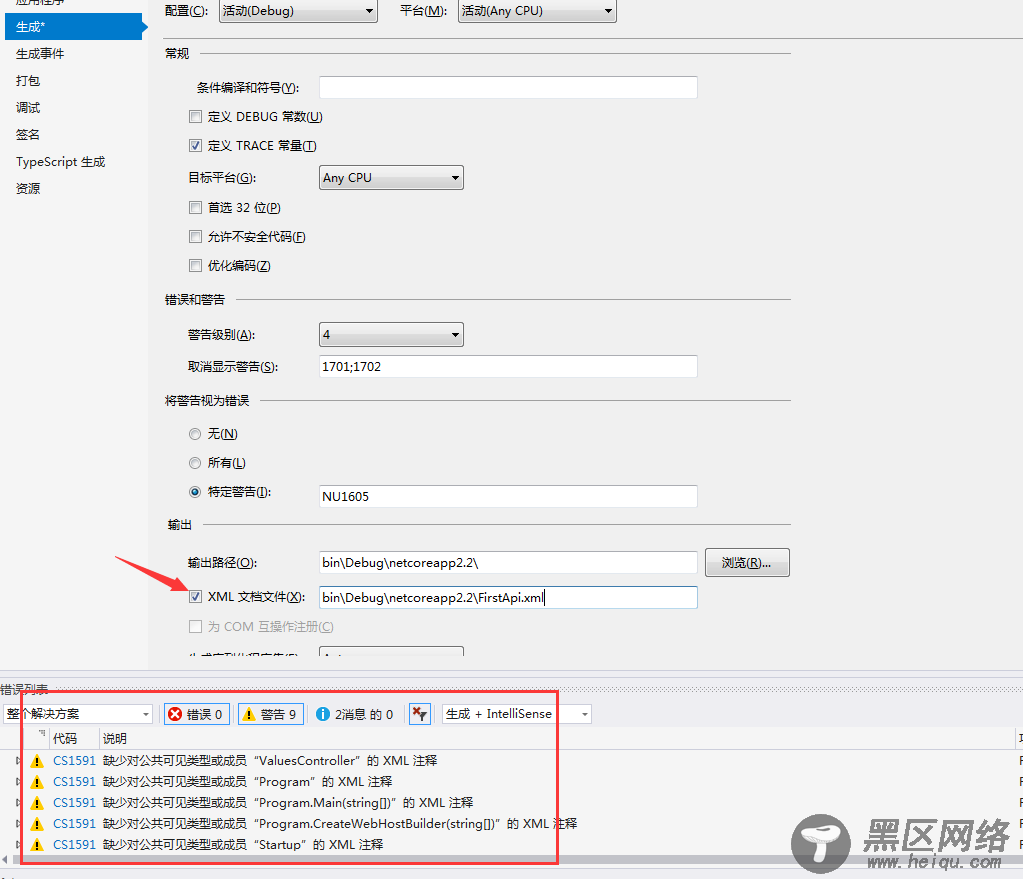
勾选XML文档文件,自动填充,然后会出现警告(非强迫症可以忽略警告)
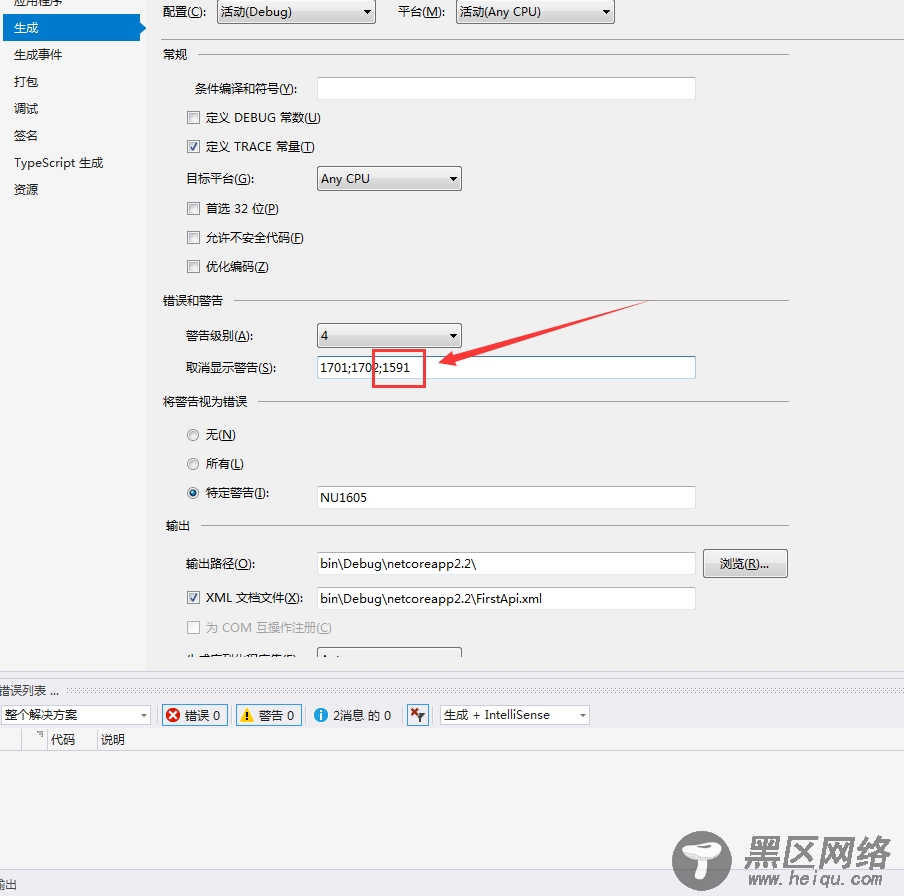
想要去掉警告,就在上面的取消显示警告中加入上面显示的1591,Ctrl+S保存一下,警告就没了。
然后点击调试,将启动浏览器后面url去掉。
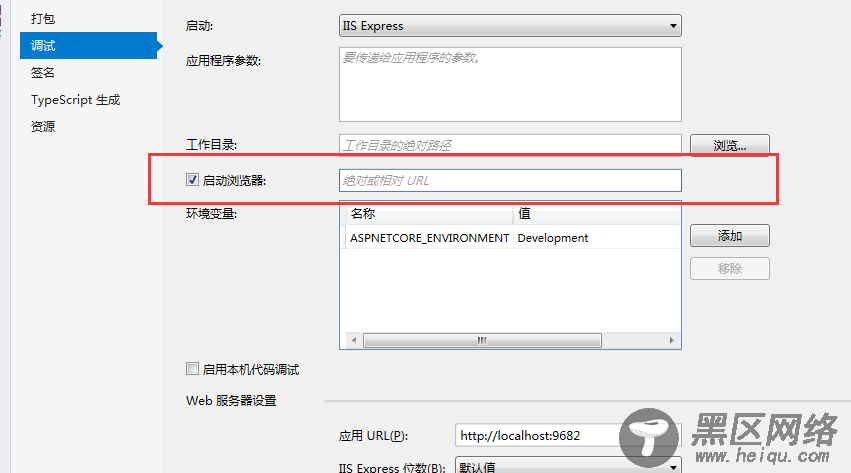
完成后,直接运行VS,就会进入文档UI页面了。
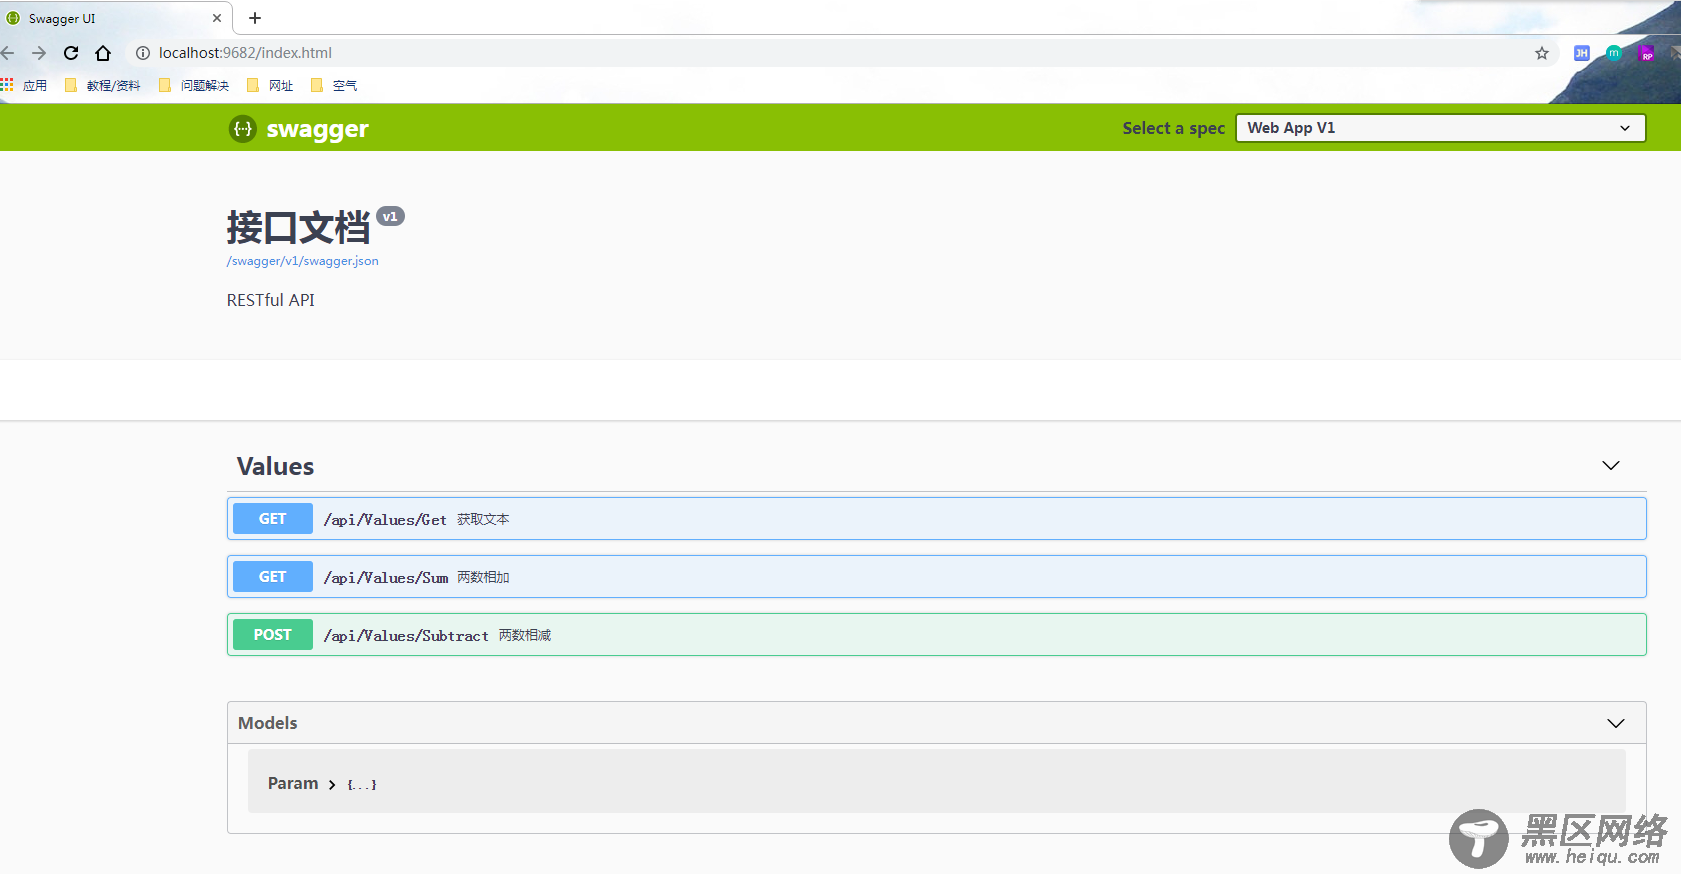
四、使用Swagger
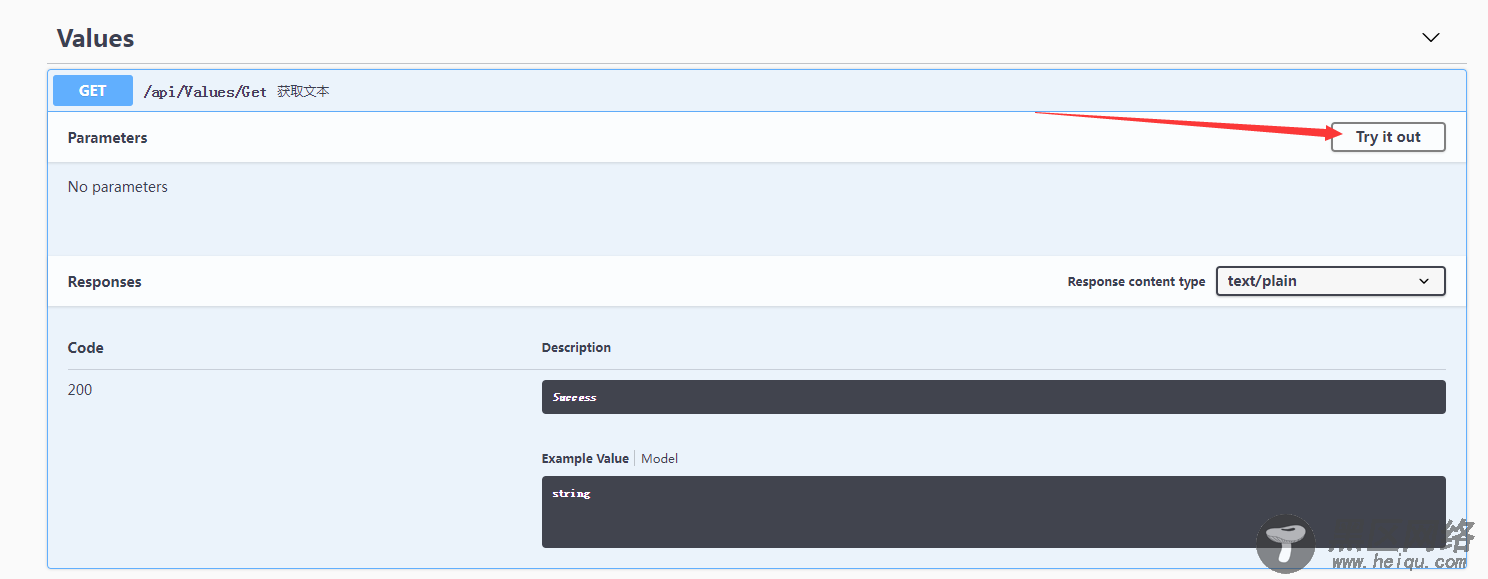
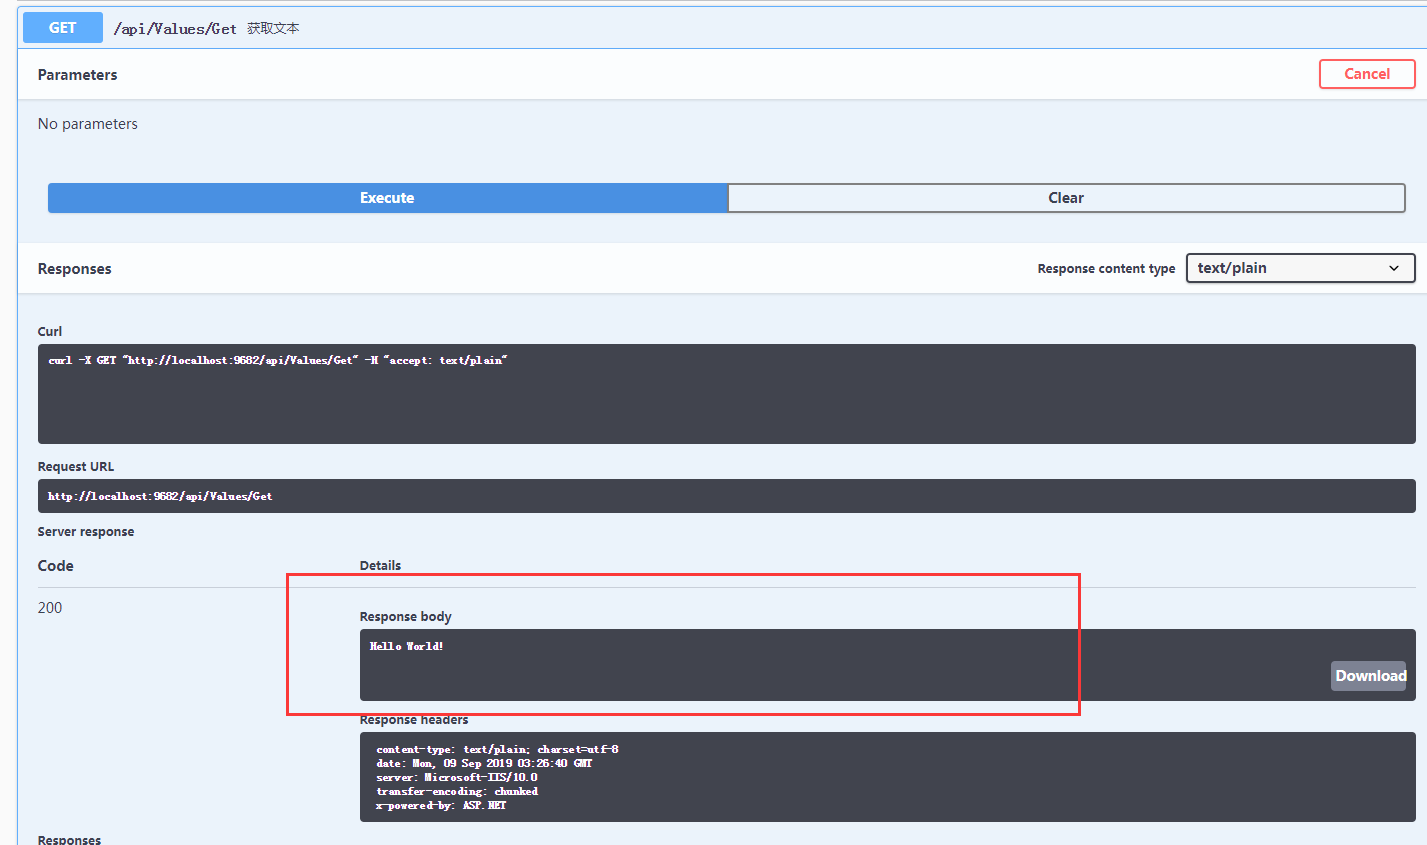
我们打开第一个方法,点击Try it out按钮。
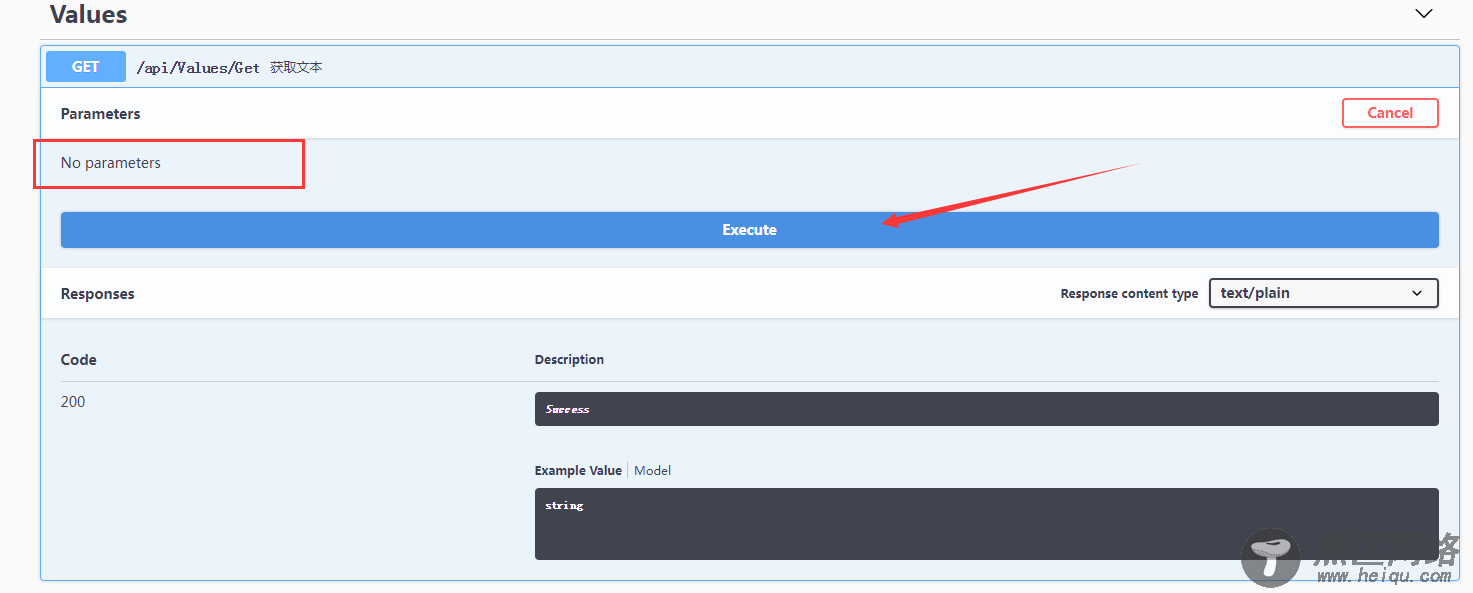
这个是无参的方法,直接点击Execute执行。
执行后可以看到Response body返回的内容。
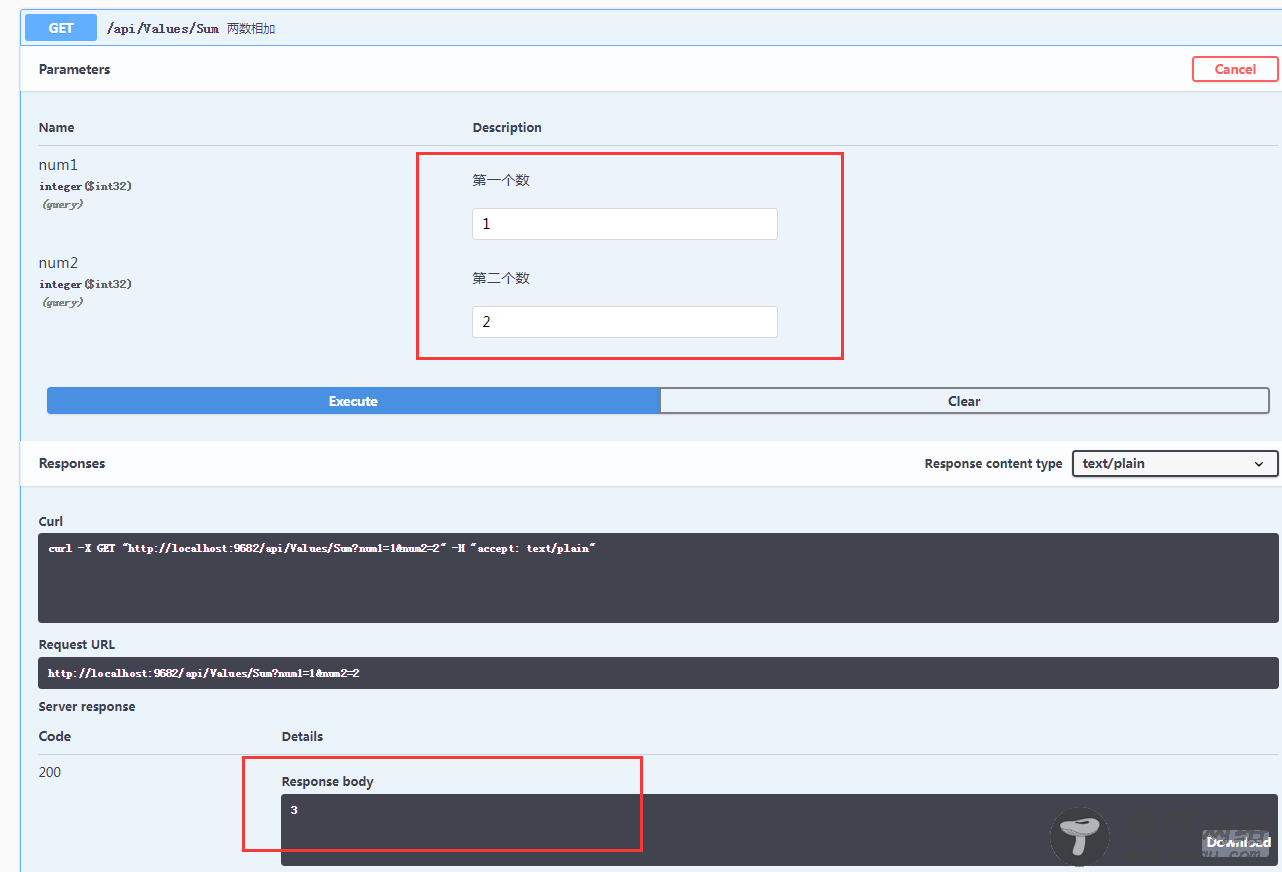
点击第二个方法,给出两个参数,输入执行,得到返回结果。
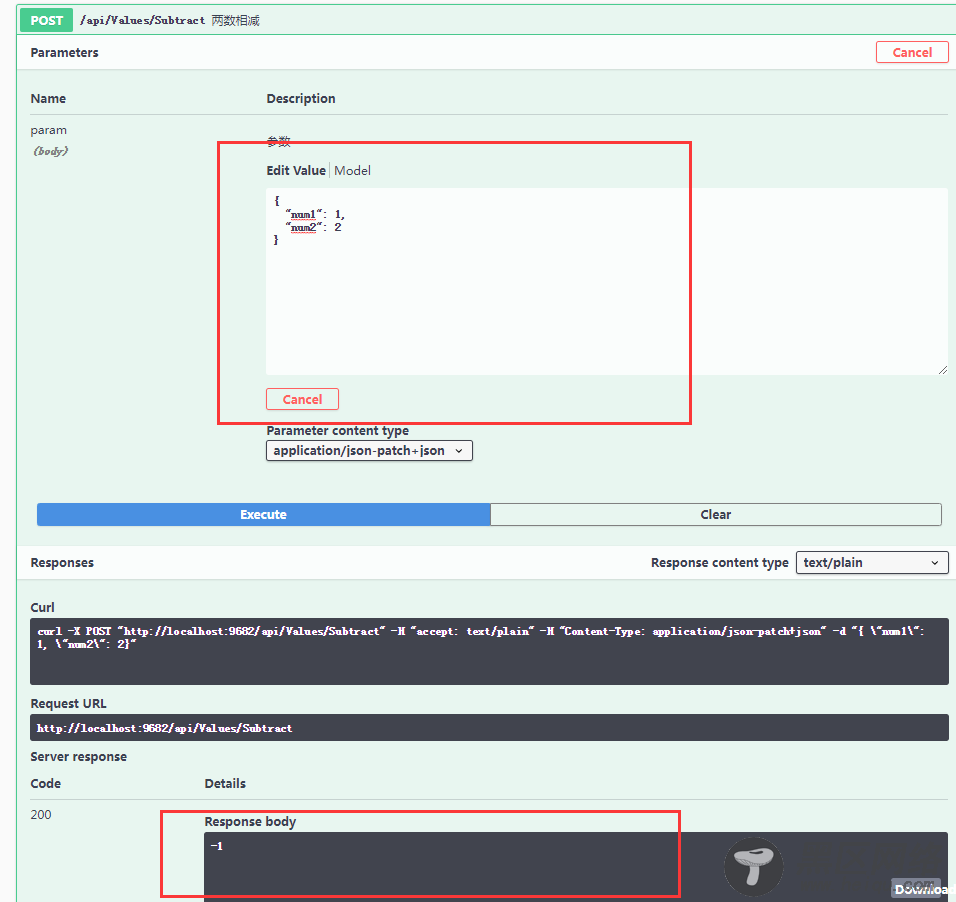
第三个方法的参数是model,要传递json格式的,默认已经生成好了,我们只需要编辑改一下值,再执行就行了。
五、总结
