接着上一篇文章,熟悉vue3.0的基本用法,和使用一段时间以后,开始准备开发适用于vue3.0使用的pc端的组件库。会陆续跟新一些组件库的写法和注意事项,有兴趣的同学可以多多关注哦,不多bb,开始。
开发一个轮播图组件,适用pc端,(暂无考虑app), 使用于vue3.0 + TS
大致的实现效果是这样:
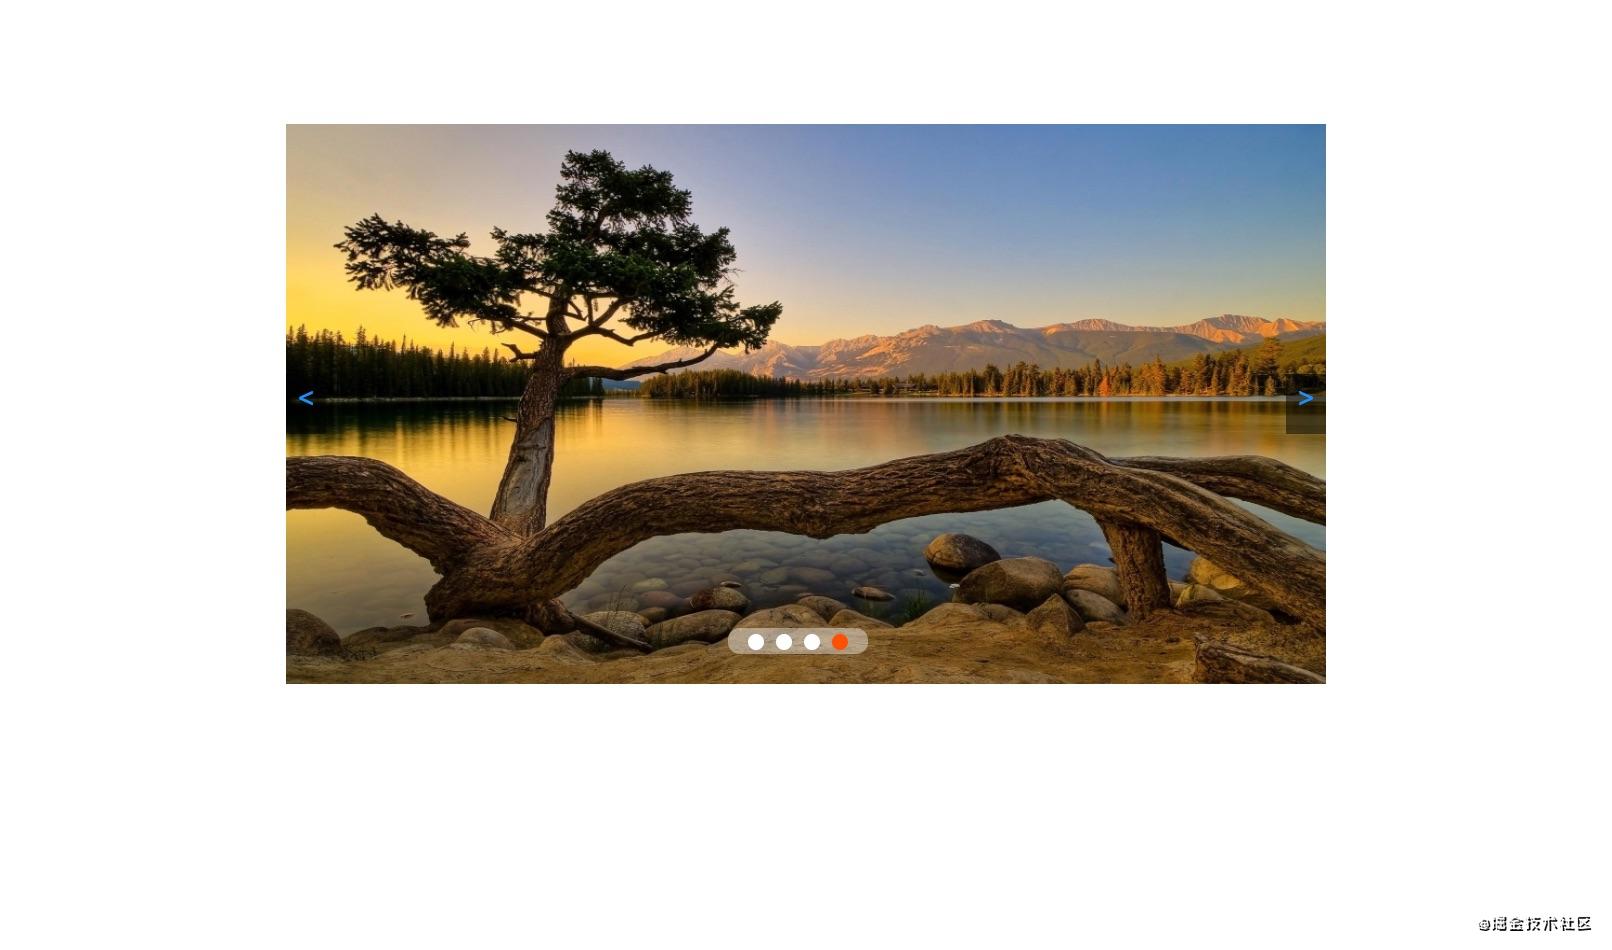
图片自由轮播,对应圆点图片跳转,左右指示器跳转等。暴露以下options配置:
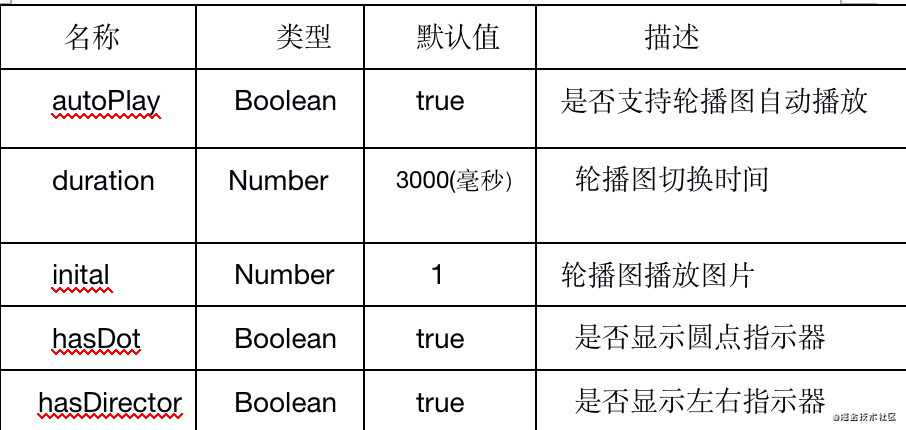
以上是主要的options,下面展开来说一下具体如何封装。
一:封装思想在vue3.0和vue2.0中封装组件其实核心思想都是一样的,需要使用到vue.component();对组件进行注册,之后在main.ts中挂载一下就可以使用。
在 src下面创建: src --> libs --> sqm_ui(自己UI库的名称)-->index.js
这里的index.js就是注册组件的入口。
同级目录下新建一个文件, Carousel, 这个文件包含所有的轮播组件的功能和样式。
目录如下:
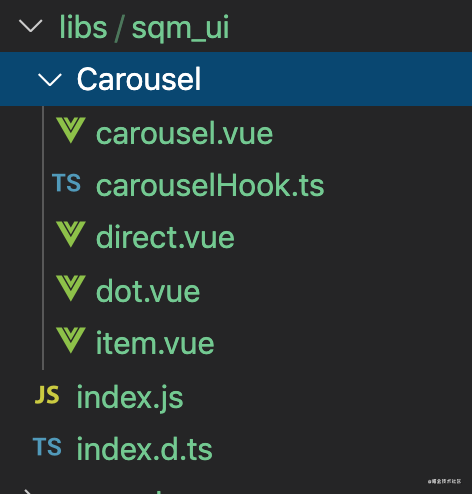
要注意一点: 虽然是在vue3.0和ts中使用,但是入口文件还是用js,这也是为了可以适用非ts写法。
在index.js中:
import Carousel from './Carousel/carousel'; import CarItem from './Carousel/item';let SqmUI = {}; SqmUI.install = function(vue) { vue.component(Carousel.name, Carousel); vue.component(CarItem.name,CarItem); }; export default SqmUI;
但是为了配合TS使用,我们需要新建一个index.d.ts文件,用来描述库中成员类型来给TS用。
declare const _default: ({ install: (app: import("vue").App<any>, ...options: any[]) => any; // 这里单纯描述一下install}); export default _default;
完成以上配置后,在main.ts中使用:
import SqmUI from '@/libs/sqm_ui/index'; import { createApp } from 'vue'; createApp.use(SqmUI);
二:封装流程对于轮播图而言,我们需要一个固定的容器,来放置每一张滚动的图片,这时候我们需要定义一个Carousel.vue组件。
<template> <div> <slot></slot> // 这里的slot是用来放置item组件 </div> </template>
还需要一个用来存储照片的组件,item.vue
<template> <div> <slot></slot> // 这里的slot是用来放置img </div> </template>
基本框架搭好,当用户使用的时候在carousel中配置options。
<carousel :autoPlay="true" :durdation="3000" :initial="3" :hasDot="true" :hasDirector="true"> </carousel>
在carousel.vue中:接受传来的配置项
props: { autoplay: { type: Boolean, default: true }, duration: { type: Number, default: 3000 }, initial: { type: Number, default: 0 }, hasDot: { type: Boolean, default: true }, hasDirector: { type: Boolean, default: true } }
(1): 实现autoPlay:
在carousel.vue中:
const autoPlay = () => { if (props.autoplay) { t = setInterval(() => { // 轮播逻辑 }, props.duration); }; onMounted(() => { autoPlay(); });
逻辑很简单,定义一个autoPlay函数,在mounted阶段挂载。
(2): 实现轮播:
想这样一个问题:如何才能让这一张图片显示?一定需要当前图片的index,等于轮播时的index才可以显示。
在item.vue中:
<div v-if="selfIndex === currentIndex"> <slot></slot> </div>
只有当自身的index,等于当前的index的时候才能显示。
获取currentIndex:
vue3.0中内置方法: getCurrentInstance()
这是一个很重要的方法,通过这个方法我们可以获取当前组件的实例,然后通过ctx获取该组件的上下文。特别好用。
在item.vue中:
setup() { const instance:any = getCurrentInstance(); console.log(instance); }
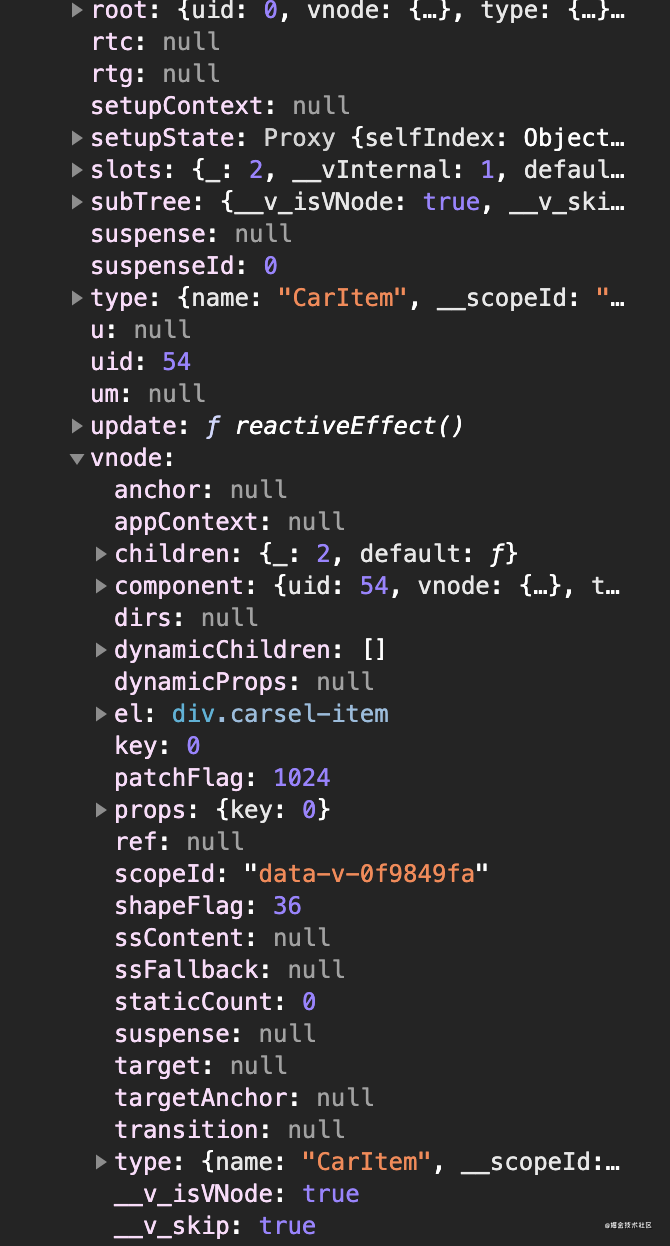
在instance.vnode下面有个key是每个图片对应的自身的key也就是index。
在instance.parent.ctx 下面有个定义的currentIndex,是当前的index。
当二者相同时,可以显示当前图片。那么currentIndex在哪里设置呢?
回到carousel.vue中:
setup(props) { const state = reactive({ currentIndex: props.initial, itemLen: 0, showDir: false }); }
当前的currentIndex就是传入的initial的值。
在autoPlay中:执行轮播