每个BrowserWindow实例都有一个名为webContents的属性,它存储一个对象,该对象负责在调用new BrowserWindow()时创建的web浏览器窗口。webContents与app类似,因为它在渲染器进程中根据web页面的生命周期发出事件。
以下是一些不完整的事件列表,你可以在webContents对象上监听:
did-start-loading
did-stop-loading
dom-ready
blur
focus
resize
enter-full-screen
leave-full-screen
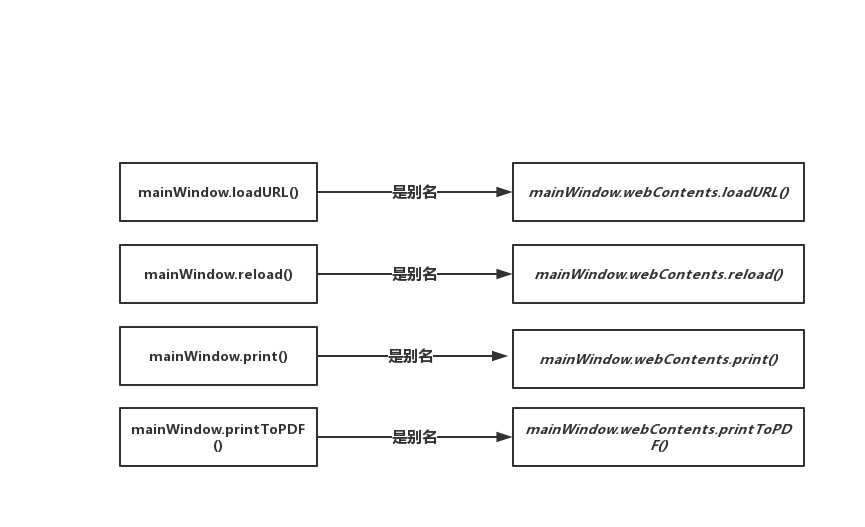
webContents还有许多方法,可以在渲染器进程中触发与主进程不同的函数。在前一章中,我们通过主进程使用mainWindow.webContents.openDevTools()在渲染器进程中打开了Chrome开发工具。mainWindow.loadURL('file://${__dirname}/ index.html')是mainWindow.webContents.loadURL()的别名,它在应用程序首次启动时将HTML文件加载到渲染器进程中。图4.14显示了更多的别名。

图4.14 BrowserWindow实例的方法是Electron webContents API的别名。
webContents有一个名为send()的方法,它将信息从主进程发送到渲染器进程。webContents.send()接受可变数量的参数。第一个参数是用来发送消息的通道的名称,它是一个任意字符串。渲染器进程中的事件监听器在同一通道上监听。当我们看到它的行动时,这种流动将变得更加清晰。第一个参数之后的所有后续参数都传递给渲染器进程。
发送文件内容到渲染器进程我们当前实现是读取用户选择的文件并打印到终端上,mainWindow.webContents.send()将文件的内容发送到渲染器进程中。下一章将介绍打开文件的其他方法,这些方法不需要一个对话框来提示用户选择特定的文件,因为我们确实会遇到一些情况,在不触发对话框的情况下打开文件。
列表4.13 从主进程发送内容到渲染器进程: ./app/main.js
const getFileFromUser = exports.getFileFromUser = () => { const files = dialog.showOpenDialog(mainWindow, { properties: ['openFile'], filters: [ { name: 'Text Files', extensions: ['txt'] }, { name: 'Markdown Files', extensions: ['md', 'markdown'] } ] }); if (files) { openFile(files[0]); } // 在前面,在文件未定义的情况下,使用return语句中断了函数。在本例中,当dialog.showOpenFile()成功返回一个文件路径数组时,我们将调整逻辑并将第一个文件传递给Open File。 }; const openFile = (file) => { const content = fs.readFileSync(file).toString(); mainWindow.webContents.send('file-opened', file, content); // 我们将通过"file-opened"通道将文件的名称及其内容发送到渲染器进程 };主进程现在通过打开的文件file-opened通道广播文件的名称及其内容。下一步是使用ipcRenderer模块在渲染器进程中file-opened通道上设置监听器。Electron提供了两个基本模块,用于在进程之间来回发送消息: ipcRenderer和ipcMain。每个模块仅在与之共享名称的进程类型中可用。
ipcRender可以向主进程发送消息,最重要的是,它还可以监听使用webContents.send()从主进程发送的消息。它在渲染器进程中需要ipcRenderer模块。
列表4.14 导入ipcRenderer模块: ./app/renderer.js
const { remote, ipcRenderer } = require('electron'); //将在我们的渲染器进程中导入ipcRenderer模块 const mainProcess = remote.require('./main.js')有了这些,我们现在可以设置一个监听器。ipcRenderer监听file-opened通道,将内容添加到页面,并将Markdown渲染为HTML。
列表4.15 在file-opened通道上监听消息
ipcRenderer.on('file-opened', (event, file, content) => { markdownView.value = content; renderMarkdownToHtml(content); });ipcRenderer.on接受两个参数:要监听的参数和一个回调函数,回调函数定义当渲染器进程在设置监听器的通道上接受到消息时要采取的操作。回调函数在调用时提供几个参数,第一个是事件对象,它与浏览器中的普通事件监听器一样。它包含关于我们为其设置监听器事件的消息,其他参数是在主进程中使用webContents.send()时提供的。在清单4.13中,我们发送了文件的名称及其内容,这些将是传递给监听器的附加参数。
有了这些新增功能,用户现在可以单击Open File按钮,使用本机文件对话框选择一个文件,并在UI中呈现内容。我们已经成功地实现了我们在本章开始时设定的特性,我们的主进程和渲染进程的代码应该类似于以下两个清单。
列表4.16 在主进程实现打开文件的功能: ./app/main.js
const{ app, BrowserWindow,dialog } = require('electron'); const fs = require('fs'); let mainWindow = null; app.on('ready', () => { mainWindow = new BrowserWindow({ show: false, webPreferences: { nodeIntegration: true } }) mainWindow.loadFile('app/index.html'); mainWindow.once('ready-to-show', () => { mainWindow.show(); }); mainWindow.on('closed', () => { mainWindow = null; }); }); const getFileFromUser = exports.getFileFromUser = () => { const files = dialog.showOpenDialog(mainWindow, { properties: ['openFile'], filters: [ { name: 'Text Files', extensions: ['txt'] }, { name: 'Markdown Files', extensions: ['md', 'markdown'] } ] }); if (files) { openFile(files[0]); } }; const openFile = (file) => { const content = fs.readFileSync(file).toString(); mainWindow.webContents.send('file-opened', file, content); };
