这篇文章主要为大家详细介绍了原生JS实现简单放大镜效果,文中示例代码介绍的非常详细,具有一定的参考价值,感兴趣的小伙伴们可以参考一下
本文实例为大家分享了原生JS实现放大镜效果的具体代码,供大家参考,具体内容如下
<html> <head> <meta charset="UTF-8"> <title></title> <style type="text/css"> * { margin: 0; padding: 0; } img{ vertical-align: top; } .fdj { width: 350px; height: 350px; position: relative; margin: 100px auto; border: 1px solid gainsboro; } .small { position: relative; } .small img { width: 350px; } .mask { width: 100px; height: 100px; background: rgba(255, 255, 0, 0.4); position: absolute; left: 0; top: 0; cursor: move; display: none; } .big { position: absolute; top: 0; left: 360px; width: 500px; height: 500px; border: 1px solid gainsboro; overflow: hidden; display: none; } .big img{ position: absolute; left: 0; top: 0; } </style> </head> <body> <div> <div> <img src="https://cdn.attach.qdfuns.com/notes/pics/201702/08/162503mw0fawb5b02va22i.jpg" /> <div></div> </div> <div> <img src="https://cdn.attach.qdfuns.com/notes/pics/201702/08/162503mw0fawb5b02va22i.jpg" /> </div> </div> </body> <script type="text/javascript"> var fdj = document.querySelector('.fdj') // 获得最大的盒子 var small = document.querySelector('.small'); //获取小图片盒子 var big = document.querySelector('.big'); //获取大图片盒子 var bigs = big.children[0] //大图片 var smalls = small.children[0] //小图片 var mask = small.children[1]; //遮罩 //鼠标移入小图片盒子 small.onmouseover = function() { //鼠标移入图片盒子将遮罩与大图片显示 mask.style.display = 'block'; big.style.display = ' block'; }; //鼠标移出小图片盒子 small.onmouseout = function() { //鼠标移出小图片盒子将遮罩与大图片隐藏 mask.style.display = 'none'; big.style.display = 'none'; }; var x=0; var y=0; //鼠标在小图片上移动时 small.onmousemove = function(ev) { var ev = event || window.event; //让鼠标在遮罩正中 //鼠标X坐标与Y坐标 x = ev.clientX -this.offsetParent.offsetLeft- mask.offsetWidth / 2 ; y = ev.clientY -this.offsetParent.offsetTop- mask.offsetHeight / 2 ; //将遮罩限制在小图片盒子中 if (x<0) { x=0; }else if(x>small.offsetWidth-mask.offsetWidth){ x = small.offsetWidth-mask.offsetWidth; } if(y<0){ y=0; }else if(y>small.offsetHeight-mask.offsetHeight){ y= small.offsetHeight-mask.offsetHeight } mask.style.left = x + 'px'; mask.style.top = y + 'px'; //大图与小图的比例 /*var scalX = bigs.offsetWidth/small.offsetWidth; var scalY = bigs.offsetHeight/small.offsetHeight;*/ var scalX = x/(small.offsetWidth-mask.offsetWidth); var scalY = y/(small.offsetHeight-mask.offsetHeight); bigs.style.left = -(x*scalX)+'px'; bigs.style.top = -(y*scalY)+'px'; }; </script> </html>
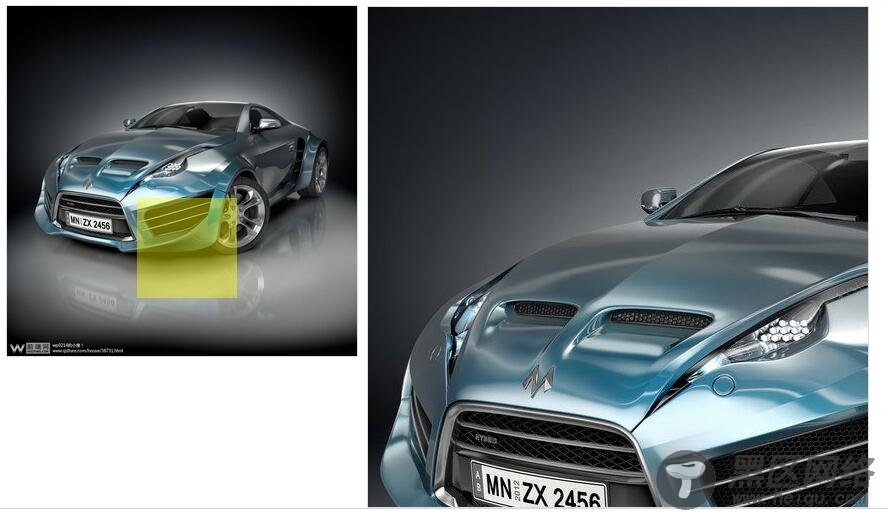
效果图:(演示)
以上就是本文的全部内容,希望对大家的学习有所帮助,也希望大家多多支持脚本之家。
您可能感兴趣的文章: