static void Main(string[] args) { string salt = null; var password = "baidu"; var hashPassword = CryptHelper.HashPassword(password, out salt); Console.WriteLine("Password => {0}", password); Console.WriteLine("HashPassword => {0}", hashPassword); Console.WriteLine("Salt => {0}", salt); //=================================== var matchs = CryptHelper.VerifyPassword(password, hashPassword, salt); Console.WriteLine("Matchs: {0}", matchs); Console.ReadLine(); }
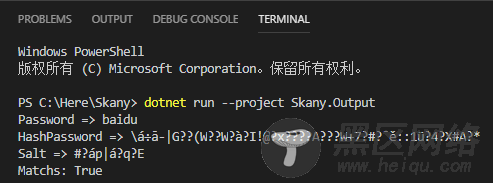
运行 Output 项目
dotnet run --project Skany.Output
断点调试
在 Output/Program.cs 中第13行设置一个端点(鼠标在行首点一下即可,再点一下移除断点)
DEBUG面板配置选择 .NET Core Launch (console),点击绿色的开始调试按钮,启动调试
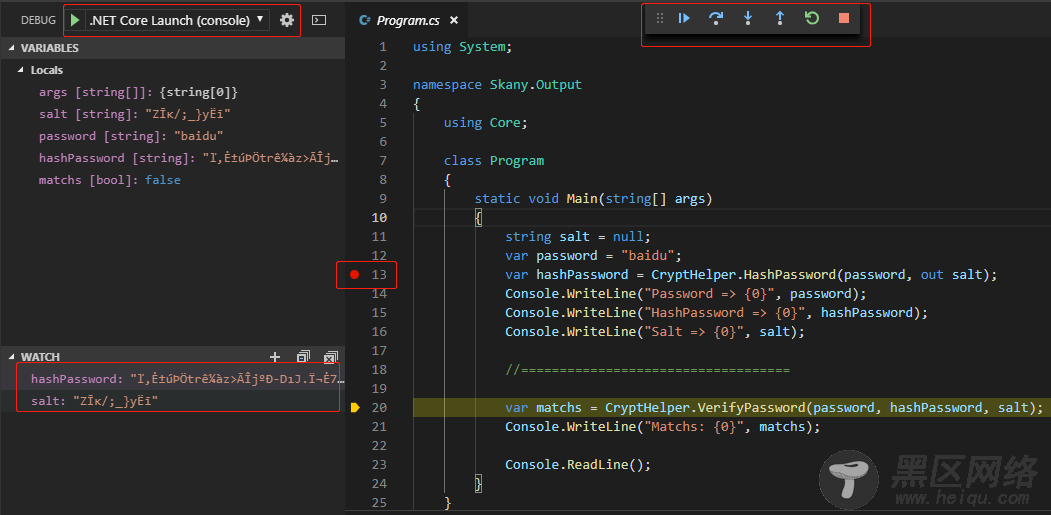
与 VS 中一样,可以通过 F5/F10/F11 控制调试流程,也可以添加 Watch 变量,鼠标也可以感知变量值
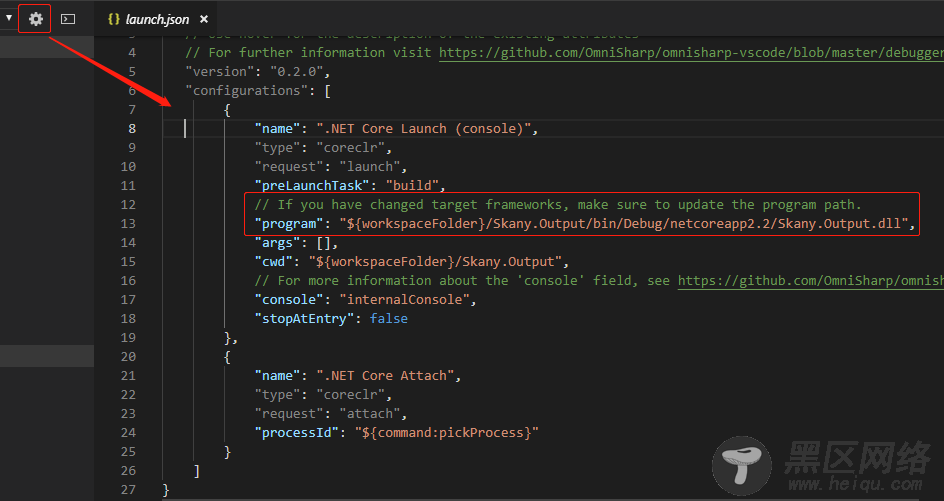
如果开始测试后,警告提示启动程序找不到,可以按提示(也可以点击界面齿轮按钮)修改配置文件 .vscode/launch.json
核对 program 节点路径是否正确
发布
VS 中用工具发布,发布参数配置在 *Profile.pubxml,但 VS Code 中只能用命令
# 发布Release配置,包括 .net core 运行时,分别发布到 linux 和 windows dotnet publish -c Release --self-contained -r linux-x64 dotnet publish -c Release --self-contained -r win-x64 # 发布Release配置,包括 .net core 运行时,指定目标框架 netcoreapp2.2 dotnet publish -c Release -f netcoreapp2.2 --self-contained -r linux-x64 dotnet publish -c Release -f netcoreapp2.2 --self-contained -r win-x64 # 发布Release配置,不包括 .net core 运行时 dotnet publish -c Release --self-contained false -r linux-x64 dotnet publish -c Release --self-contained false -r win-x64 # 发布Release配置,不包括 .net core 运行时,指定输出目录 dotnet publish -c Release --self-contained false -r linux-x64 -o C:\Here\Spany\publish\linux-x64 dotnet publish -c Release --self-contained false -r win-x64 -o C:\Here\Spany\publish\win-x64
虽然 VS 无比强大,VS Code 小清醒,但是 VS Code 灵活扩展性强,用来开发前端或 .NET Core 项目,也是得心应手
到此这篇关于使用VSCode开发和调试.NET Core程序的方法的文章就介绍到这了,更多相关VSCode开发和调试.NET Core内容请搜索脚本之家以前的文章或继续浏览下面的相关文章希望大家以后多多支持脚本之家!
您可能感兴趣的文章: