2、创建AIDL 客户端
同样是新建一个项目,这里要注意,需要将服务端生成成功后的gen 目录下的包复制过来,放到我们新建项目的src 文件夹下,如下图:
因为IMyService 这个生成类,引用到了Student 这个javabean 所以这里一并将javabean也复制过来。
至此,客户端的创建己经完毕,下面我们就要利用创建的客户端去调用服务端的方法。
3、客户端调用服务端提供的服务接口
先看一下运行效果:
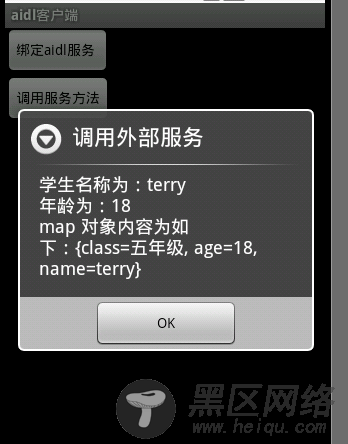
细心的朋友会发现,上面的数据不是我们在上面客户端为Student 设置的数据吗?怎么在这个程序 里面也同样得到了?没错。这就是aidl 的魅力,下面来看看如何调用 吧,图中有两个按钮,一个按钮为绑定AIDL 服务,即通过Activity 的 bindService 绑定 AIDL 外部服务,全部代码如下:
package com.aidl.client;
import com.aidl.test.IMyService;
import Android.app.Activity;
import android.app.AlertDialog;
import android.content.ComponentName;
import android.content.Context;
import android.content.Intent;
import android.content.ServiceConnection;
import android.os.Bundle;
import android.os.IBinder;
import android.os.RemoteException;
import android.view.View;
import android.view.View.OnClickListener;
import android.widget.Button;
public class aidlActivity extends Activity implements OnClickListener {
Button btn1, btn2;
private IMyService myService = null;
private ServiceConnection serviceConnection = new ServiceConnection() {
@Override
public void onServiceDisconnected(ComponentName name) {
// TODO Auto-generated method stub
}
@Override
public void onServiceConnected(ComponentName name, IBinder service) {
// TODO Auto-generated method stub
myService = IMyService.Stub.asInterface(service);
btn2.setEnabled(true);
}
};
/** Called when the activity is first created. */
@Override
public void onCreate(Bundle savedInstanceState) {
super.onCreate(savedInstanceState);
setContentView(R.layout.main);
btn1 = (Button) findViewById(R.id.Button01);
btn2 = (Button) findViewById(R.id.Button02);
btn2.setEnabled(false);
btn1.setOnClickListener(this);
btn2.setOnClickListener(this);
}
@Override
public void onClick(View v) {
// TODO Auto-generated method stub
switch (v.getId()) {
case R.id.Button01:
bindService(new Intent("com.aidl.test.IMyService"),
serviceConnection, Context.BIND_AUTO_CREATE);
break;
case R.id.Button02:
StringBuilder sb = new StringBuilder();
try {
sb.append("学生名称为:" + myService.getStudent().getName() + "\n");
sb.append("年龄为:" + myService.getStudent().getAge() + "\n");
sb.append("map 对象内容为如下:"
+ myService.getMap("中国", myService.getStudent())
.toString());
} catch (RemoteException e) {
// TODO Auto-generated catch block
e.printStackTrace();
}
new AlertDialog.Builder(aidlActivity.this).setTitle("调用外部服务")
.setMessage(sb.toString()).setPositiveButton(
android.R.string.ok, null).show();
break;
default:
break;
}
}
}
在ServiceConnetction里面对IMyService 进行初始化,即可操作该对象 ,该对象就可以得到我们所有要处理的数据。
4、小结
aidl 文件调用javabean 的aidl文件必须导包; javabean 必须序列化,如果没有用javabean可以用简单的变量代替,如返回一个整型,返回一个字符串等。 使用aidl 必须同时存在客户端和服务端,即客户端在本机上,服务端也在本机上,要使用客户端必须服务端事先在本机上注册过服务。代码下载: