微信小程序的轮播图和Android的轮播图一点不一样 ,这里我们看一下我们需要用到的控件介绍
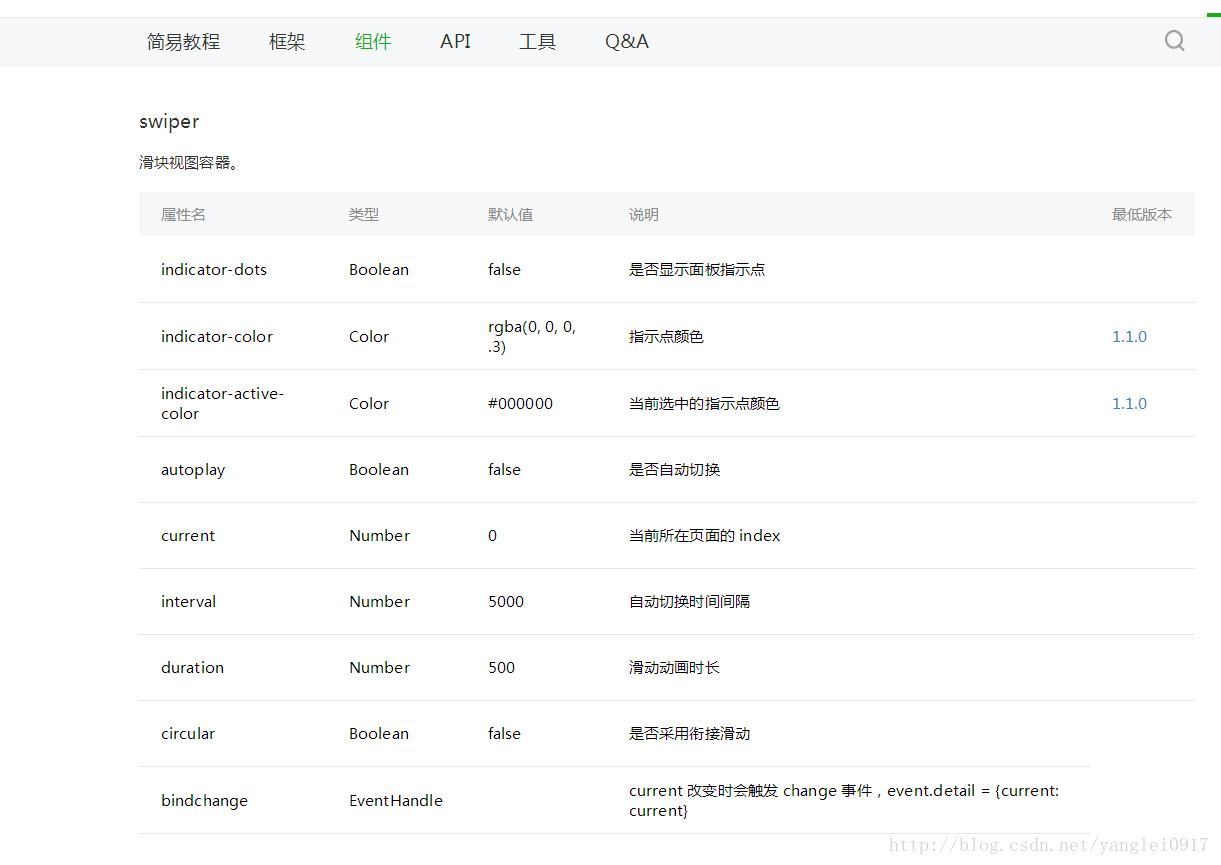
这里我们用到了swiper这个组件,上边的图片已经把这个组件的属性 都列出来了 我们用的时候直接用就可以了 接下来,再看一下网络请求的API,这里我们用到的是GET 请求,我们开一下微信小程序官方给我们的API


接下来就是开启我们小程序轮播图之旅了,附上一张效果图
首先,我们看一下我们的index.wxml文件
<view> <swiper indicator-dots="{{indicatorDots}}" vertical="{{vertical}}" autoplay="{{autoplay}}" interval="{{interval}}" duration="{{duration}}" bindchange="swiperchange"> <block wx:for="{{images}}"> <swiper-item> <image src="https://www.jb51.net/{{item.picurl}}" /> </swiper-item> </block> </swiper> </view>
index.js文件
var app = getApp() Page({ /** * 页面的初始数据 */ data: { //是否显示指示点 true 显示 false 不显示 indicatorDots: true, //控制方向 vertical: false, //是否自动切换 autoplay: true, //自动切换时间间隔 interval: 3000, //滑动动画时长 duration: 1000, }, /** * 生命周期函数--监听页面加载 */ onLoad: function (options) { var that = this //调用应用实例的方法获取全局数据 app.getUserInfo(function (userInfo) { //更新数据 that.setData({ userInfo: userInfo }) }) //网络请求 GET方法 wx.request({ url: 'http://huanqiuxiaozhen.com/wemall/slider/list', method: 'GET', data: {}, header: { 'Accept': 'application/json' }, //成功后的回调 success: function (res) { console.log('11111' + res), that.setData({ images: res.data }) } }) } })
index.wxss 这里就是简单的控制了一下显示的样式
.swiper_box { width: 100%; } swiper-item image { width: 100%; display: inline-block; overflow: hidden; }