Installing Apache MySQL, PHP and phpmyadmin on Ubuntu10.10 Maverick Meerkat is far easier and less complicated than doing the same on Fedora 13, (my own experience).
Step 1: You start by installing mysql Specify new password for the MySQl “root” user when prompted. Repeat it for a second time and you would have MySQL server and client installed. Step 2: Next, install Apache2: sudo apt-get install apache2 And you get apache2 installed as well. To double check, point your browser to , and you should see the Apache2 placeholder page like this.
Step 3: To install support for PHP, do the usual
sudo apt-get install php5 libapache2-mod-php5To verify that everything installed correctly and php support is enabled, you need torestart apache by doing this
sudo /etc/init.d/apache2 restartCreate a test php file called info.php, using a text editor of your choice (say gedit)
sudo gedit /var/www/info.phpand paste the following content and save the file
<?php phpinfo(); ?>Now open the following page and you should see something like this
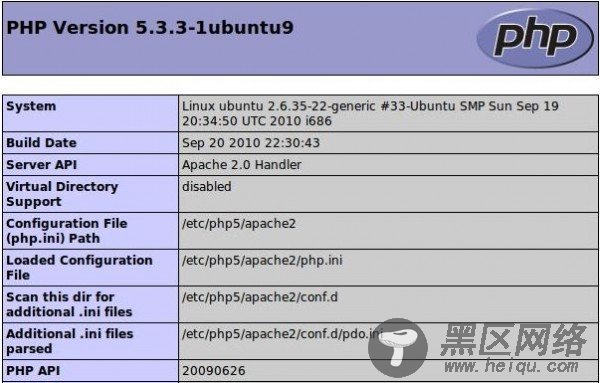
Step 4: To make MySQL, php and apache talk among themselves, you would have to install php5-mysql, below I am listing some more useful packages that you might want to install
sudo apt-get install php5-mysql php5-curl php5-gd php5-idn php-pear php5-imagick php5-imap php5-mcrypt php5-memcache php5-ming php5-ps php5-pspell php5-recode php5-snmp php5-sqlite php5-tidy php5-xmlrpc php5-xsl php5-common
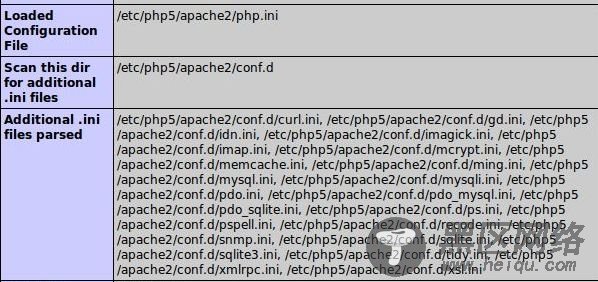
Now refresh the info.php page that you have open in your browser and you should be able to see the support for mysql if you search for it by doing Ctrl+f, but before that don’t forget to restart apache again (sudo /etc/init.d/apache2 restart)
![]()