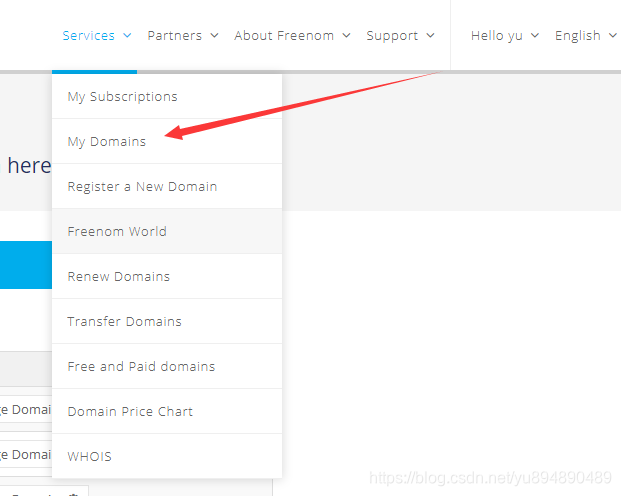

点击Manage domain
进入下图在点红色箭头处,
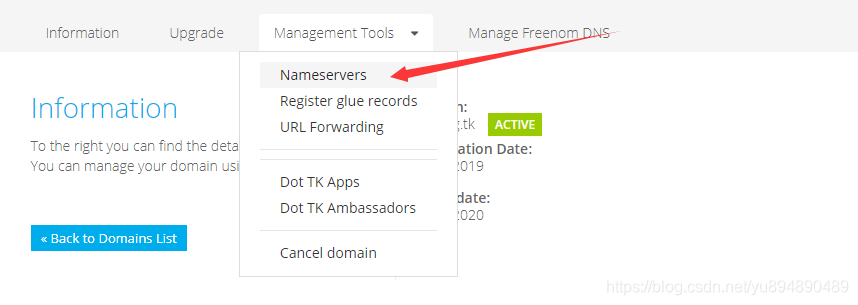
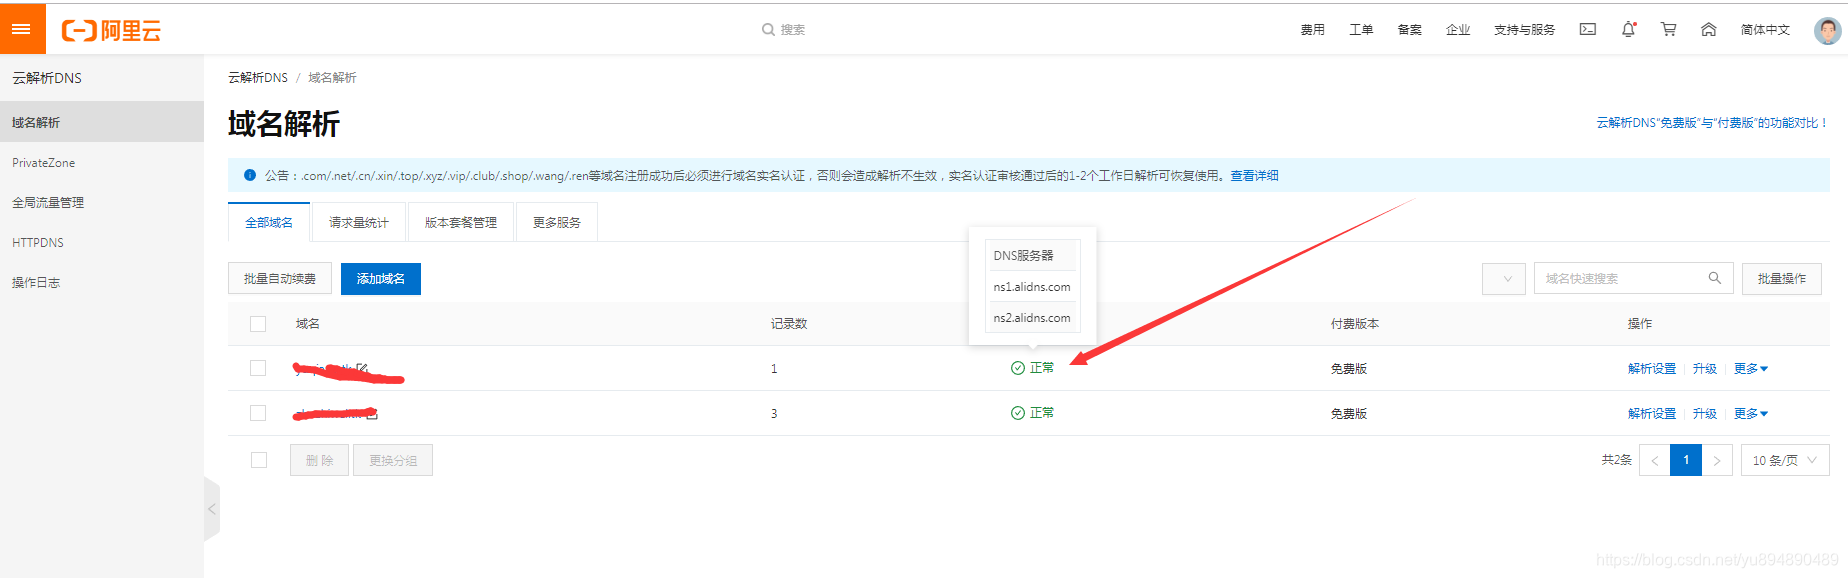
下图我个人用了阿里云的域名解析也是免费的,所以使用自定义的,也可以使用默认的先说使用自定义的,下图的2个nameserver从阿里云处获取

从阿里云处获取DNS,先添加域名,然后鼠标悬浮在第三列上就会出现如下图的DNS地址,填写写到上图就可以了
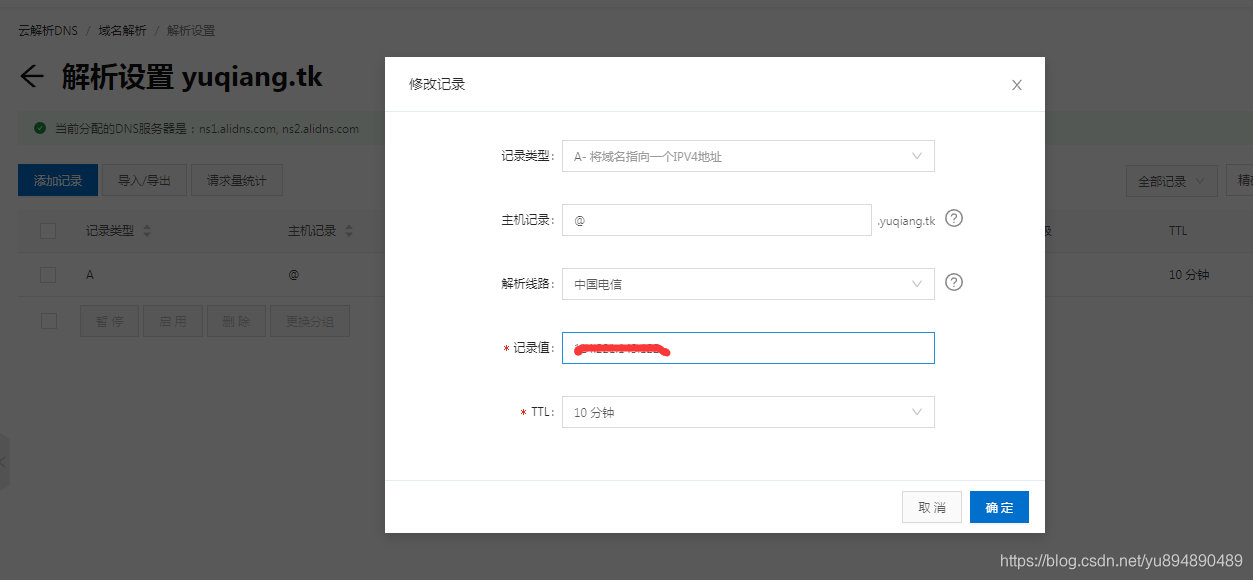

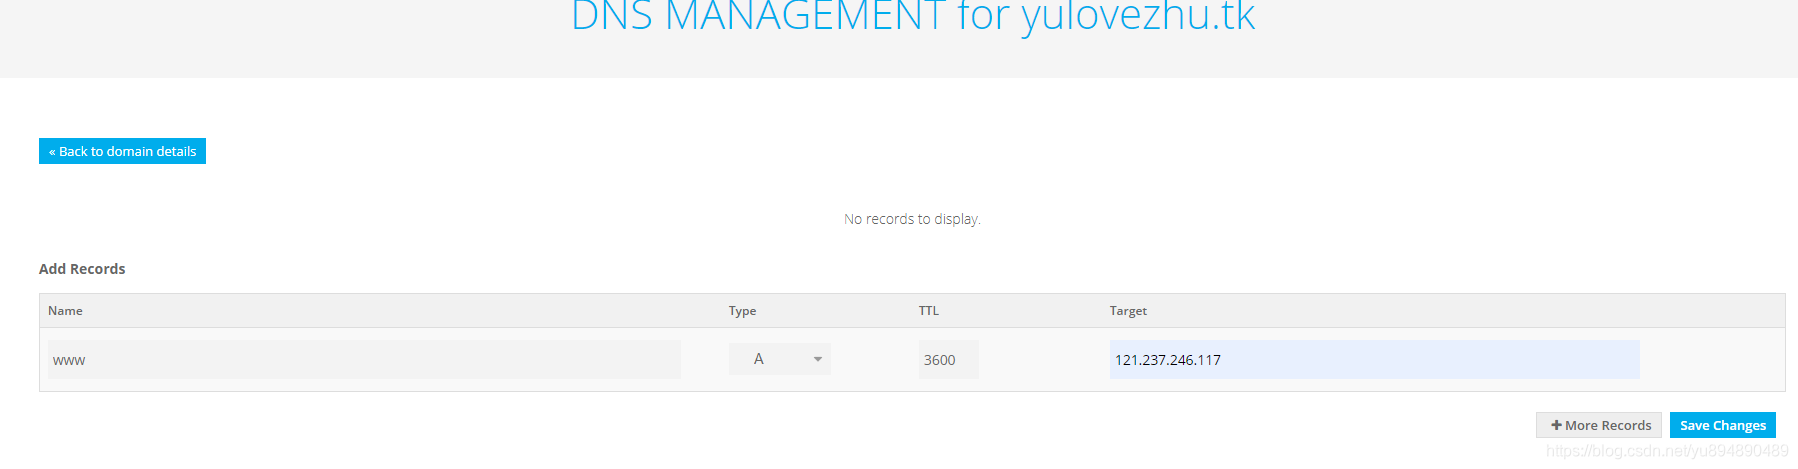
这里的@代表你可以直接访问假如你申请的是do-bi.tk,那么你可以直接访问do-bi.tk,如果你填写的是www那么你就要,明白了吧。
如果是默认的如下图:

点击manage frenom dns,填写下图内容保存即可。
5.python动态解析DNS
上面的问题解决了通过简单好记的域名关联到了个人电脑的ip,但是还有一个上面提到的问题,如果你的路由重启公网ip会变化的。域名就会失效。我当时想到2个解决办法:一个是通过脚本获取ip定时发送email给自己。但这样有个问题是域名的意义就不大了,每次xshell之类的都要重新换ip,或者去重新解析DNS。第二个是看有个cloudxns可以动态解析DNS,但不幸运的是这个网站好像关了,虽然网站还在服务停止了,连注册都不行了。但它给了我个启发,原来可以这样做,我就开始找解析DNS的工具,最终发现原来freenom有解析的API,这种必须使用默认的nameserver。,这是api地址,大家如果英文好可以看下,虽然我没试成功,哈哈。主要是我个人英文不怎么样。知道怎么去做,就知道怎么去搜索了,然后我就发现阿里的域名解析功能,很不错,免费的也够用,还记得我们的原则吗。嘿嘿。
脚本我已经写好了,如果你想用的话先要注册阿里云,获取AK。
在这个网地址申请后下载下来会有个.csv文件,也可以直接在页面复制,不过只能看一次。
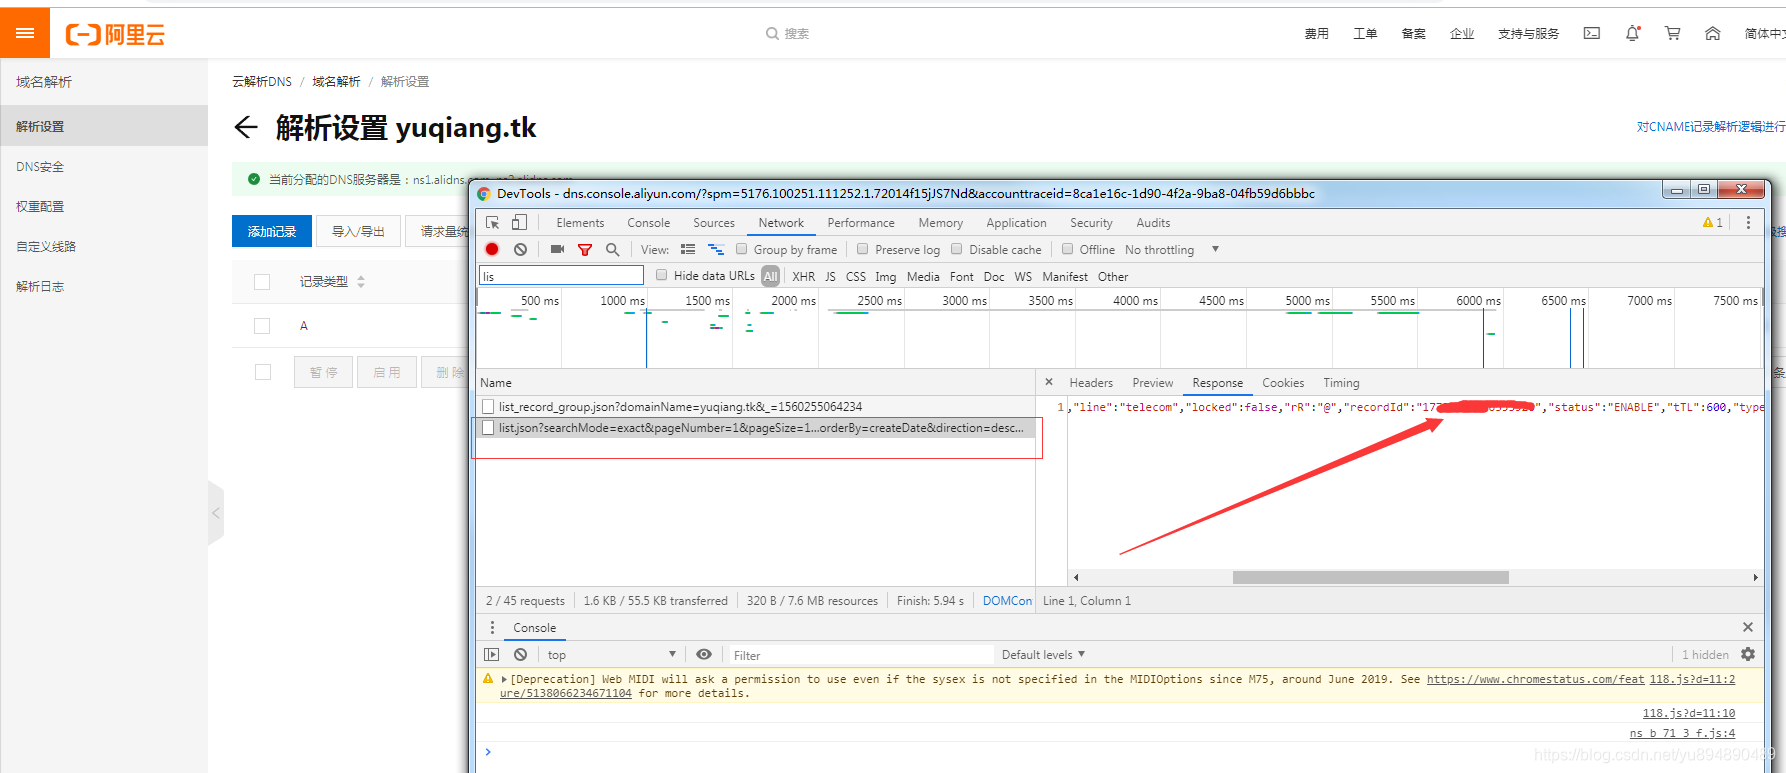
脚本:里面的三个参数id,key,和record_id是要换你自己的(下面的我随意写的应该不会成功的 哈哈),record_id可以在下图的操作找到。
#!/usr/bin/env python
#coding =utf-8
#!pip install schedule
from aliyunsdkcore.client import AcsClient
from aliyunsdkcore.acs_exception.exceptions import ClientException
from aliyunsdkcore.acs_exception.exceptions import ServerException
from aliyunsdkalidns.request.v20150109.UpdateDomainRecordRequest import UpdateDomainRecordRequest
import requests
import re
from aliyunsdkalidns.request.v20150109.DescribeDomainRecordInfoRequest import DescribeDomainRecordInfoRequest
import time
import os
import schedule
id = 'LTAIdBHkdcozZ7eo'#AK的id
key = 'Zl2TjasivfasnoukPdasuNJJkaasdKWsj6fI1F0'#AK的key
client = AcsClient(id, key, 'cn-hangzhou')
record_id = '17786684s56asd6353920' #这个id是你新建的解析记录id
def get_ip():
responses = requests.get("")
print(responses.text)
return responses.text
def update(ip):
request = UpdateDomainRecordRequest()
request.set_accept_format('json')
request.set_Line("telecom")
request.set_Value(ip)
request.set_Type("A")
request.set_RecordId(record_id)
request.set_RR("@")
response = client.do_action_with_exception(request)
# python2: print(response)
print(str(response, encoding='utf-8'))
def query():
request = DescribeDomainRecordInfoRequest()
request.set_accept_format('json')
request.set_RecordId("17782361597555712")
response = client.do_action_with_exception(request)
# python2: print(response)
print(str(response, encoding='utf-8'))
return str(response, encoding='utf-8')
def regip(strs):
#精确提取IP
result = re.findall(r"\b(?:[0-9]{1,3}\.){3}[0-9]{1,3}\b", strs)[0]
if result:
return result
else:
return '0.0.0.0'
#query()
def deal():
localhost_ip = get_ip()
domain_ip = regip(query())
if domain_ip == '0.0.0.0':
print('出错了!')
elif domain_ip == localhost_ip:
print('ip一致不需要更新')
else:
print('更新ip:'+localhost_ip)
update(localhost_ip)
#schedule.every(10).seconds.do(deal)
schedule.every().hour.do(get_ip)
while True:
schedule.run_pending()
time.sleep(10)
#print(regip(query()))
然后将该脚本复制到一个.py的文件中名字自己想个就行,不过要先配置python3的环境,参考如下:
https://www.runoob.com/python/python-install.html
配置好环境先执行下列:
pip install aliyun-python-sdk-domain aliyun-python-sdk-alidns aliyun-python-sdk-core-v3 aliyun-python-sdk-httpdns requests schedule
如果想测试下将#schedule.every(10).seconds.do(deal)的#删除
schedule.every().hour.do(get_ip)这个加个#就会在每10多秒跑一次
最后将该脚本做成服务就可以了,我的是ubuntu18,请参考https://www.cnblogs.com/airdot/p/9688530.html
将$nohup 绝对路径的脚本.py文件 &加入 /etc/rc.local文件中即可
7.最后总结测试
