The article for vue.js Setup.
Original post link:https://www.cnblogs.com/markjiang7m2/p/10783456.html
Source code:https://gitee.com/Sevenm2/Vue.Web/tree/master/Vue.Web
If we want to develop Vue.js, we should install Node.js firstly.
Actually I have installed Node.js in my environment when I started my another repository TaxSystem, but without any note to mark down the action. I will write down the procedure here.
1.Install Node.js
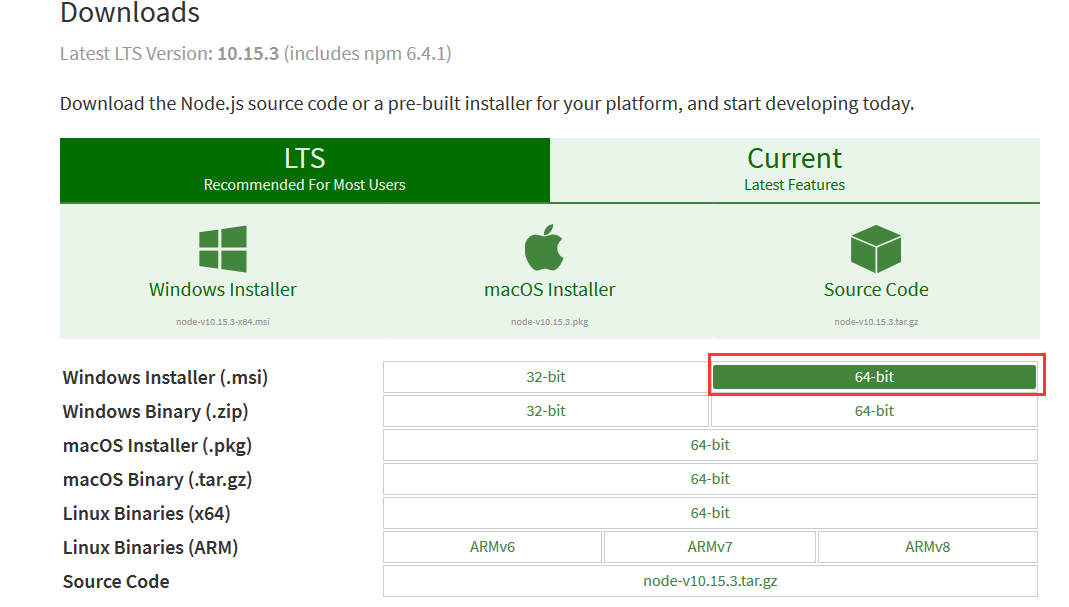
Download Node.js install package from nodejs.org and install. You should select your version.
Set environment variables
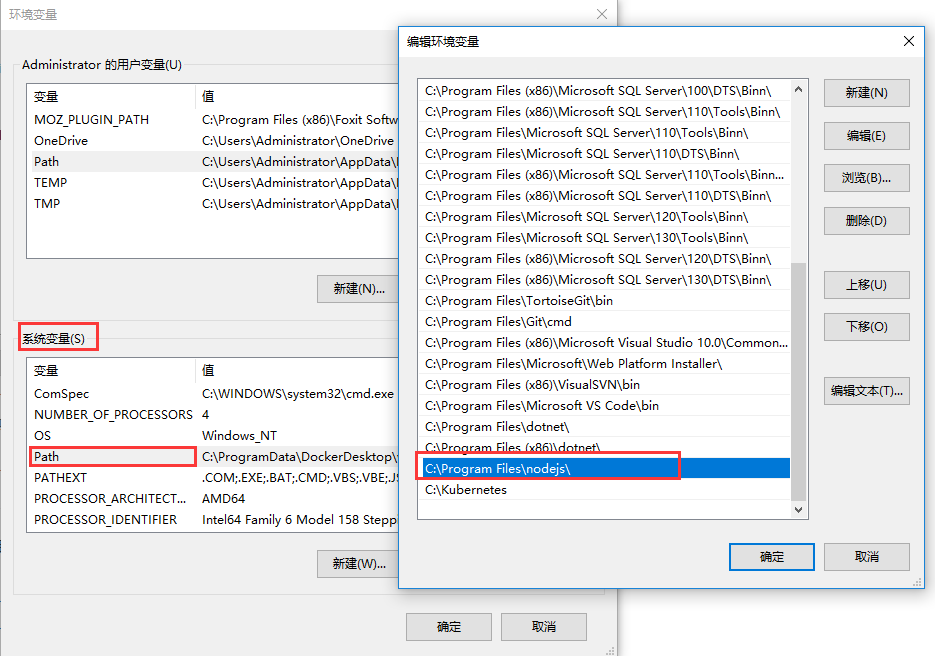
And then you can input the command line to verify if Node.js is installed successfully.
node -v npm -v
2.Environment Configuration
The node cache files and global modules will be installed and saved into C:\Users\xxx\AppData\Roaming\npm by default. We have better to change the path as our system disk space is limited.
Create 2 folders node_global & node_cache

Reset the configuration in CMD.
npm config set prefix "D:\Mark\nodejs\node_global" npm config set cache "D:\Mark\nodejs\node_cache"Add the environment variables
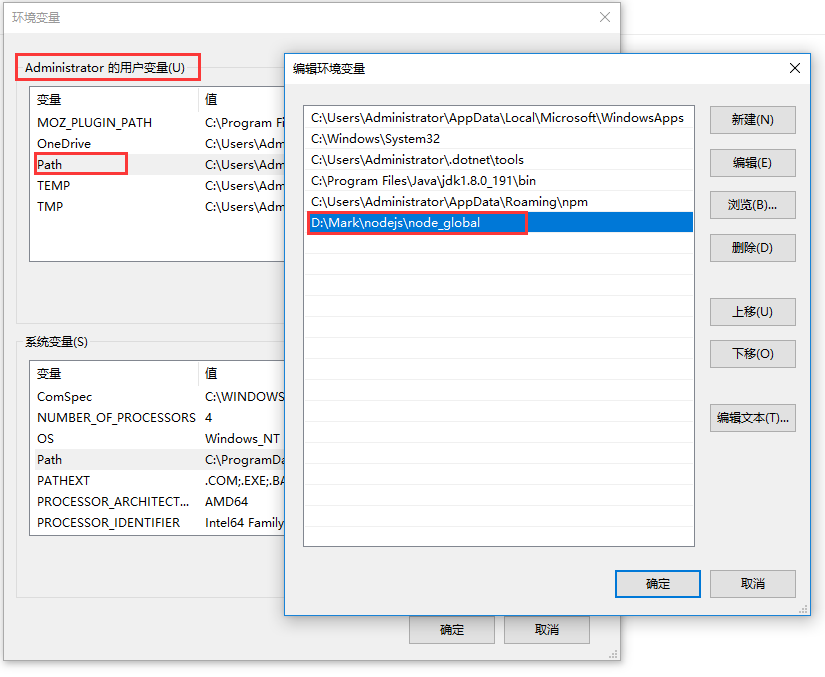
Install vue-cli as a global module.
npm install -g vue-cli
Input a command line to verify if vue-cli is installed successfully.
Use Visual Studio Code to open the folder you want to create the project in.
Click Ctrl + ~ to open the Terminal.
Input the below command line to new a project based on webpack and select the setting as requested.
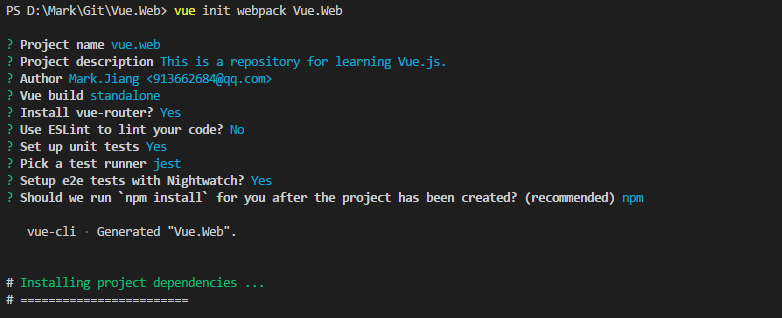
Config the PORT No.

Enter the project folder and run the project
cd Vue.Web npm run dev
Then we can view the Website in browser.
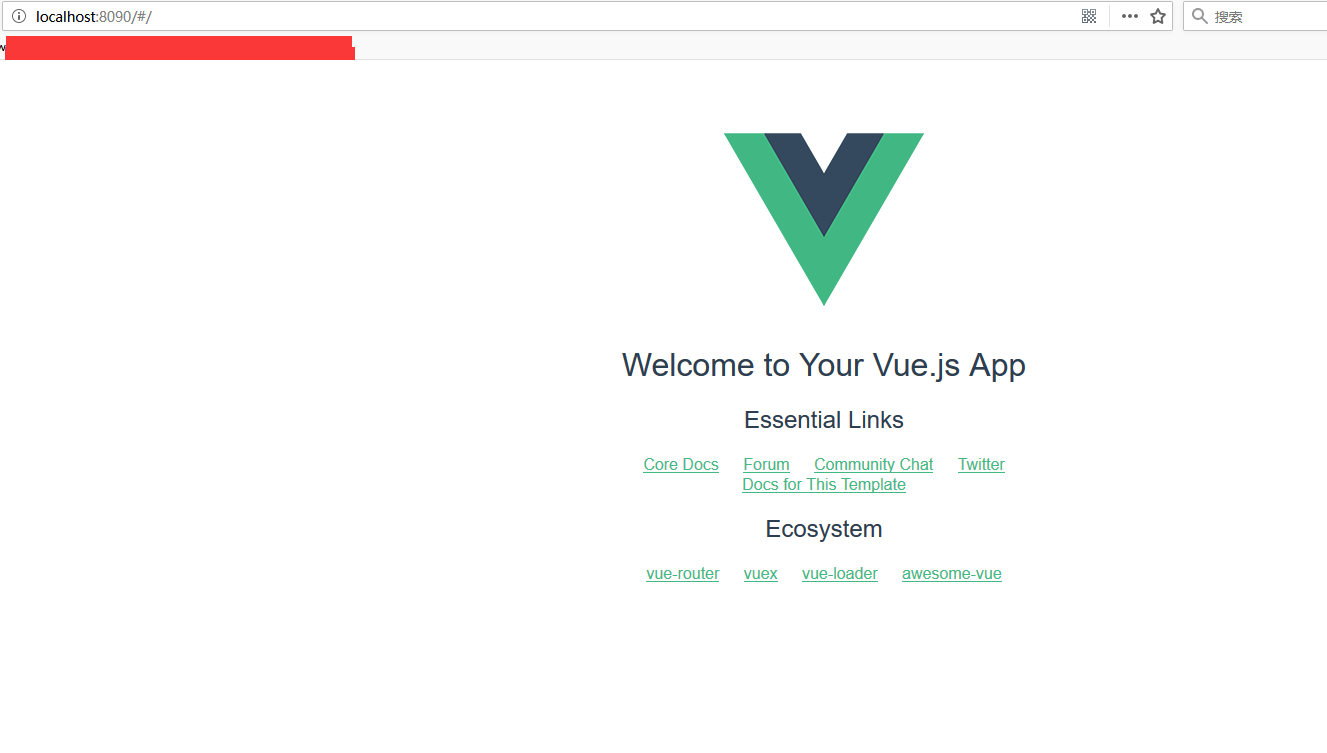
We can also build the project
npm run build .

It is an extension Vue tooling for VS Code.
1.Install vetur
Click Ctrl + P, input ext install vetur, then install the extension.
2.Add the below in User settings
Click Ctrl + Shift + P, input Preferences: Open User Settings.
Add the below in User settings

