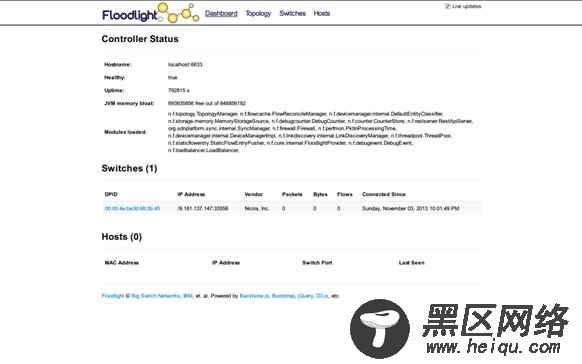
通过访问 Floodlight 提供的 Web 管理界面 <Host Address>:8080/ui/index.html,我们可以查看 Floodlight 控制器的状态以及所有连接到 Floodlight 的交换机列表
图 2. Floodlight 主界面
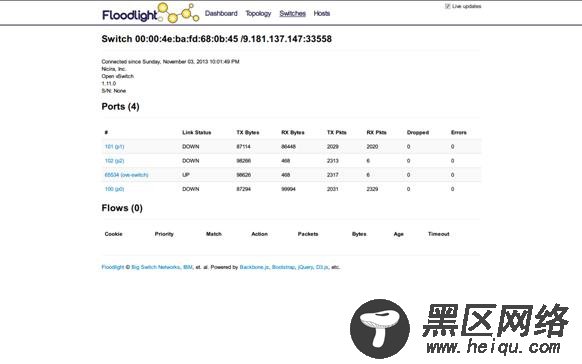
选中某个 OpenFlow 交换机, 查看其中的端口列表和流表信息
图 3. 查看 OpenFlow 交换机的详细信息
通过 Floodlight 的 RESTAPI,添加两条新的规则让端口 p0 和 p1 可以相互通讯。注意:替换命令行中的 switch 的 ID 为交换机的 datapath ID
1 2 3 4 5 6 7
curl -d '{"switch": "00:00:0e:f9:05:6b:7c:44", "name":"my-flow1", "cookie":"0","priority":"32768", "ingress-port":"100","active":"true", "actions":"output=flood"}' :8080/wm/staticflowentrypusher/json curl -d '{"switch": "00:00:0e:f9:05:6b:7c:44", "name":"my-flow2", "cookie":"0","priority":"32768", "ingress-port":"101","active":"true", "actions":"output=flood"}' :8080/wm/staticflowentrypusher/json
验证是否能从端口 p0 发送数据包到 p1
1 2 3 4 5 6 7 8 9 10
$ ip netns exec ns0 ping -c4 192.168.1.101 PING 192.168.1.101 (192.168.1.101) 56(84) bytes of data. 64 bytes from 192.168.1.101: icmp_req=1 ttl=64 time=0.027 ms 64 bytes from 192.168.1.101: icmp_req=2 ttl=64 time=0.018 ms 64 bytes from 192.168.1.101: icmp_req=3 ttl=64 time=0.023 ms 64 bytes from 192.168.1.101: icmp_req=4 ttl=64 time=0.022 ms --- 192.168.1.101 ping statistics --- 4 packets transmitted, 4 received, 0% packet loss, time 2998ms rtt min/avg/max/mdev = 0.018/0.022/0.027/0.005 ms
在 OVS 端也可以看到,流表规则已经被 OVS 同步到本地。
1 2 3 4 5 6
$ ovs-ofctl dump-flows ovs-switch NXST_FLOW reply (xid=0x4): cookie=0xa0000000000000, duration=335.122s, table=0, n_packets=347, n_bytes=28070, idle_age=1, in_port=100 actions=FLOOD cookie=0xa0000000000000, duration=239.892s, table=0, n_packets=252, n_bytes=24080, idle_age=0, in_port=101 actions=FLOOD
通过 Floodlight 的 RestAPI,查看交换机上的流表规则
1
curl :8080/wm/staticflowentrypusher/list/00:00:0e:f9:05:6b:7c:44/json
通过 Floodlight 的 RestAPI,删除交换机上的流表规则
1
curl :8080/wm/staticflowentrypusher/clear/00:00:0e:f9:05:6b:7c:44/json
总结
通过本文的讲述和实验,我们了解了 Open vSwitch 以及 OpenFlow 的基本概念,以及通过 OpenFlow 协议修改 Open vSwitch 中的流表项,最后演示了如何使用 Floodlight 连接 Open vSwitch 并进行管理。

