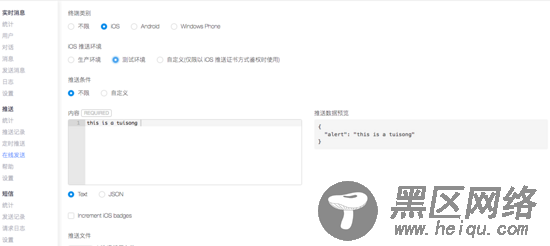
进行到这步了就已经完成了一半了,现在只需要配置推送证书即可接收推送消息,这里就不介绍配置证书流程了,详细步骤请参考 iOS推送证书设置,推送证书设置完成后,现在就去leanclound试试看能不能收到推送吧,退出APP,让APP处于后台状态,

点击发送,看是不是收到了消息.
进行到这步骤说明推送已经完成了一大半了,APP当然还需要包括以下功能:
APP在前台、后台或者关闭状态下也能收到推送消息
点击通知能够对消息进行操作,比如跳转到具体页面
APP处于前台状态时通知的显示
当APP在前台运行时的通知iOS是不会提醒的(iOS10后开始支持前台显示),因此需要实现的功能就是收到通知并在前端显示,这时候就要使用一个模块来支持该功能了,那就是react-native-message-bar
首先就是安装react-native-message-bar模块了
yarn add react-native-message-bar //yarn安装 或者 npm install react-native-message-bar --save //npm安装
安装成功之后,在App.js文件中引入并注册MessageBar
... /* *引入展示通知模块 */ const MessageBarAlert = require('react-native-message-bar').MessageBar; const MessageBarManager = require('react-native-message-bar').MessageBarManager; ... componentDidMount () { //初始化 PushService.init_pushService(); MessageBarManager.registerMessageBar(this.alert); } ... render() { const {Nav} = this.state if (Nav) { return ( //这里用到了导航,所以需要这样写,布局才不会乱 MessageBarAlert绑定一个alert <View style={{flex: 1,}}> <Nav /> <MessageBarAlert ref={(c) => { this.alert = c }} /> </View> ) } return <View /> }
然后再对PushService进行修改,新增对notification事件监听和推送消息的展示
import { AppState, NativeModules, Alert, DeviceEventEmitter } from 'react-native'; ... //初始化推送 init_pushService = () => { //添加监听事件 PushNotificationIOS. addEventListener('register',this.register_push); PushNotificationIOS.addEventListener('notification', this._onNotification); //请求权限 PushNotificationIOS.requestPermissions(); } _onNotification = ( notification ) => { var state = AppState.currentState; // 判断当前状态是否是在前台 if (state === 'active') { this._showAlert(notification._alert); } } ... _showAlert = ( message ) => { const MessageBarManager = require('react-native-message-bar').MessageBarManager; MessageBarManager.showAlert({ title: '您有一条新的消息', message: message, alertType: 'success', stylesheetSuccess: { backgroundColor: '#7851B3', titleColor: '#fff', messageColor: '#fff' }, viewTopInset : 20 }); } ...
最后重新运行APP并在leanclound发送一条消息,看是否在APP打开状态也能收到通知,到了这里推送就完成了
