2.添加摘要:我们在购物车存放了许多东西,通过摘要,可以显示购物总额的缩略图,我们选择的位置在顶部右上角的一个比较显眼的位置进行显示它,当然,还需要有点击的跳转按钮方便显示所有的购物清单页面。
继续在 CartController 下新增一个 Action,名为 Summary,返回值是一个分部视图:
/// <summary> /// 摘要 /// </summary> /// <returns></returns> public PartialViewResult Summary() { return PartialView(GetCart()); }
对应的Summary.cshtml
@model Wen.BooksStore.Domain.Entities.Cart <div> 你的购物车:@Model.ComputeTotalValue() <span>@Html.ActionLink("结算", "Checkout", "Cart", new { retunUrl = Request.Url.PathAndQuery }, null)</span> </div>
对应的布局页_Layout.cshtml 修改的地方为:
_Layout.cshtml
<!DOCTYPE html> <html> <head> <meta content="width=device-width" /> <title>@ViewBag.Title</title> <link href="https://www.jb51.net/~/Contents/Site.css" /> </head> <body> <div> @{ Html.RenderAction("Summary", "Cart");} <div>图书商城</div> </div> <div> @{ Html.RenderAction("Sidebar", "Nav"); } </div> <div> @RenderBody() </div> </body> </html>
添加了新的东西,css 也要进行修改:
Site.css
body { } #header, #content, #sideBar { display: block; } #header { background-color: green; border-bottom: 2px solid #111; color: White; } #header, .title { font-size: 1.5em; padding: .5em; } #sideBar { float: left; width: 8em; padding: .3em; } #content { border-left: 2px solid gray; margin-left: 10em; padding: 1em; } .pager { text-align: right; padding: .5em 0 0 0; margin-top: 1em; } .pager A { font-size: 1.1em; color: #666; padding: 0 .4em 0 .4em; } .pager A:hover { background-color: Silver; } .pager A.selected { background-color: #353535; color: White; } .item input { float: right; color: White; background-color: green; } .table { width: 100%; padding: 0; margin: 0; } .table th { font: bold 12px "Trebuchet MS", Verdana, Arial, Helvetica, sans-serif; color: #4f6b72; border-right: 1px solid #C1DAD7; border-bottom: 1px solid #C1DAD7; border-top: 1px solid #C1DAD7; letter-spacing: 2px; text-transform: uppercase; text-align: left; padding: 6px 6px 6px 12px; background: #CAE8EA no-repeat; } .table td { border-right: 1px solid #C1DAD7; border-bottom: 1px solid #C1DAD7; background: #fff; font-size: 14px; padding: 6px 6px 6px 12px; color: #4f6b72; } .table td.alt { background: #F5FAFA; color: #797268; } .table th.spec, td.spec { border-left: 1px solid #C1DAD7; } .bookSummary { width: 15%; float: right; margin-top: 1.5%; }

二、订单结算
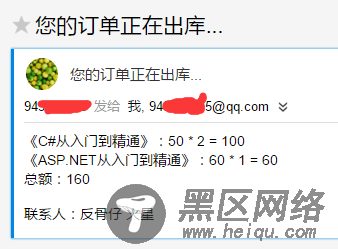
购物完毕就是结算页面了,这里的订单结算并不涉及支付接口的调用,只是使用邮件的形式进行通知而已。
这里,我设计结算的时候需要要求用户输入一些信息,如姓名、地址和邮箱等信息,在点击确定时我再将这些输入的信息与购物清单的信息从系统的邮箱发到你所输入的邮箱当中。一个比较直观的图:

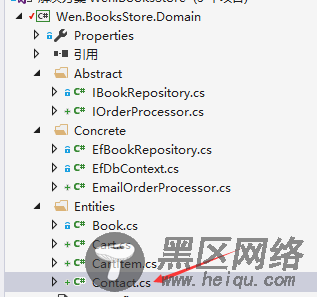
1.在 Entities 中添加一个域模型 Contact.cs 表示联系人的信息。

/// <summary> /// 联系信息 /// </summary> public class Contact { [Required(ErrorMessage = "姓名不能为空")] public string Name { get; set; } [Required(ErrorMessage = "地址不能为空")] public string Address { get; set; } [Required(ErrorMessage = "邮箱不能为空")] [RegularExpression(@"(\w+([-+.]\w+)*@\w+([-.]\w+)*\.\w+([-.]\w+)*\w\w)", ErrorMessage = "输入的邮箱地址不合法")] public string Email { get; set; } }
CartController.cs 添加一个用于结算的 Action:
/// <summary> /// 结算 /// </summary> /// <returns></returns> public ViewResult Checkout() { return View(new Contact()); }
Checkout.cshtml 中的:
@model Wen.BooksStore.Domain.Entities.Contact <div> @using (Html.BeginForm()) { <div>@Html.ValidationSummary()</div> <div>姓名: @Html.TextBoxFor(x => x.Name)</div> <div>地址: @Html.TextBoxFor(x => x.Address)</div> <div>邮箱: @Html.TextBoxFor(x => x.Email)</div> <div><input type="submit" value="提交" /></div> } </div>
这里使用的是模型校验,_Layout.cshtml 布局页需要引入js:
