最近使用ng-alain做前端,sf的部件很丰富,但是做起来之后就会发现,多多少少会有一些不符合需求的东西,比如:

这是一个string的部件,后边跟上一个单位看着很不错,但是我们通常在使用number时会更需要这个单位,然而官方的部件并没有
再比如:

我想做一个编辑框,要求内容不可编辑,并且该内容要从别的列表进行选择,下拉选择可以满足需求,但是如果内容太多,有时就不方便使用下拉框了,那么这时候我们就需要自定义
二、自定义ng-alain部件的流程
1、组件的整体结构
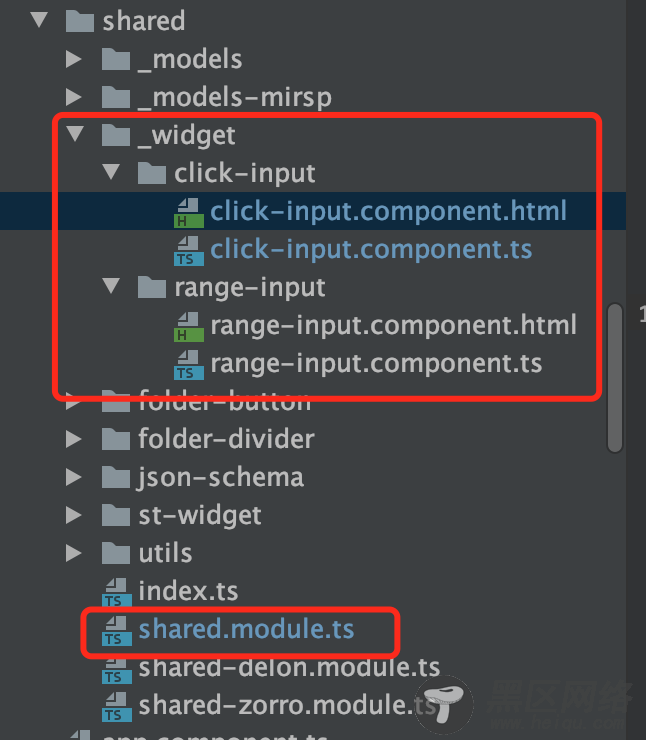
2、首先,组件click-input.component.html,自定义组件要包在sf-item-wrap特殊标签里面
<sf-item-wrap [id]="id" [schema]="schema" [ui]="ui" [showError]="showError" [error]="error" [showTitle]="schema.title"> <!-- 开始自定义控件区域 --> <div nz-row> <div nz-col nzSpan="16"><input type="text" [placeholder]="placeholder" nz-input [(ngModel)]="content" [disabled]="inputDisable" (ngModelChange)="onChange()"></div> <div nz-col nzSpan="2" nzPush="2"></div> <div nz-col nzSpan="6"><button nz-button type="button" nzType="primary" (click)="test()" >{{btnTitle}}</button></div> </div> <!-- 结束自定义控件区域 --> </sf-item-wrap>
3、写组件click-input.component,继承ControlWidget
import {Component, OnInit} from '@angular/core'; import { ControlWidget } from '@delon/form'; @Component({ selector: 'app-product-widget-click-input', templateUrl: './click-input.component.html', }) export class ClickInputComponent extends ControlWidget implements OnInit { /* 用于注册小部件 KEY 值 */ static readonly KEY = 'click-input'; // 价格区间 content: any; // to: any; placeholder: string; // 使用的时候用来绑定 ui: {placeholder: '请选择业务系统' } inputDisable: boolean; // 使用的时候用来绑定 ui: {inputDisable: true, // input是否可用} btnTitle: string; // 使用的时候用来绑定 ui: {btnTitle: '选择数据',} 按钮名称 ngOnInit(): void { this.placeholder = this.ui.placeholder || '请输入'; // 使用的时候用来绑定 ui: {placeholder: '请选择业务系统' } this.inputDisable = this.ui.inputDisable || false; // 使用的时候用来绑定 ui: {inputDisable: true, // input是否可用} this.btnTitle = this.ui.btnTitle || '按钮'; // 使用的时候用来绑定 ui: {btnTitle: '选择数据',} } getData = () => { return this.content; } onChange() { const v = this.getData(); this.setValue(v); } // reset 可以更好的解决表单重置过程中所需要的新数据问题 reset(value: any) { if (value) { console.log(value); const content = value; this.content = content; // this.to = to; this.setValue(value); } } test(value?: string){ if (this.ui.click) { this.ui.click(value); // 可以在组件里直接调用使用ui的配置那里的方法 ui: {click: (value) => this.test(value),} } } }
4、在shared.module.ts中注册部件
涉及到项目内容,以下只展示注册部件的住要内容
// 自定义 小部件 const WIDGETS = [ RangeInputComponent, ClickInputComponent ]; @NgModule({ declarations: [ // your components ...COMPONENTS, ...DIRECTIVES, ...WIDGETS ], }) export class SharedModule { constructor(widgetRegistry: WidgetRegistry) { // 注册 自定义的 widget for (const widget of WIDGETS){ widgetRegistry.register(widget.KEY /* 'range-input' */, widget); } } }
5、使用自定义部件
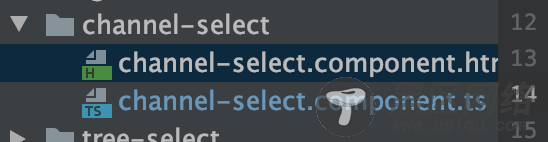
channel-select.component.html
<sf [schema]="schema" (formSubmit)="submit($event)"> </sf>
channel-select.component.ts
schema: SFSchema = { properties: { btn: { type: 'string', title: '编辑框+按钮', default: '1234', // 设默认值 ui: { widget: 'click-input', placeholder: '请选择业务系统', // inputDisable: true, // input是否可用 btnTitle: '选择数据', click: (value) => this.test(value), } }, } };
总结
到此这篇关于ng-alain的sf如何自定义部件的文章就介绍到这了,更多相关ng-alain的sf如何自定义部件内容请搜索脚本之家以前的文章或继续浏览下面的相关文章希望大家以后多多支持脚本之家!
您可能感兴趣的文章: