
在并发场景中,保证同一时刻只有一个线程对有并发隐患的代码进行操作
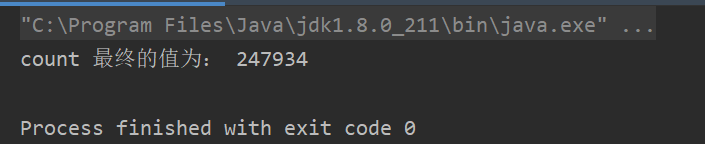
1.2 错误案例需求:两个线程对 count 变量进行200000次循环增加,预期结果是400000次
public class SynchronizedDemo implements Runnable { private static int count = 0; static SynchronizedDemo synchronizedInstance = new SynchronizedDemo(); public static void main(String[] args) { Thread t1 = new Thread(synchronizedInstance); Thread t2 = new Thread(synchronizedInstance); t1.start(); t2.start(); try { t1.join(); t2.join(); System.out.println("count 最终的值为: " + count); } catch (InterruptedException e) { e.printStackTrace(); } } @Override public void run() { synchronized (this) { for (int i = 0; i < 200000; i++) { count++; } } } }结果 :显然不等于400000次所以出现了运算错误
原因:
count++;该语句包含三个操作:
线程t1、t2 从主内存中获取共享变量count的值,到自己的工作内存中
将自己的工作内存中的count值进行+1操作
将修改完的count变量的值存入到主内存中
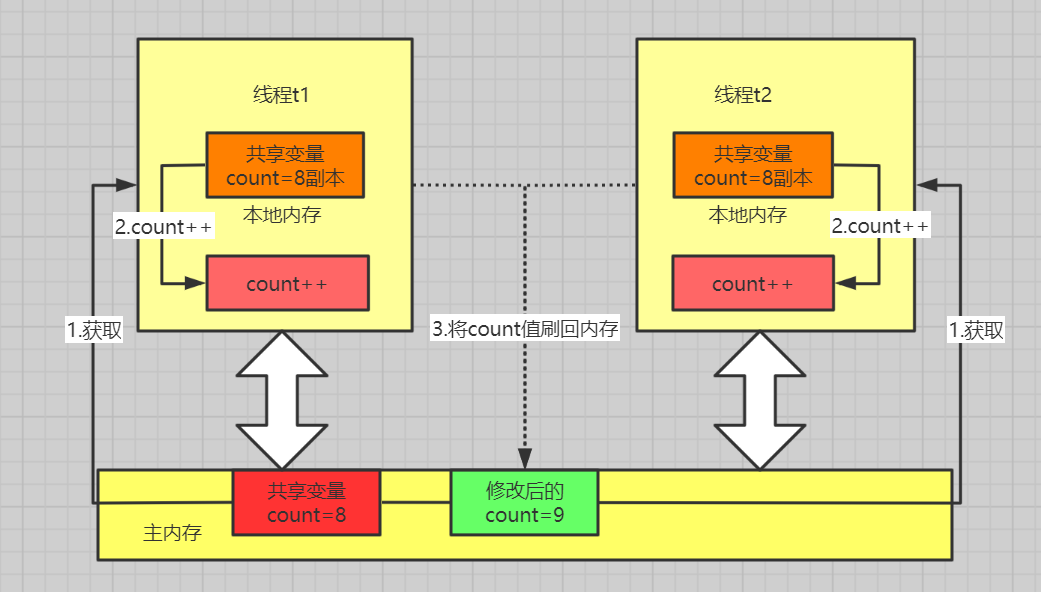
注意:他们是将自己工作内存中的值进行改变刷回主内存,假设当前count的值为8,t1、t2将count的值复制到自己的工作内存中进行修改,如果此时t1将count变成9、t2此时也将count的值变成9,当t1、t2两个线程都将值刷回主内存的时候count值为9,并不是10,这个时候就会造成最后的结果和预期的不一致。
1.3 正确案例代码块上加对象锁 this
@Override public void run() { synchronized (this) { for (int i = 0; i < 200000; i++) { count++; } } }在普通方法上加锁
@Override public synchronized void run() { for (int i = 0; i < 200000; i++) { count++; } }加.class锁
@Override public void run() { for (int i = 0; i < 200000; i++) { synchronized (SynchronizedDemo.class) { count++; } } }输出结果:

后文详细讲解四种加 synchronized 的方式
2.用法 2.1 对象锁2.1.1 方法锁
修饰普通方法默认锁对象为this当前实例对象
public synchronized void method() ;在普通方法上面加synchronized
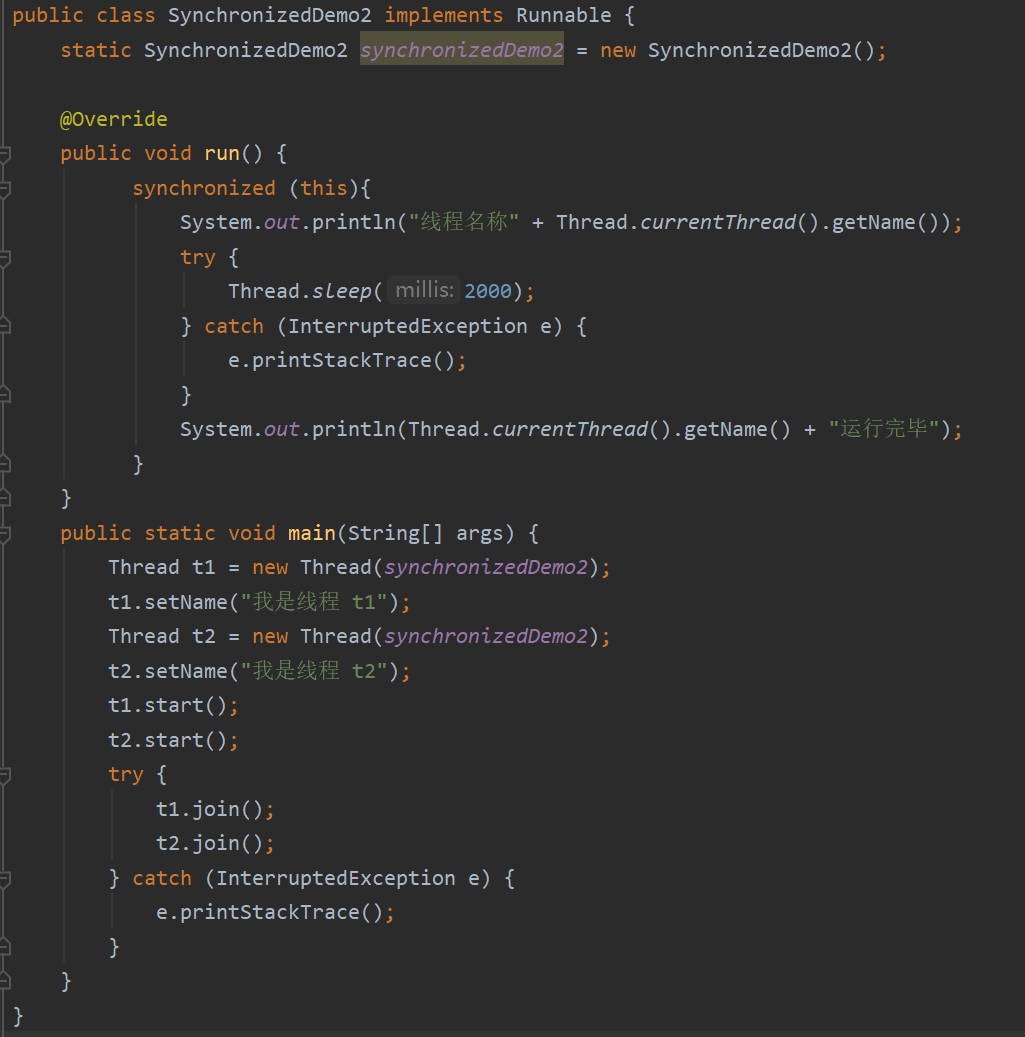
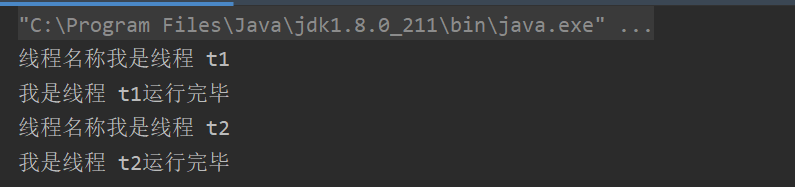
public class SynchronizedDemo3 implements Runnable { static SynchronizedDemo3 synchronizedDemo3 = new SynchronizedDemo3(); public synchronized void method() { System.out.println("线程名称" + Thread.currentThread().getName()); try { Thread.sleep(3000); } catch (InterruptedException e) { e.printStackTrace(); } System.out.println("线程名称" + Thread.currentThread().getName() + "运行完成"); } @Override public void run() { method(); } public static void main(String[] args) { Thread t1 = new Thread(synchronizedDemo3); t1.setName("我是线程 t1"); Thread t2 = new Thread(synchronizedDemo3); t2.setName("我是线程 t2"); t1.start(); t2.start(); try { t1.join(); t2.join(); } catch (InterruptedException e) { e.printStackTrace(); } } }输出结果: 线程 t1 和线程 t2 执行过程是顺序执行的

2.1.2 同步代码块
代码示例:没有加锁而定义的两个线程执行的情况

输出结果:线程 t1 和线程 t2 交叉执行形成了乱序

代码示例:加Synchronized 锁而定义的两个线程执行的情况,锁对象的是this(当前对象)
输出结果:线程 t1 和线程 t2 执行过程是顺序执行的
代码示例:加Synchronized 锁而定义的两个线程执行的情况,锁对象的是自定义对象