坐标轴写错了一点,偏移了点,好歹也是在范围之内。如果选择边缘的点,偏了点可能就出不去了。所以,一般选一个元素的坐标,尽量选择中心。 每个点之间的间隔是一样的。从一个点挪到另外一个点,y 轴不用动,x 轴只要有个固定的距离就好了。
例如 3 个点的值是:147.376、359.378、571.378
能把这 3 个值直接这样写出来吗?不能。换台设备就不行了,这样绝对的数据是不能放在这里的。采用和滑屏操作一样的思想,用百分比和相对距离。如果能获取到元素的大小以及起点坐标就可以了。
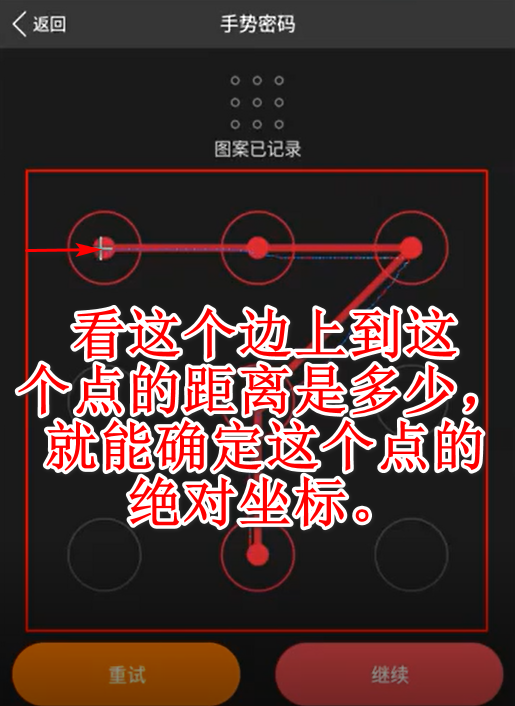
距离是 59。147-59=88

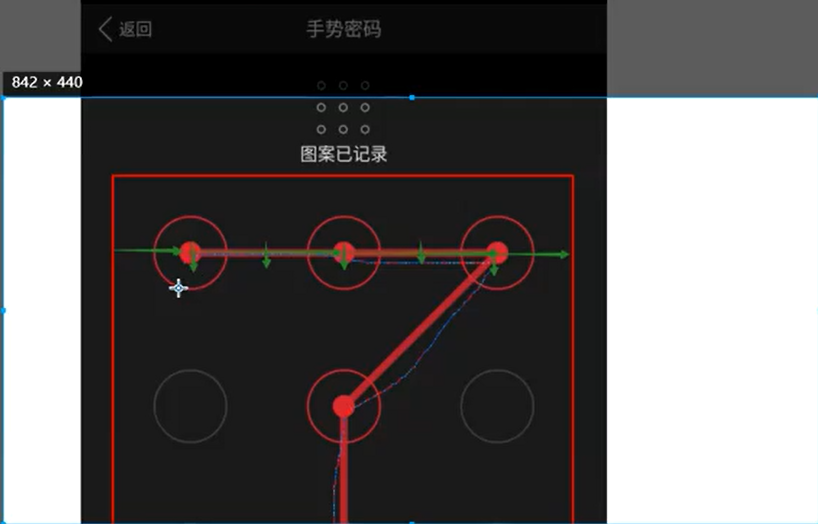
如果是长方形那就需要另外再算,但是图中是正方形,这 9 个格子的间距是没有什么区别的,重点是它与边界值的差距。
边界值的差距是多少?把它分成 6 份。第一个点的坐标:能够得到 view 的起点坐标是 45,272。有专门的函数可以获取元素的大小以及它的起点坐标。

假设起点坐标是 x、y,我现在已经知道将它分成了 6 份。
那么,第一个点的坐标怎么写?x+width*1/6 + height*1/6
看 size 源码: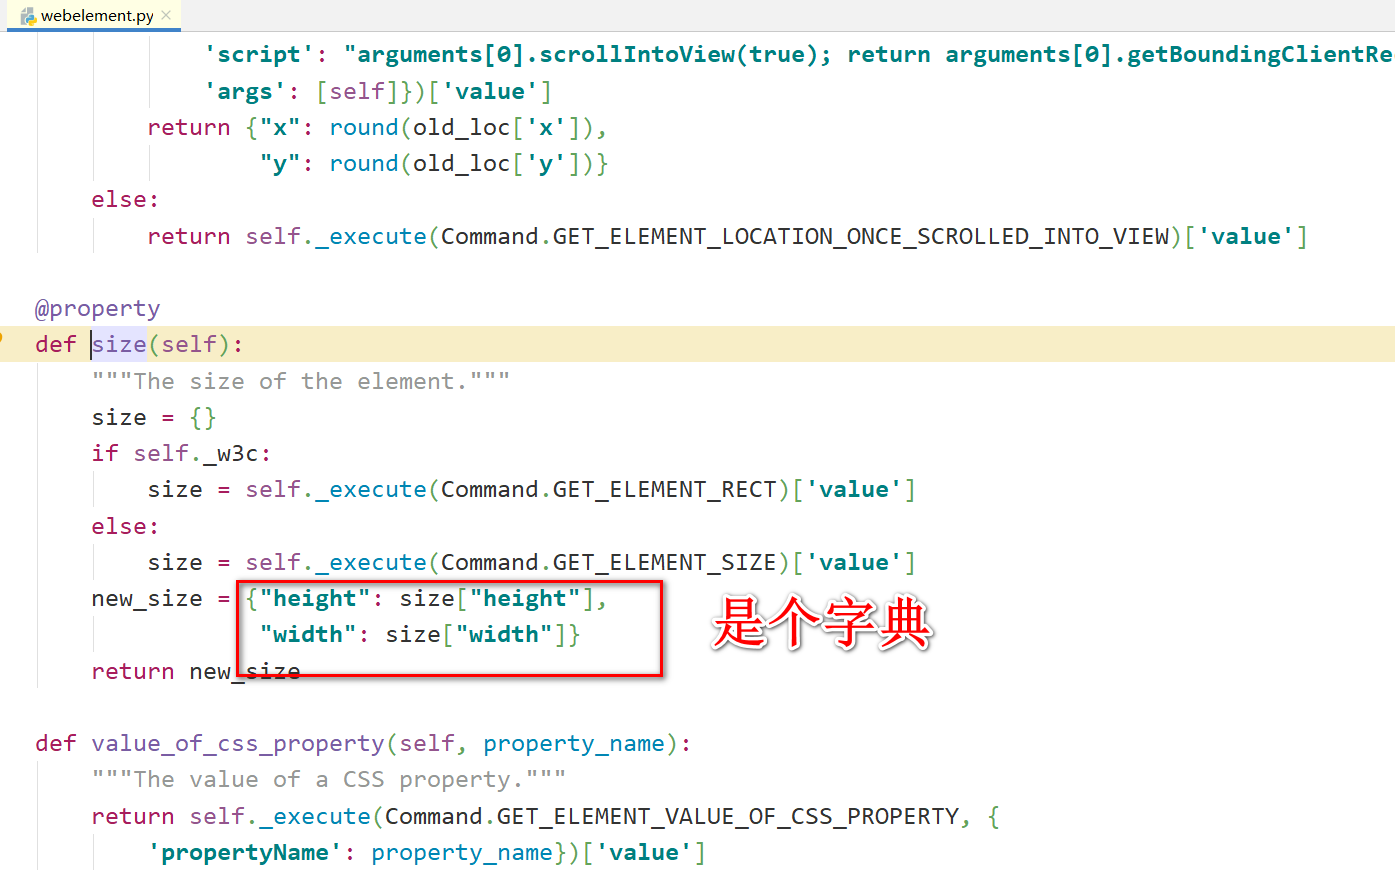
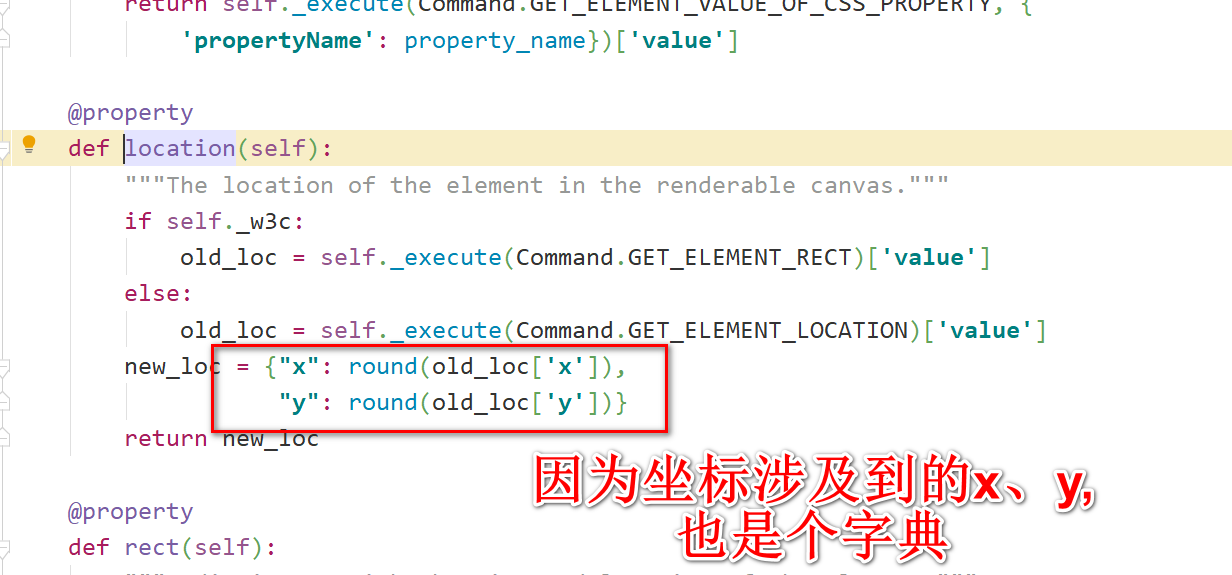
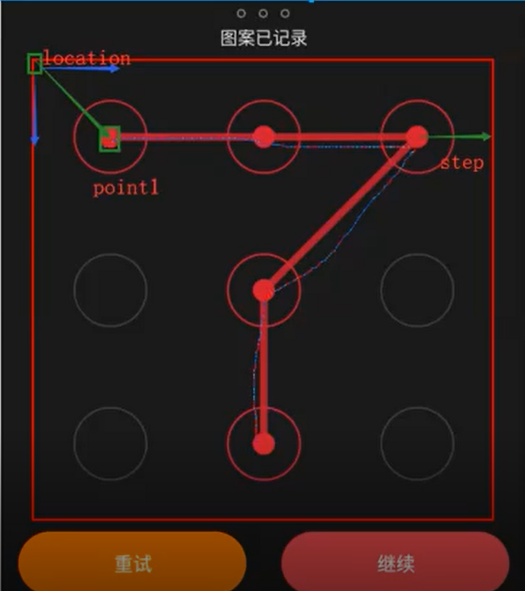
等于横向走了这么远,纵向也走了这么远,刚好对着这个点了。
第二个点的坐标怎么算?
基于第一个点的基础上做调整就行了。y 轴不变,x 轴往前走了 2 份。

第3个点也是在第2个点的基础上往前挪动了2个。
#元素的大小 size=ele.size # 均分的步长 高和宽一样(因为是正方形) step=size["width"]/6#py3中除是取整数的,会缺点小数点没关系。取得是终点,问题不大,还是可以滑动到的。 # 元素的起点坐标-左上角 ori=ele.location point1=(ori["x"]+step,ori["y"]+step) point2=(point1[0]+step*2,point1[1]) #x轴增加了2*step point3=(point2[0]+step*2,point2[1]) #x轴增加了2*step TouchAction(driver)第4个点的坐标:
它是倒着往回走。
第5个点的坐标。
#元素的大小 size=ele.size # 均分的步长 高和宽一样(因为是正方形) step=size["width"]/6#py3中除是取整数的,会缺点小数点没关系。取得是终点,问题不大,还是可以滑动到的。 # 元素的起点坐标-左上角 ori=ele.location point1=(ori["x"]+step,ori["y"]+step) point2=(point1[0]+step*2,point1[1]) #相对于point1,x轴增加了2*step point3=(point2[0]+step*2,point2[1]) #相对于point2,x轴增加了2*step point4=(point3[0]-step*2,point3[1]+step*2)#相对于point3,x轴减少了2*step,y轴增加了2*step point5=(point4[0],point4[1]+step*2)#相对于point4,x轴不变,y轴增加了2*step TouchAction(driver).press(x=point1[0],y=point1[1]).wait(200).\ move_to(x=point2[0],y=point2[1]).wait(200).\ move_to(x=point3[0],y=point3[1]).wait(200).\ move_to(x=point4[0],y=point4[1]).wait(200).\ move_to(x=point5[0],y=point5[1]).wait(200).\ release().\ perform() #.\是换行用的。以 1 个点做基准,针对不同的点做基准,容易把自己绕晕了。所以,都以前一个点做基准。也可以以起点作为基准。
6.代码 from appium import webdriver import time from selenium.webdriver.support.wait import WebDriverWait from selenium.webdriver.support import expected_conditions as EC from appium.webdriver.common.mobileby import MobileBy import time from appium.webdriver.common.touch_action import TouchAction desired_caps={} # 平台类型 desired_caps["platformName"]="Android" # 平台版本号 desired_caps["platformVersion"]="7.0" # 设备名称 desired_caps["deviceName"]="XPUDU17713003790" # app 包名 desired_caps["appPackage"]="填上appPackage" # app 入口 acitivity desired_caps["appActivity"]="填上appActivity" # 重置与否 desired_caps["noReset"]=True # 连接Appium server。前提:appium desktop要启动。有监听端口。 # 将desired_caps发送给appium server。打开app driver = webdriver.Remote('http://127.0.0.1:4723/wd/hub',desired_caps) ele=driver.find_element_by_id("填上元素定位下吧,如果你app这里的元素定位不了,那就只能用坐标了,需要另外学习这块的坐标怎么写,呜呜") # 元素的大小 size=ele.size # 均分的步长 高和宽一样(因为是正方形) step=size["width"]/6#py3中除是取整数的,会缺点小数点没关系。取得是终点,问题不大,还是可以滑动到的。 # 元素的起点坐标-左上角 ori=ele.location point1=(ori["x"]+step,ori["y"]+step) point2=(point1[0]+step*2,point1[1]) #相对于point1,x轴增加了2*step point3=(point2[0]+step*2,point2[1]) #相对于point2,x轴增加了2*step point4=(point3[0]-step*2,point3[1]+step*2)#相对于point3,x轴减少了2*step,y轴增加了2*step point5=(point4[0],point4[1]+step*2)#相对于point4,x轴不变,y轴增加了2*step TouchAction(driver).press(x=point1[0],y=point1[1]).wait(100).\ move_to(x=point2[0],y=point2[1]).wait(100).\ move_to(x=point3[0],y=point3[1]).wait(100).\ move_to(x=point4[0],y=point4[1]).wait(100).\ move_to(x=point5[0],y=point5[1]).wait(100).\ release().\ perform() #.\是换行用的。 三、注意