如果这是你第一次使用 RabbitMQ,并且你没有收到“Sent”这一消息,这时你可能会抓耳挠腮,想知道是什么导致了错误。在这种情况下,有很大可能是因为代理(broker)在启动时没有足够的可用磁盘空间(默认至少需要 50M ),因此拒绝接收消息。检查代理(broker)日志文件(logfile),并进行确认以减少限制,通过查看配置文件文档,可以知晓如何设置 disk_free_limit。
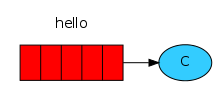
Receiving 接收That's it for our publisher. Our consumer is pushed messages from RabbitMQ, so unlike the publisher which publishes a single message, we'll keep it running to listen for messages and print them out.
以上是我们的发布者。我们的消费者已开始从 RabbitMQ 上被推送了消息,与发送一条消息的发布者有所不同的是,我们会让消费者持续地监听消息并将其打印出来。

The code (in Receive.cs) has almost the same using statements as Send:
在 Receive.cs 类文件中,using 区域的声明代码与 Send.cs 类文件近乎相同:
using RabbitMQ.Client; using RabbitMQ.Client.Events; using System; using System.Text;Setting up is the same as the publisher; we open a connection and a channel, and declare the queue from which we're going to consume. Note this matches up with the queue that send publishes to.
与发布者的设置一样,我们打开一个连接和信道,并且声明好队列以作好消费的准备。需要注意的是,该队列与发布者所发送消息的队列是相匹配的(即基于同一个队列)。
class Receive { public static void Main() { var factory = new ConnectionFactory() { HostName = "localhost" }; using (var connection = factory.CreateConnection()) { using (var channel = connection.CreateModel()) { channel.QueueDeclare(queue: "hello", durable: false, exclusive: false, autoDelete: false, arguments: null); ... } } } }Note that we declare the queue here, as well. Because we might start the consumer before the publisher, we want to make sure the queue exists before we try to consume messages from it.
可以看到我们在消费者这里又声明了一次队列(QueueDeclare),在实践中,我们很可能是先启动消费者,后启动发布者。所以重复的声明代码,是当我们尝试从队列中消费消息时,确保队列总是已存在的。
We're about to tell the server to deliver us the messages from the queue. Since it will push us messages asynchronously, we provide a callback. That is what EventingBasicConsumer.Received event handler does.
我们即将告知服务器从队列中向我们递送消息,因为该动作是基于异步的,所以我们需要提供回调,这便是 EventingBasicConsumer.Received 事件处理方法所要做的。
using RabbitMQ.Client; using RabbitMQ.Client.Events; using System; using System.Text; class Receive { public static void Main() { var factory = new ConnectionFactory() { HostName = "localhost" }; using(var connection = factory.CreateConnection()) using(var channel = connection.CreateModel()) { channel.QueueDeclare(queue: "hello", durable: false, exclusive: false, autoDelete: false, arguments: null); var consumer = new EventingBasicConsumer(channel); consumer.Received += (model, ea) => { var body = ea.Body; var message = Encoding.UTF8.GetString(body); Console.WriteLine(" [x] Received {0}", message); }; channel.BasicConsume(queue: "hello", autoAck: true, consumer: consumer); Console.WriteLine(" Press [enter] to exit."); Console.ReadLine(); } } }Here's the whole Receive.cs class.
这里是完整的 Receive.cs 类文件
Putting It All Together 融合一起Open two terminals.
打开两个终端。
Run the consumer:
运行消费者:
cd Receive dotnet runThen run the producer:
紧接着运行生产者:
cd Send dotnet runThe consumer will print the message it gets from the publisher via RabbitMQ. The consumer will keep running, waiting for messages (Use Ctrl-C to stop it), so try running the publisher from another terminal.
消费者会经由 RabbitMQ 打印出那些来自发布者的消息。消费者会持续运行,以等待消息(使用 Ctrl-C 来终止运行),如此,我们可以尝试从其他终端来运行发布者(重复运行多个生产者实例程序)。

