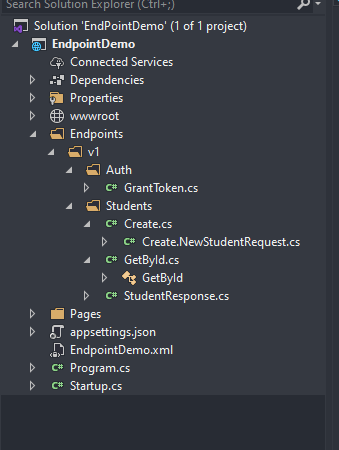
修改appsettings.json文件,如下:
{ "Logging": { "LogLevel": { "Default": "Information", "Microsoft": "Warning", "Microsoft.Hosting.Lifetime": "Information" } }, "AllowedHosts": "*", "JwtToken": { "SecretKey": "SecretKeywqewqeqqqqqqqqqqqweeeeeeeeeeeeeeeeeee", "Issuer": "http://localhost:56369/" } }接下来,我们使用SwaggerOperation来丰富接口文档的注释,修改GetById.cs文件如下:
using Ardalis.ApiEndpoints; using Microsoft.AspNetCore.Authorization; using Microsoft.AspNetCore.Mvc; using Swashbuckle.AspNetCore.Annotations; namespace EndpointDemo.Endpoints.v1.Students { /// <summary> /// 获取指定ID的学生信息 /// </summary> public class GetById : BaseEndpoint<int, StudentResponse> { /// <summary> /// 获取指定ID的学生信息 /// </summary> /// <param></param> /// <returns></returns> [Authorize] [HttpGet, Route("api/v1/student/{id:int}")] [SwaggerOperation( Summary = "获取指定ID的学生信息", Description = "获取指定ID的学生信息", OperationId = "Student.GetById", Tags = new[] { "StudentEndpoint" } )] public override ActionResult<StudentResponse> Handle(int id) { var response = new StudentResponse { Id = id, Name = "Rector" }; return Ok(response); } } }同时,我还创建了一个Create.cs文件,用来演示[HttpPost]请求,如下:
using System; using Ardalis.ApiEndpoints; using Microsoft.AspNetCore.Mvc; using Swashbuckle.AspNetCore.Annotations; namespace EndpointDemo.Endpoints.v1.Students { /// <summary> /// 创建新的学生记录 /// </summary> public class Create : BaseEndpoint<NewStudentRequest, StudentResponse> { /// <summary> /// 创建新的学生记录 /// </summary> /// <param></param> /// <returns></returns> [HttpPost, Route("api/v1/student/create")] [SwaggerOperation( Summary = "创建新的学生记录", Description = "创建新的学生记录", OperationId = "Student.Create", Tags = new[] { "StudentEndpoint" } )] public override ActionResult<StudentResponse> Handle(NewStudentRequest request) { var response = new StudentResponse { Name = request.Name, Id = new Random().Next(1, 100) }; return Ok(response); } } }NewStudentRequest.cs
using System.ComponentModel.DataAnnotations; namespace EndpointDemo.Endpoints.v1.Students { /// <summary> /// 创建学生的实体类 /// </summary> public class NewStudentRequest { /// <summary> /// 姓名 /// </summary> [Required] public string Name { get; set; } } }创建用于用户授权的目录v1/Auth,并创建获取令牌的类GrantToken.cs,代码如下:
using Ardalis.ApiEndpoints; using Microsoft.AspNetCore.Mvc; using System; using System.IdentityModel.Tokens.Jwt; using System.Text; using Microsoft.AspNetCore.Authorization; using Microsoft.Extensions.Configuration; using Microsoft.IdentityModel.Tokens; using Swashbuckle.AspNetCore.Annotations; namespace EndpointDemo.Endpoints.v1.Auth { /// <summary> /// /// </summary> public class GrantToken : BaseEndpoint<AuthInfoRequest, TokenResponse> { private readonly IConfiguration _config; public GrantToken(IConfiguration config) { _config = config; } [SwaggerOperation( Summary = "用户登录", Description = "用户登录", OperationId = "Auth.GrantToken", Tags = new[] { "AuthEndpoint" } )] [AllowAnonymous] [HttpPost, Route("api/v1/auth/grant_token")] public override ActionResult<TokenResponse> Handle(AuthInfoRequest request) { if (request == null) return Unauthorized(); var validUser = Authenticate(request); var token = ""; if (validUser) { token = BuildToken(); } else { return Unauthorized(); } var response = new TokenResponse { Token = token }; return Ok(response); } private string BuildToken() { var key = new SymmetricSecurityKey(Encoding.UTF8.GetBytes(_config["JwtToken:SecretKey"])); var creds = new SigningCredentials(key, SecurityAlgorithms.HmacSha256); var token = new JwtSecurityToken(_config["JwtToken:Issuer"], _config["JwtToken:Issuer"], expires: DateTime.Now.AddMinutes(30), signingCredentials: creds); return new JwtSecurityTokenHandler().WriteToken(token); } private bool Authenticate(AuthInfoRequest login) { var validUser = login.Username == "admin" && login.Password == "123456"; return validUser; } } }运行项目,打开地址::56369/swagger 如果运行成功,你将看到如下界面:
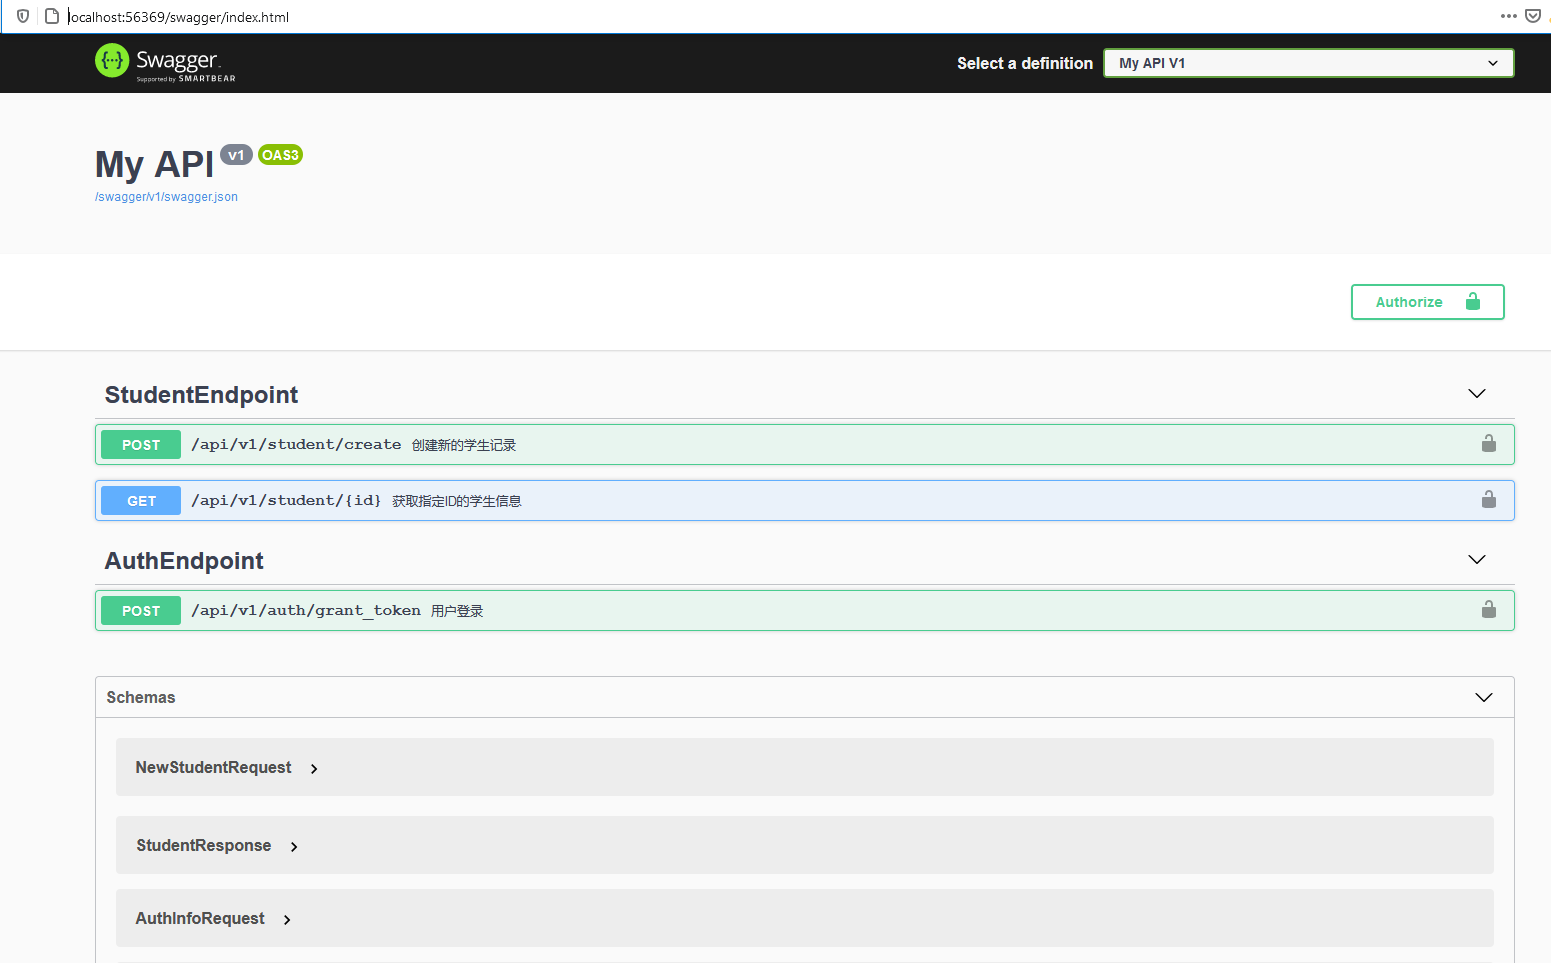
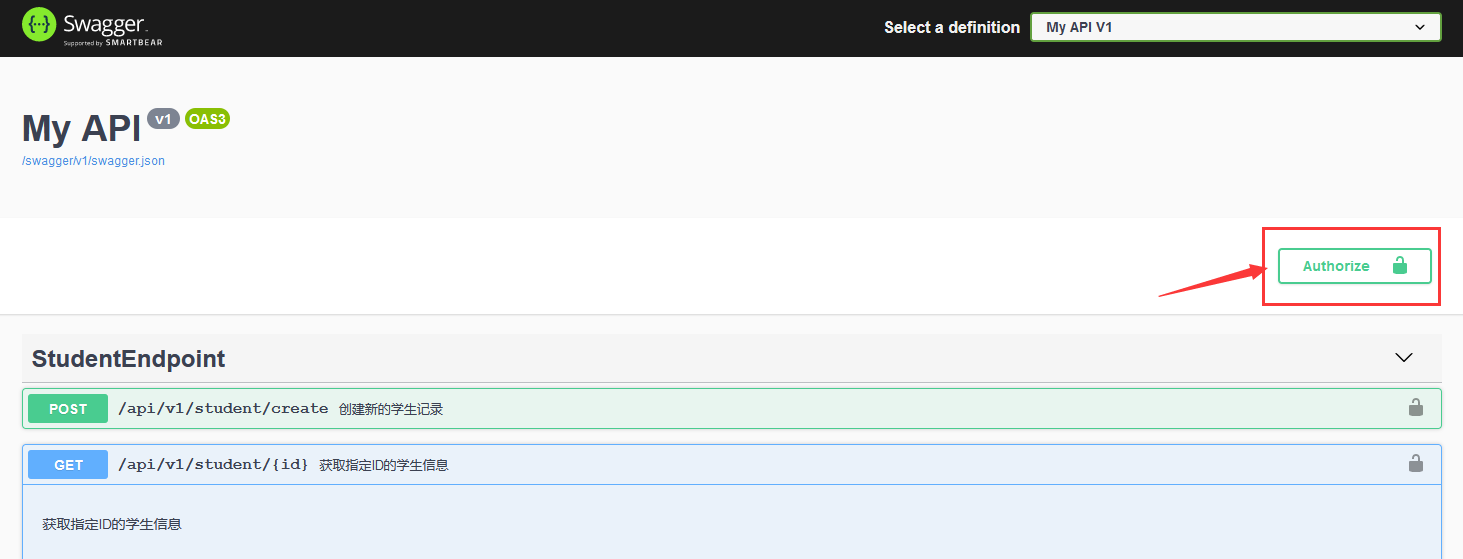
这时,如果你直接点击【获取指定ID的学生信息】,接口返回的是401错误,如图:
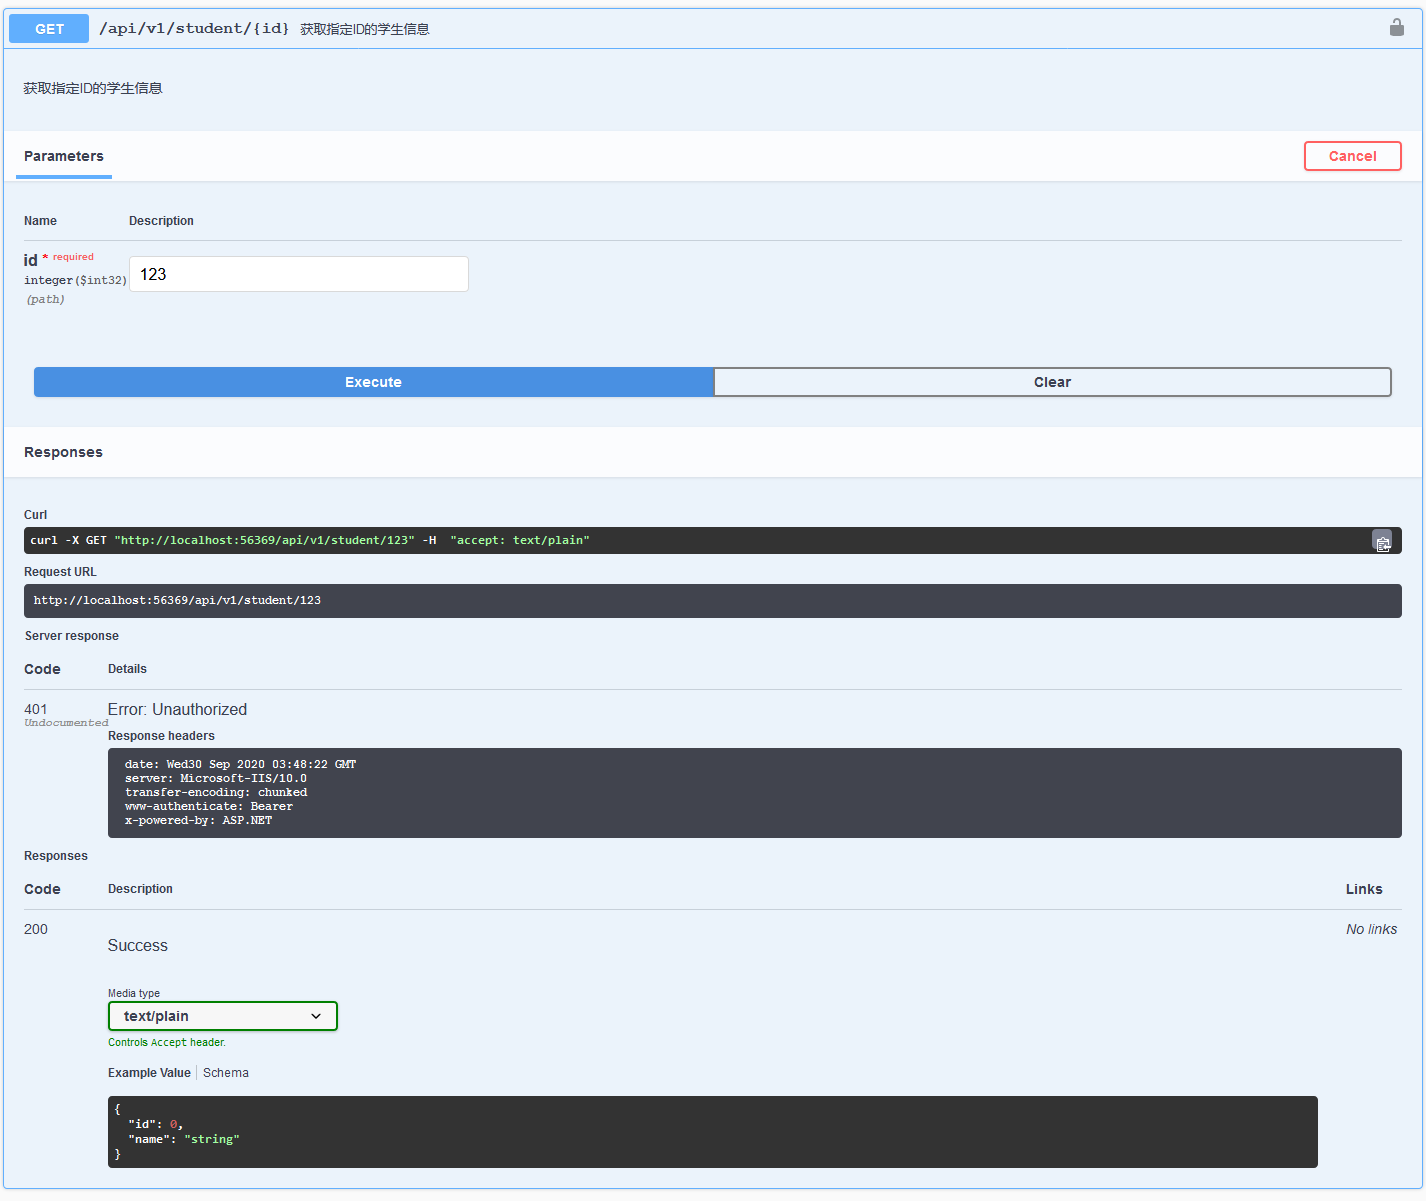
因为我们还未对接口访问进行授权,那么我们需要先请求授权接口:/api/v1/auth/grant_token,以获取用户令牌,如下:
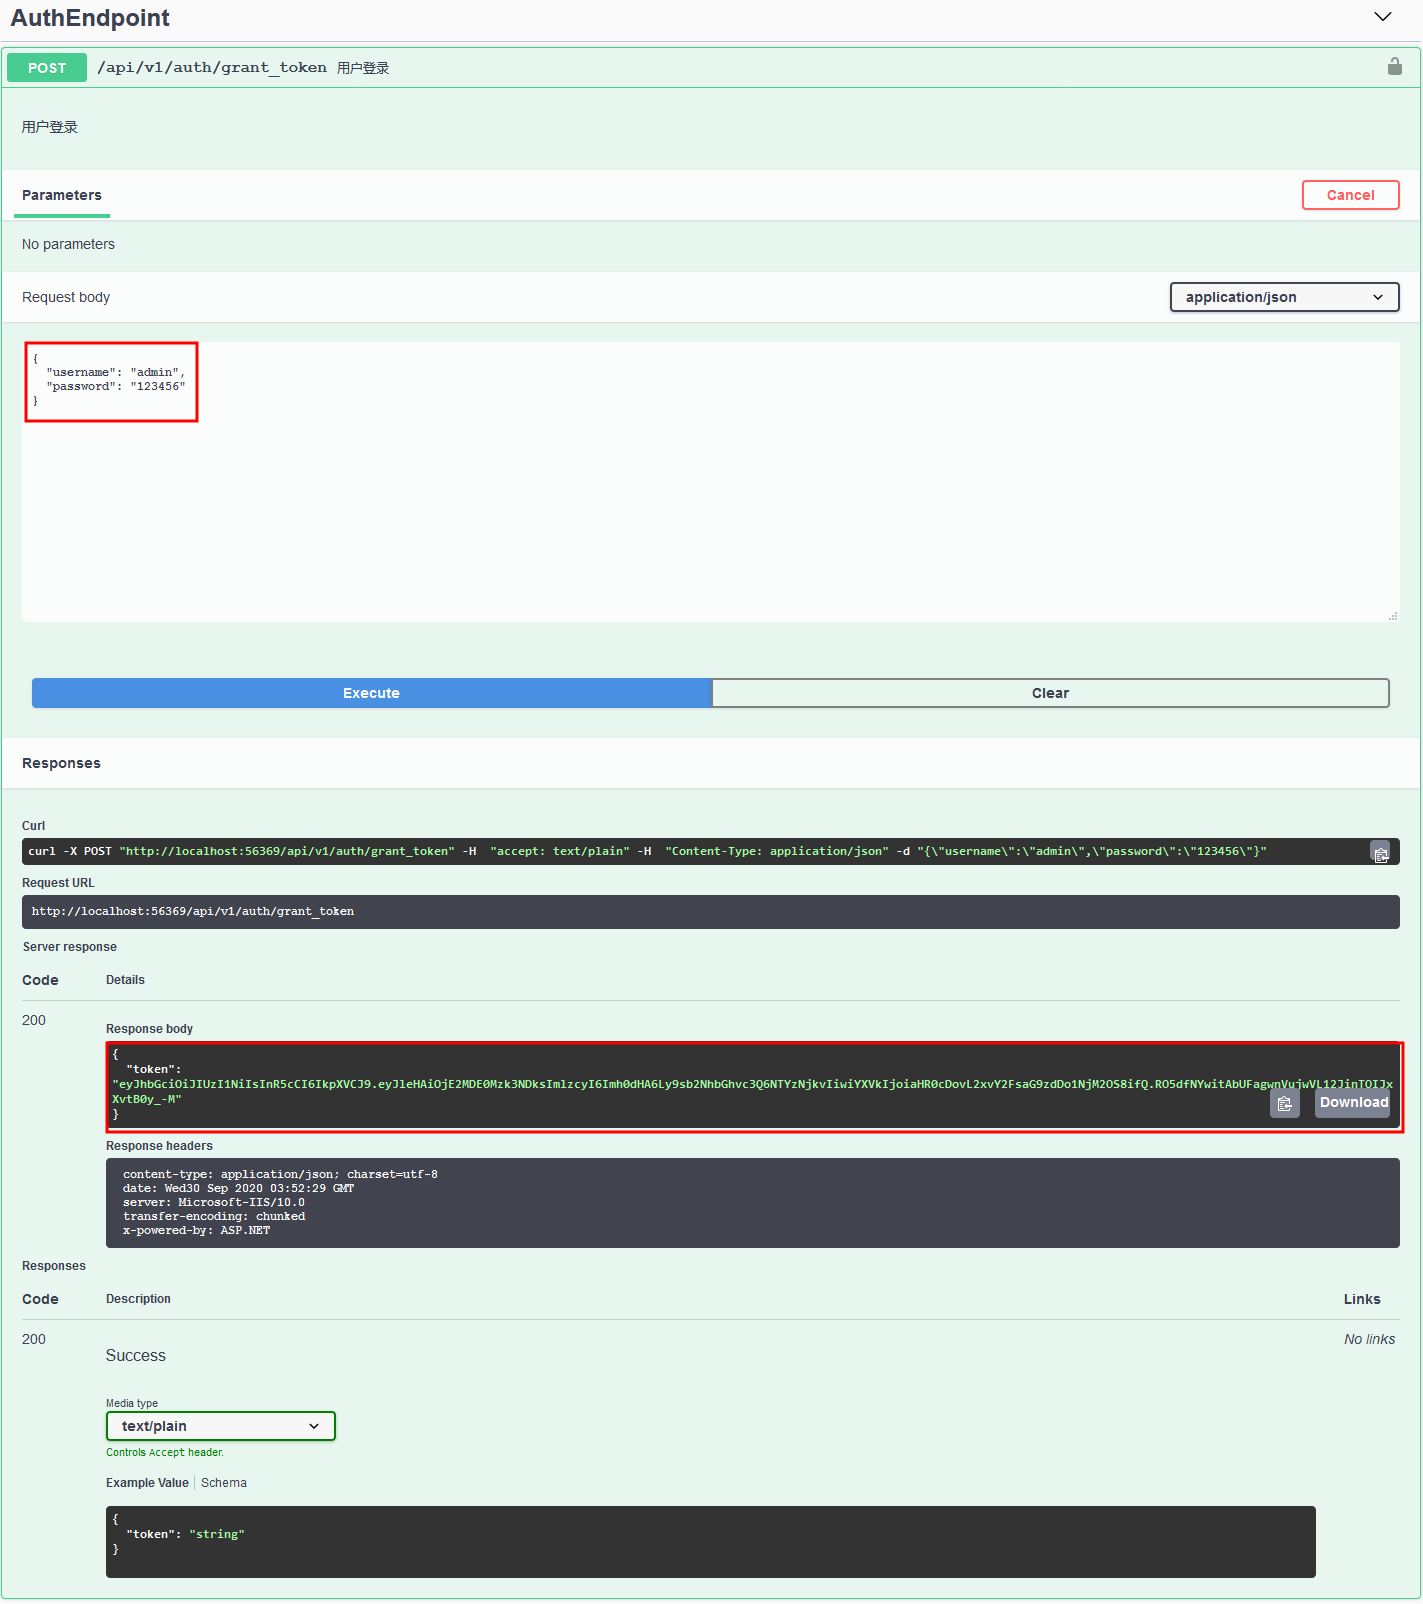
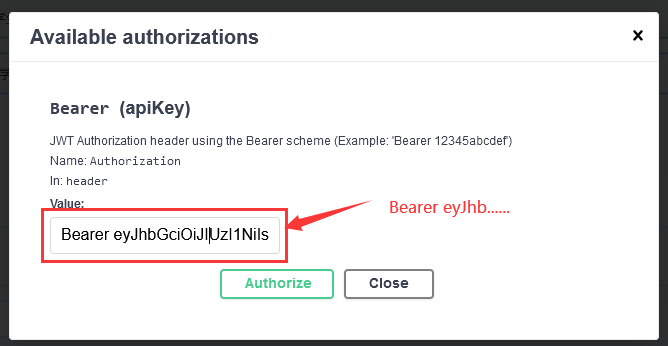
将获取到的令牌填入授权窗口中,如下:
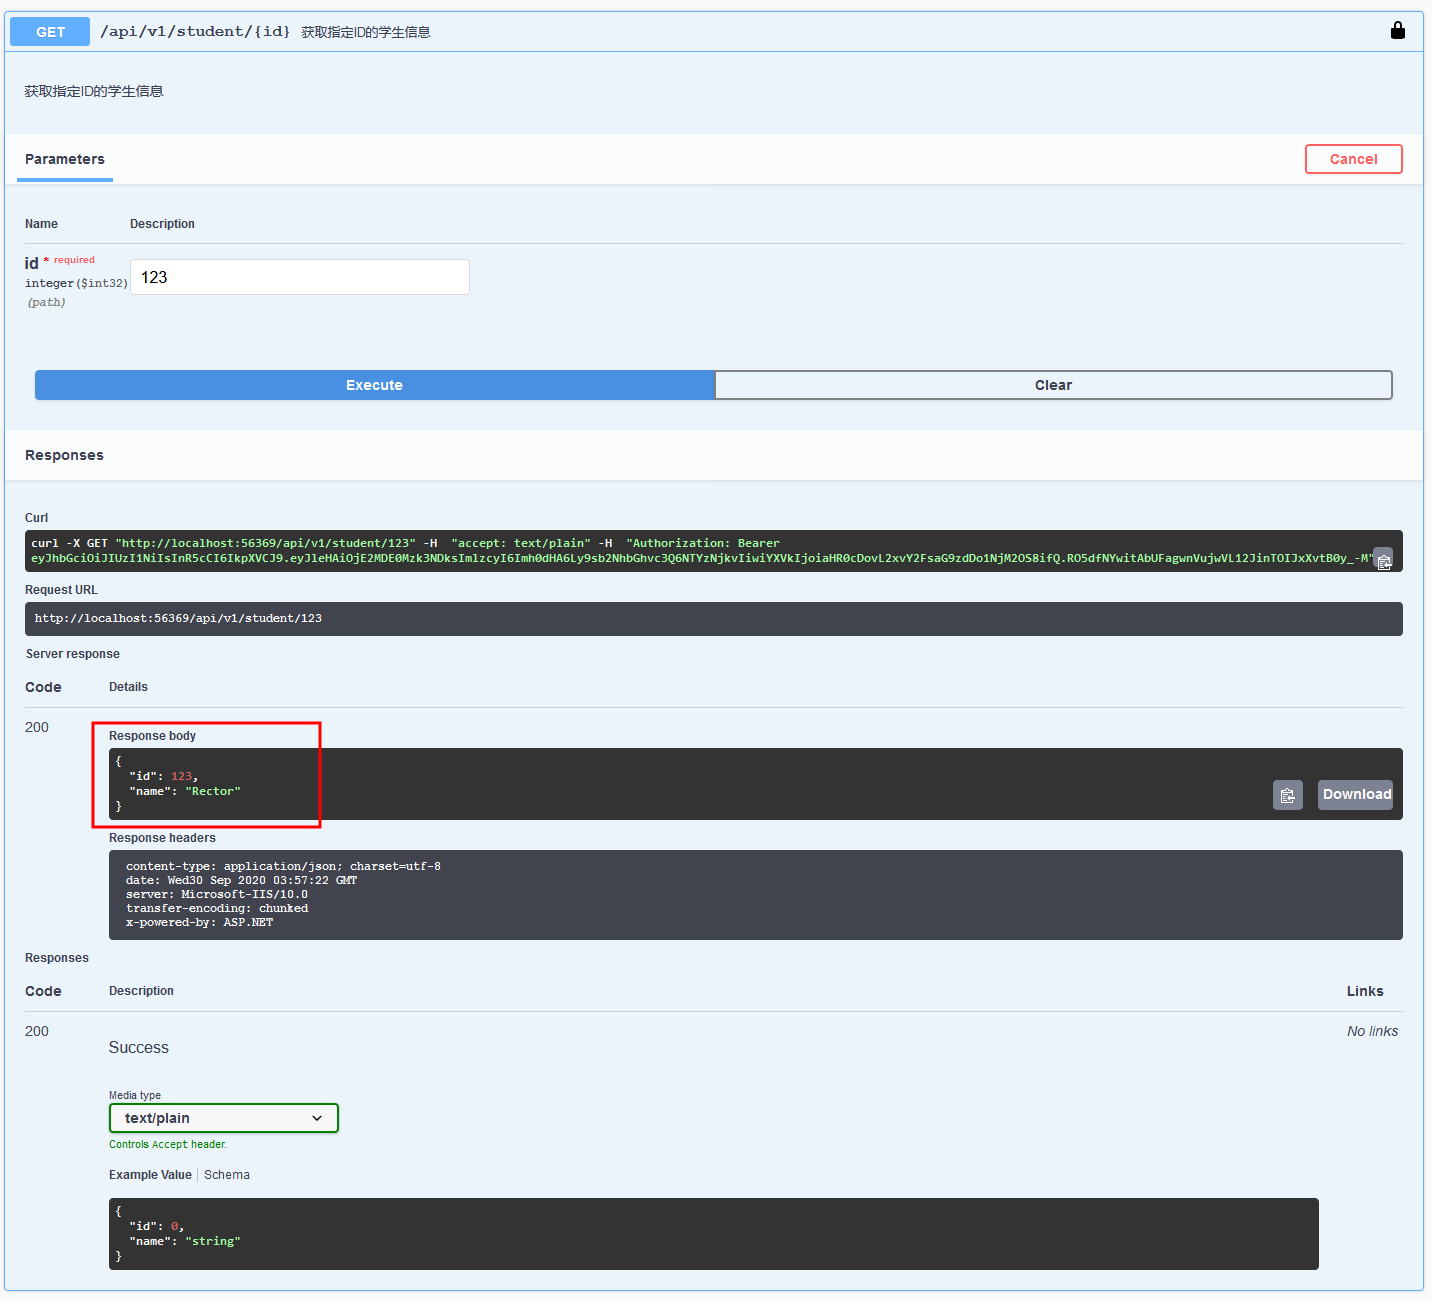
最后,再请求【获取指定ID的学生信息】,得到正确的接口返回内容,如下:
项目结构如下:
