react native实现登录功能,包括ui的封装、网络请求的封装、导航器的实现、点击事件。
demo下载:react-native 完整实现登录功能
后台如果是springmvc实现的需要配置上如下代码
<!--加入multipart 的解析器,这个必须配置,一会在controller里抓取上传文件时要用。否则会报错。--> <bean> <property value="102400"></property> <property value="utf-8"/><!--属性:编码--> </bean>
1.实现的界面
2.完整目录
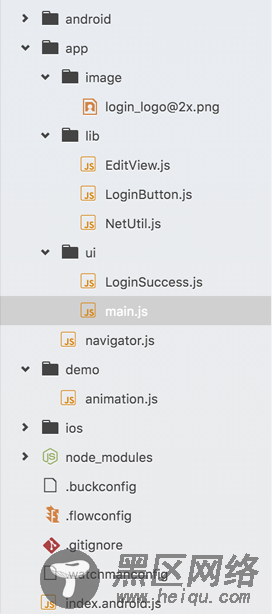
3.主界面的代码实现
import React, { Component } from 'react'; import { ToolbarAndroid, AppRegistry, StyleSheet, Text, View, Image, TextInput, TouchableOpacity } from 'react-native'; import EditView from '../lib/EditView'; import LoginButton from '../lib/LoginButton'; import LoginSuccess from '../ui/LoginSuccess'; import NetUitl from '../lib/NetUtil'; export default class LoginActivity extends Component { constructor(props) { super(props); this.userName = ""; this.password = ""; } render() { return ( <View style={LoginStyles.loginview}> <View style={{flexDirection: 'row',height:100,marginTop:1, justifyContent: 'center', alignItems: 'flex-start',}}> <Image source={require('../image/login.png')}/> </View> <View style={{marginTop:80}}> <EditView onChangeText={(text) => { this.userName = text; }}/> <EditView onChangeText={(text) => { this.password = text; }}/> <LoginButton onPressCallback={this.onPressCallback}/> <Text style={{color:"#4A90E2",textAlign:'center',marginTop:10}} >忘记密码?</Text> </View> </View> ) } onPressCallback = () => { let formData = new FormData(); formData.append("loginName",this.userName); formData.append("pwd",this.password); let url = "http://localhost:8080/loginApp"; NetUitl.postJson(url,formData,(responseText) => { alert(responseText); this.onLoginSuccess(); }) }; //跳转到第二个页面去 onLoginSuccess(){ const { navigator } = this.props; if (navigator) { navigator.push({ name : 'LoginSuccess', component : LoginSuccess, }); } } } class loginLineView extends Component { render() { return ( <Text > 没有帐号 </Text> ); } } const LoginStyles = StyleSheet.create({ loginview: { flex: 1, padding: 30, backgroundColor: '#ffffff', }, });
说明:
1.使用了线性布局,从上往下依次Image,EditView,LoginButton,Text
2.EditView和LoginButton 为自定义控件,实现输入框,和按钮的封装。
4.EditView.js
import React, { Component } from 'react'; import { ToolbarAndroid, AppRegistry, StyleSheet, Text, View, Image, TextInput, TouchableOpacity } from 'react-native'; export default class EditView extends Component { constructor(props) { super(props); this.state = {text: ''}; } render() { return ( <View style={LoginStyles.TextInputView}> <TextInput style={LoginStyles.TextInput} placeholder={this.props.name} onChangeText={ (text) => { this.setState({text}); this.props.onChangeText(text); } } /> </View> ); } } const LoginStyles = StyleSheet.create({ TextInputView: { marginTop: 10, height:50, backgroundColor: '#ffffff', borderRadius:5, borderWidth:0.3, borderColor:'#000000', flexDirection: 'column', justifyContent: 'center', }, TextInput: { backgroundColor: '#ffffff', height:45, margin:18, }, });
说明:
1.利用TextInput的onChangeText 方法获取到输入框中输入的数据,在利用EditView 传入的onChangeText回调方法,把数据回调出封装的EditView,在外部获取到TextInput输入的数据。
5.LoginButton.js
import React, { Component } from 'react'; import { ToolbarAndroid, AppRegistry, StyleSheet, Text, View, Image, TextInput, TouchableOpacity } from 'react-native'; export default class LoginButton extends Component { constructor(props) { super(props); this.state = {text: ''}; } render() { return ( <TouchableOpacity onPress={this.props.onPressCallback} style={LoginStyles.loginTextView}> <Text style={LoginStyles.loginText} > {this.props.name} </Text> </TouchableOpacity> ); } } const LoginStyles = StyleSheet.create({ loginText: { color: '#ffffff', fontWeight: 'bold', width:30, }, loginTextView: { marginTop: 10, height:50, backgroundColor: '#3281DD', borderRadius:5, flexDirection: 'row', justifyContent: 'center', alignItems:'center', }, });
说明: