npm install -g vue-cli
vue init webpack demo # 中间会让你选npm yarn 等来安装依赖,我选的是yarn,因为它快些
安装mint-ui
yarn add mint-ui
mint-ui装好了,还要配置一下babel,方法跟着mint-ui的官方文档来配置就可以了
下面是我配置好的 .babelrc 文件,启动的时候会报跟es2015相关的错,装一下 babel-preset-es2015 就好了
{ "presets": [ ["env", { "modules": false, "targets": { "browsers": ["> 1%", "last 2 versions", "not ie <= 8"] } }], "stage-2", ["es2015", { "modules": false }] ], "plugins": [["component", [ { "libraryName": "mint-ui", "style": true } ]],"transform-vue-jsx", "transform-runtime"], "env": { "test": { "presets": ["env", "stage-2", "es2015"], "plugins": ["transform-vue-jsx", "transform-es2015-modules-commonjs", "dynamic-import-node"] } } }
集成
打开创建的vue项目demo,在src里找到 components/HelloWorld.vue 文件,然后将内容换成下面内容
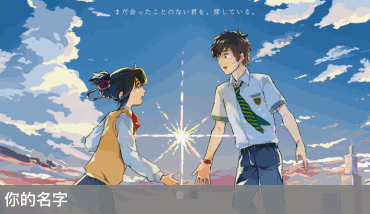
<template> <div> <mt-swipe :auto="2000"> <mt-swipe-item v-for="item in items" :key="item.id"> <a :href="item.href" > <img :src="item.url"/> <span></span> </a> </mt-swipe-item> </mt-swipe> </div> </template> <script> import {Swipe, SwipeItem} from 'mint-ui' import 'mint-ui/lib/style.css' export default { components: { 'mt-swipe': Swipe, 'mt-swipe-item': SwipeItem }, data () { return { items: [{ title: '你的名字', href: 'http://google.com', url: 'http://localhost:8080/static/img1.png' }, { title: '我的名字', href: 'http://baidu.com', url: 'http://localhost:8080/static/img2.png' }] } } } </script> <style scoped> img { width: 100%; } .mint-swipe { height: 218px; } .desc { font-weight: 600; opacity: .9; padding: 5px; height: 20px; line-height: 20px; width: 100%; color: #fff; background-color: gray; position: absolute; bottom: 0; } </style>
找两张图片,名字分别是 img1.png , img2.png , 放在demo项目的static里,然后启动项目
npm run dev
打开浏览器::8080/
注意
1.如果发现文字都是居中的
可以找到文件 App.vue 把里面的居中css代码去掉就好了
1.如果页面有内边距
设置一下 body 的样式 margin: 0 auto;
1.页面里用的时候,必须要给类样式一个高度,要不然图片不出来 .mint-swipe { height: 218px; }
总结
以上所述是小编给大家介绍的vue.js整合mint-ui里的轮播图实例代码,希望对大家有所帮助,如果大家有任何疑问请给我留言,小编会及时回复大家的。在此也非常感谢大家对脚本之家网站的支持!
您可能感兴趣的文章: