回到IdentityServer项目的appsettings.json,在ApiResources中另外添加两个服务
{ "Name": "identityAPIService8001", "DisplayName": "identityAPIService8001Name" }, { "Name": "identityAPIService8002", "DisplayName": "identityAPIService8002Name" }在Clients中添加两个Client
{ "ClientId": "markfull", "ClientSecrets": [ "markjiang7m2" ], "AllowedGrantTypes": "ClientCredentials", "AllowedScopes": [ "identityAPIService8001", "identityAPIService8002" ] }, { "ClientId": "marklimit", "ClientSecrets": [ "123456" ], "AllowedGrantTypes": "ClientCredentials", "AllowedScopes": [ "identityAPIService8001" ] }这里我为了能让大家看出允许访问范围的效果,特意分配了两个不同的AllowedScopes。
使用markfull登录的客户端可以同时请求identityAPIService8001和identityAPIService8002两个下游服务,而使用marklimit登录的客户端只允许请求identityAPIService8001服务。
Ocelot集成IdentityServer认证
跟前面的例子一样,要支持IdentityServer认证,OcelotDemo项目就需要安装IdentityServer4.AccessTokenValidation包。
OcelotDemo项目的appsettings.json添加IdentityServer信息
"IdentityServerConfig": { "IP": "localhost", "Port": 8005, "IdentityScheme": "Bearer", "Resources": [ { "Key": "APIService8001", "Name": "identityAPIService8001" }, { "Key": "APIService8002", "Name": "identityAPIService8002" } ] }当然这个配置项的结构是任意的,我这里的Resources数组配置的就是Ocelot网关支持哪些服务的认证,Name就是服务的名称,同时会唯一对应一个Key。
为了能更加方便读取IdentityServerConfig的信息,我定义了一个跟它同结构的类
public class IdentityServerConfig { public string IP { get; set; } public string Port { get; set; } public string IdentityScheme { get; set; } public List<APIResource> Resources { get; set; } } public class APIResource { public string Key { get; set; } public string Name { get; set; } }然后来到Startup.cs的ConfigureServices方法,就能很快地将IdentityServer信息进行注册
var identityBuilder = services.AddAuthentication(); IdentityServerConfig identityServerConfig = new IdentityServerConfig(); Configuration.Bind("IdentityServerConfig", identityServerConfig); if (identityServerConfig != null && identityServerConfig.Resources != null) { foreach (var resource in identityServerConfig.Resources) { identityBuilder.AddIdentityServerAuthentication(resource.Key, options => { options.Authority = $"http://{identityServerConfig.IP}:{identityServerConfig.Port}"; options.RequireHttpsMetadata = false; options.ApiName = resource.Name; options.SupportedTokens = SupportedTokens.Both; }); } }Configure方法中添加
app.UseAuthentication();最后,就是配置Ocelot.json文件。
在ReRoutes中添加两组路由
跟其他普通路由相比,这两组路由都多了一个AuthenticationOptions属性,它里面的AuthenticationProviderKey就是我们在前面ConfigureServices方法中登记过的Key。
我们来捋顺一下这个路由跟认证授权过程。以markfull的ID和这里的第一组路由为例。
客户端拿着markfull的clientID向IdentityServer(:4727/token)进行认证,得到了一个的Token
客户端带着这个Token,因此有了markfull的身份,请求Url地址:4727/ocelot/8001/identityWilling
Ocelot网关接收到请求,根据路由表找到了认证支持关键字为APIService8001,从而得到了对应的IdentityServer服务信息:IdentityServer服务地址为:8005,下游服务名称为identityAPIService8001
Ocelot带着Token向IdentityServer服务(:8005)进行配对,即查看markfull身份的访问范围是否包含了identityAPIService8001服务
Ocelot认证过markfull是允许访问的,将请求转发到下游服务中,根据路由配置,下游服务地址为:8001/api/ocelot/identityWilling
下面我将Ocelot运行起来,并通过Postman进行验证。
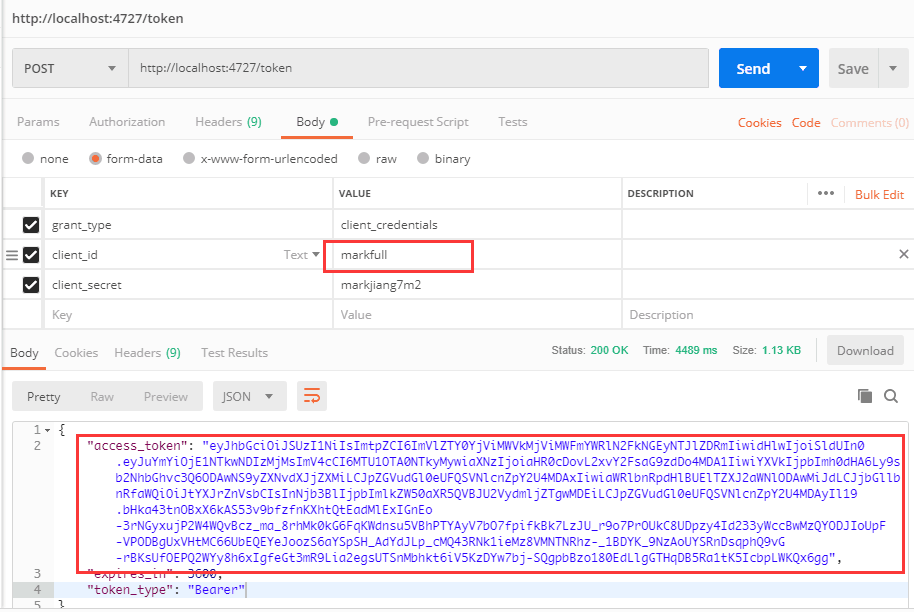
markfull身份认证
使用markfullClientId向IdentityServer进行认证

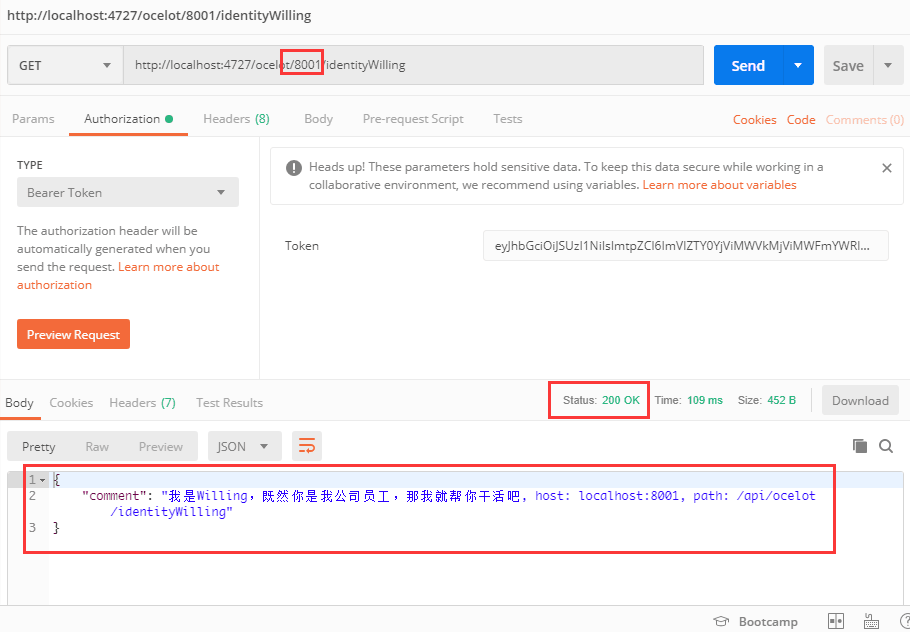
向8001请求
将得到的Token加入到请求中,请求Url地址:4727/ocelot/8001/identityWilling,得到下游服务返回的响应结果

向8002请求
将得到的Token加入到请求中,请求Url地址:4727/ocelot/8002/identityWilling,得到下游服务返回的响应结果

然后,更换marklimit身份再验证一遍
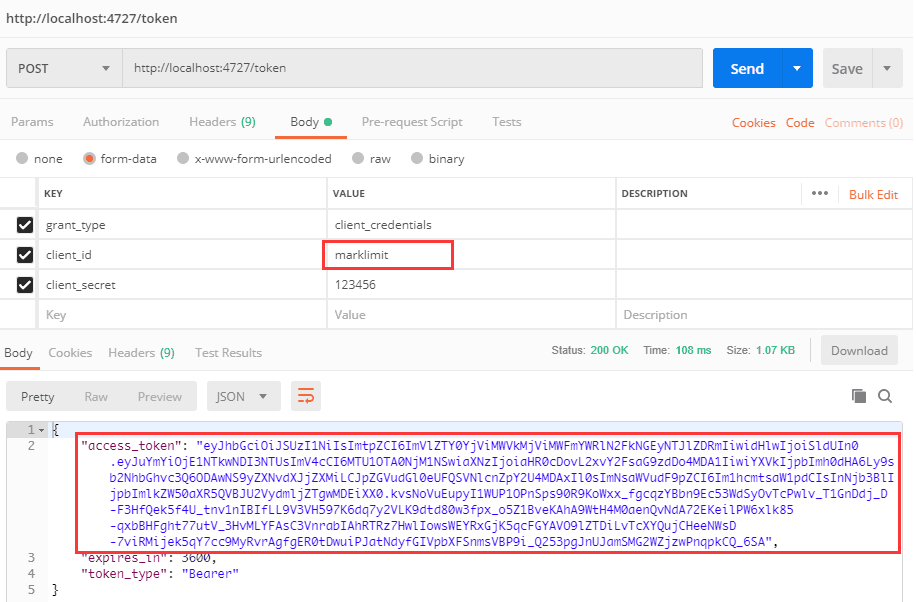
marklimit身份认证
使用marklimitClientId向IdentityServer进行认证

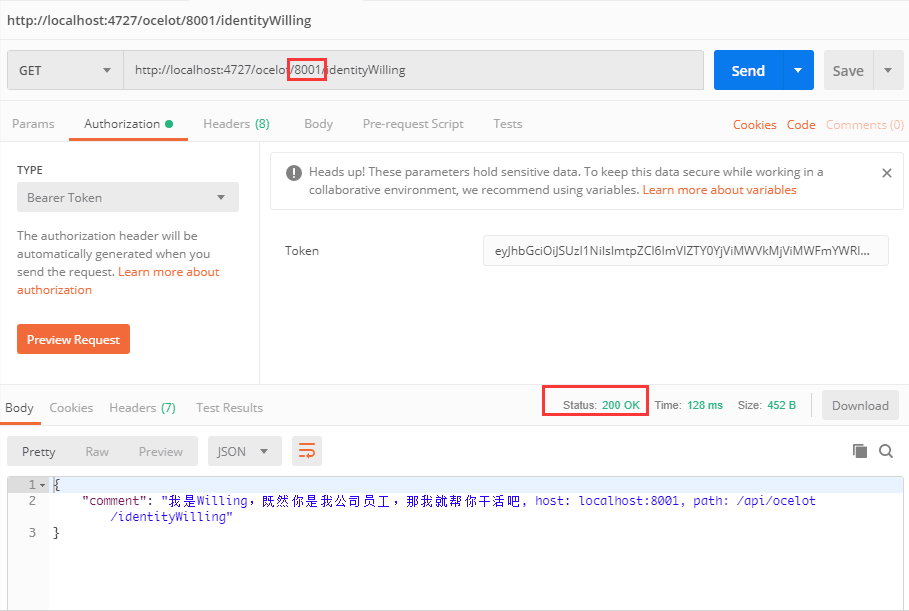
向8001请求
将得到的Token加入到请求中,请求Url地址:4727/ocelot/8001/identityWilling,得到下游服务返回的响应结果

向8002请求
将得到的Token加入到请求中,请求Url地址:4727/ocelot/8002/identityWilling,此时,我们得到了401的状态码,即未授权。


