
微信搜索: 口袋工具y
扫一扫:
 前期遇到的问题数据来源:没有数据,寸步难行呀
如何解决数据来源编写爬虫将需要的数据爬取并保存下来
找一些提供数据的平台,如阿凡达数据、聚合数据等等。
本项目选择第二种方式,并最终选择了聚合数据平台API。
项目开始 新建项目新建项目,配置好名称、目录、AppID等信息,后端服务选择小程序·云开发,点击新建。
关于AppID: 请自行修改为你注册的小程序AppID。
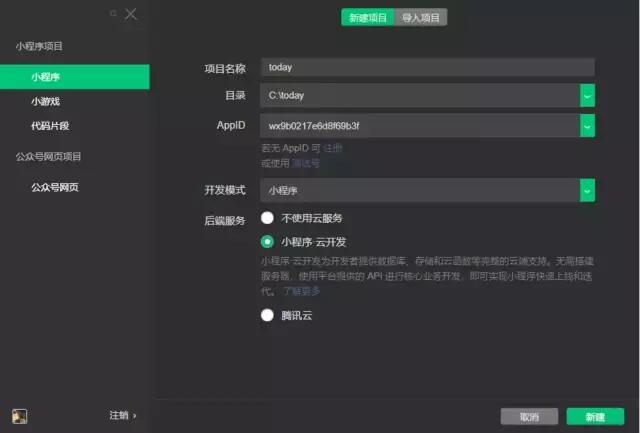点击新建即可完成项目初始化,得到一个云开发模板:
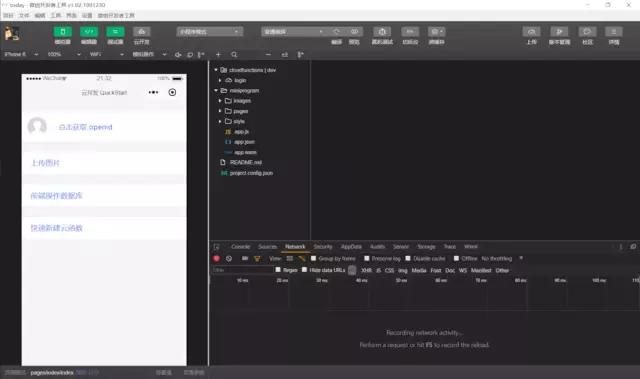目录结构:
+-- cloudfunctions|[指定的环境] // 存放云函数的目录 +-- miniprogram // 小程序代码编写目录 |-- README.md // 项目描述文件 |-- project.config.json // 项目配置文件 新建云开发环境点击左上角菜单项 云开发
点击创建资源环境,环境名称及环境ID请自行设置:
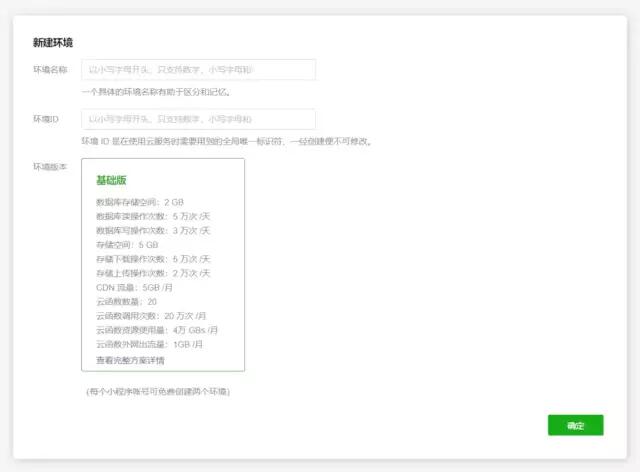点击确定即可完成创建
编写云函数 1. 新建云函数在目录 cloudfunctions 上右键
新建云函数,填入新建云函数的名称(如todayInHistory)
回车或失去焦点即会自动创建并上传。
云函数目前执行环境仅支持node,所以需要使用js来编写云函数的逻辑。
在控制台中进入该云函数的目录,执行
本项目使用axios来执行请求的发送,可以使用其他如request-promise等等的库来替换
3. 编写云函数新建 config.js 文件,添加代码如下:
exports.key = YOUR_JUHE_KEY // 在聚合数据平台申请的key exports.baseUrl = 'http://v.juhe.cn/todayOnhistory/queryEvent.php'打开 ·index.js· 文件,编写代码:
// 云函数入口文件 const cloud = require('wx-server-sdk') const axios = require('axios') cloud.init() const db = cloud.database() // 聚合数据 const { baseUrl, key } = require('./config') // 云函数入口函数 exports.main = async(event, context) => { const { month, day } = event const resp = await axios.get(baseUrl, { params: { key, date: `${month}/${day}` } }).then(res => { return res.data }) return resp.result } 编写页面 1. 新建页面在开发小程序的过程中,新建一个页面是很常见的操作,有两个非常方便的方式:
在 app.json 文件中,在pages项添加我们需要的页面路径,直接保存即可。如:
"pages": [ "pages/today-in-history/index" ]在 pages 目录下新建目录 today-in-history ,在新建的目录上 右键 -> 新建page , 填入名称如index , 回车即可完成页面下四个文件的创建
2. 编写 index.wxml <view> <view> <view>{{year}}年{{month}}月{{day}}日</view> </view> <view> <view> <block wx:for="{{list}}" wx:key="index"> <view>{{item.title}}</view> <view>{{item.date}}</view> </block> </view> </view> </view> 3. 编写 index.js // pages/today-in-history/index.js Page({ /** * 页面的初始数据 */ data: { year: 1990, month: 1, day: 1, list: [] }, /** * 生命周期函数--监听页面加载 */ onLoad: function() { const now = new Date(); const year = now.getFullYear(); const month = now.getMonth() + 1; const day = now.getDate(); this.setData({ year, month, day }); this.doGetList(); }, /** * 执行数据获取 */ doGetList: function() { const { month, day } = this.data; wx.cloud.callFunction({ name: 'todayInHistory', data: { month, day } }).then(res => { let list = res.result.reverse(); this.setData({ list }); }) .catch(console.error) } }) 4. 编写 index.wxss /* pages/today-in-history/index.wxss */ .container { padding-bottom: 20rpx; background-color: #E8D3A9; } .header { display: flex; justify-content: space-around; align-items: center; height: 80rpx; color: #FFF; } .content { flex: 1; } .list-view { height: 100%; display: flex; flex-direction: column; padding: 0 20rpx; } .list-item { display: flex; flex-direction: column; border-radius: 10rpx; padding: 16rpx 0; box-sizing: border-box; margin-top: 20rpx; background-color: #fff; text-align: center; box-shadow: 1px 1px 5px 1px rgb(207, 207, 207); } .item-title { font-size: 36rpx; padding: 10rpx 16rpx; color: #262626; line-height: 48rpx; } 5. 效果预览到这里我们完成了 历史上的今天 的列表页,效果如下:
 添加日期选择器 1. 引入 vantweapp项目中使用 wantweapp 的部分组件
安装
# npm npm i vant-weapp -S --production # yarn yarn add vant-weapp --production构建npm