这地方需要注意下,默认生成的模板代码,return的Action类加了const修饰,如果使用Action的payload字段赋值并携带数据,是会报错的;所以这里如果需要携带参数,请去掉const修饰关键字
enum CountAction { increase, updateCount } class CountActionCreator { ///去effect层去处理自增数据 static Action countIncrease() { return Action(CountAction.increase); } ///去reducer层更新数据,传参可以放在Action类中的payload字段中,payload是dynamic类型,可传任何类型 static Action updateCount(int count) { return Action(CountAction.updateCount, payload: count); } }effect
如果在调用action里面的XxxxActionCreator类中的方法,相应的枚举字段,会在combineEffects中被调用,在这里,我们就能写相应的方法处理逻辑,方法中带俩个参数:action,ctx
action:该对象中,我们可以拿到payload字段里面,在action里面保存的值
ctx:该对象中,可以拿到state的参数,还可以通过ctx调用dispatch方法,调用action中的方法,在这里调用dispatch方法,一般是把处理好的数据,通过action中转到reducer层中更新数据
Effect<CountState> buildEffect() { return combineEffects(<Object, Effect<CountState>>{ CountAction.increase: _onIncrease, }); } ///自增数 void _onIncrease(Action action, Context<CountState> ctx) { ///处理自增数逻辑 int count = ctx.state.count + 1; ctx.dispatch(CountActionCreator.updateCount(count)); }reducer
该层是更新数据的,action中调用的XxxxActionCreator类中的方法,相应的枚举字段,会在asReducer方法中回调,这里就可以写个方法,克隆state数据进行一些处理,这里面有俩个参数:state,action
state参数经常使用的是clone方法,clone一个新的state对象;action参数基本就是拿到其中的payload字段,将其中的值,赋值给state
Reducer<CountState> buildReducer() { return asReducer( <Object, Reducer<CountState>>{ CountAction.updateCount: _updateCount, }, ); } ///通知View层更新界面 CountState _updateCount(CountState state, Action action) { final CountState newState = state.clone(); newState..count = action.payload; return newState; }page模块不需要改动,这边就不贴代码了
优化
从上面的例子看到,如此简单数据变换,仅仅是个state中一个参数自增的过程,effect层就显得有些多余;所以,把流程简化成下面
view ---> action ---> reducer
注意:这边把effect层删掉,该层可以舍弃了;然后对view,action,reducer层代码进行一些小改动
搞起来
view
这边仅仅把点击事件的方法,微微改了下:CountActionCreator.countIncrease()改成CountActionCreator.updateCount()
Widget buildView(CountState state, Dispatch dispatch, ViewService viewService) { return _bodyWidget(state, dispatch); } Widget _bodyWidget(CountState state, Dispatch dispatch) { return Scaffold( appBar: AppBar( title: Text("FishRedux"), ), body: Center( child: Column( mainAxisAlignment: MainAxisAlignment.center, children: <Widget>[ Text('You have pushed the button this many times:'), Text(state.count.toString()), ], ), ), floatingActionButton: FloatingActionButton( onPressed: () { ///点击事件,调用action 计数自增方法 dispatch(CountActionCreator.updateCount()); }, child: Icon(Icons.add), ), ); }action
这里只使用一个枚举字段,和一个方法就行了,也不用传啥参数了
enum CountAction { updateCount } class CountActionCreator { ///去reducer层更新数据,传参可以放在Action类中的payload字段中,payload是dynamic类型,可传任何类型 static Action updateCount() { return Action(CountAction.updateCount); } }reducer
这里直接在:_updateCount方法中处理下简单的自增逻辑
Reducer<CountState> buildReducer() { return asReducer( <Object, Reducer<CountState>>{ CountAction.updateCount: _updateCount, }, ); } ///通知View层更新界面 CountState _updateCount(CountState state, Action action) { final CountState newState = state.clone(); newState..count = state.count + 1; return newState; } 搞定可以看见优化了后,代码量减少了很多,对待不同的业务场景,可以灵活的变动,使用框架,但不要拘泥框架;但是如果有网络请求,很复杂的业务逻辑,就万万不能写在reducer里面了,一定要写在effect中,这样才能保证一个清晰的解耦结构,保证处理数据和更新数据过程分离


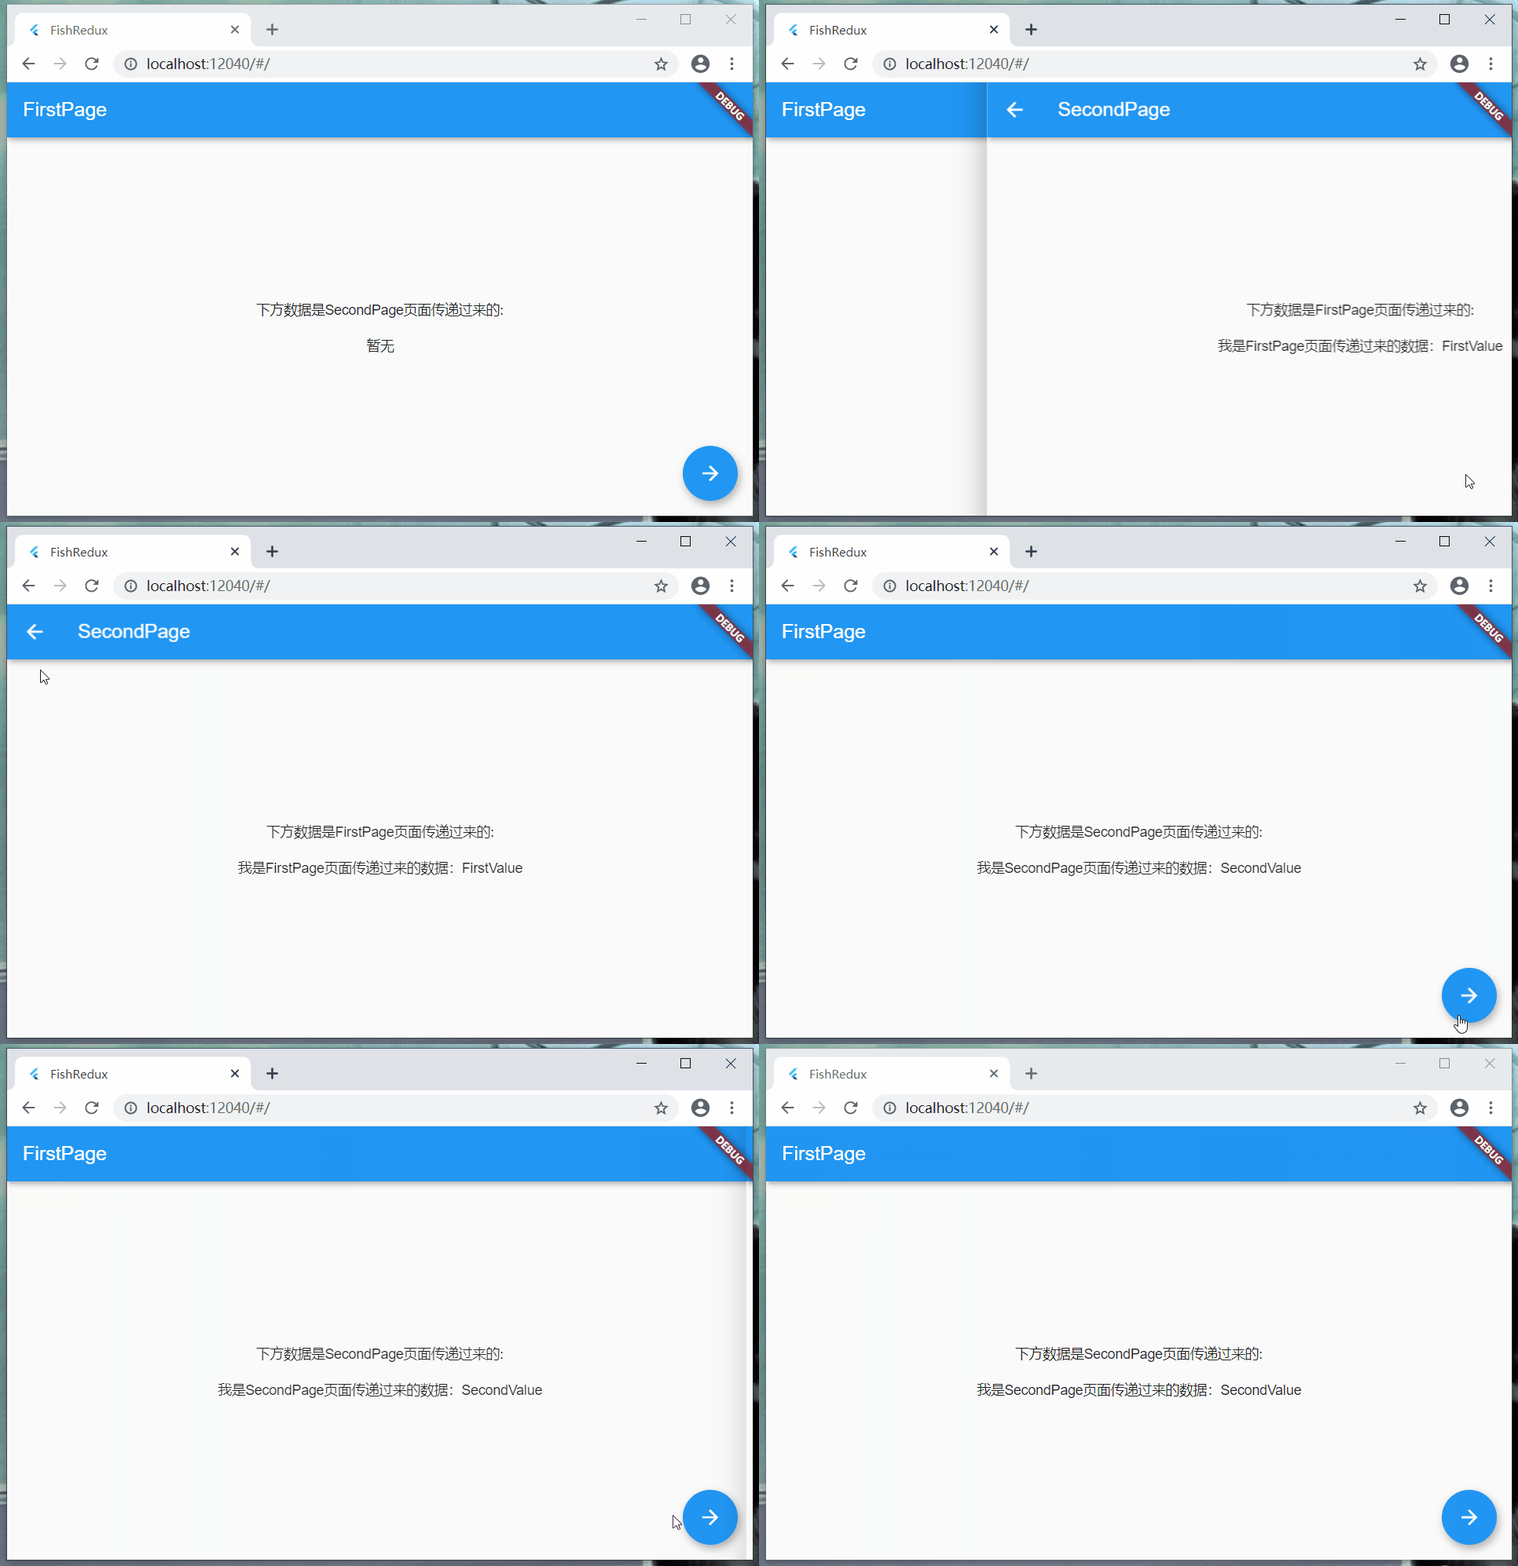
从效果图,很容易看到,俩个页面相互传值
FirstPage ---> SecondPage(FirstPage跳转到SecondPage,并传值给SecondPage页面)
SecondPage ---> FirstPage(SecondPage返回到FirstPage,并返回值给FirstPage页面)
实现从上面效果图上看,很明显,这边需要实现俩个页面,先看看main页面的改动
main

